Difference between revisions of "MessagesGuide"
doc>WikiSysop |
m (1 revision imported) |
(No difference)
| |
Latest revision as of 06:37, 23 November 2020
Process communication
RunaWFE Free Workflow System (BPMS) Version 4.5.0
© 2003 - 2015, Consulting Group Runa
© 2015 - 2026, "Process Technologies" Ltd, this document is available under GNU FDL license. RunaWFE Free is an open source system distributed under a LGPL license (http://www.gnu.org/licenses/lgpl.html).
Process communication implementation in RunaWFE
General
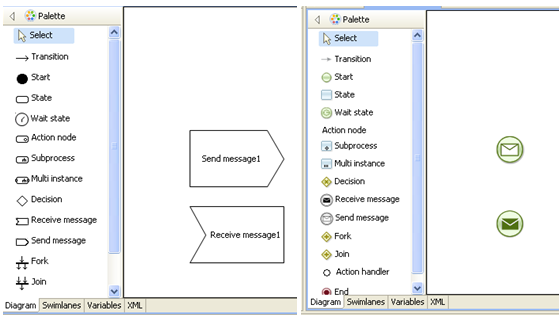
Process communication in RunaWFE is implemented via messages. According to this concept business process instance can send a message from one business process node to the other business process instance node or to the other node of the same business process instance. The elements "Send message" and "Receive message" were added to graphic elements palette for sending and receiving messages.
JMS technology is used for sending and receiving messages. The sender node sends a message right after the control flow reaches it, then the control shifts to the next node. The receiver node awaits for the message to come and control flow can stay in this node indefinitely long.
Message parameters
A message contains the following information:
- receiver identifier
- the business process variables values that have to be sent
Sometimes one messages can be processed by several receivers.
A message receiver can be identified via the following ways:
- by business process name (processDefinitionName)
- by business process node name (processNodeName)
- by business process instance identifier (processInstanceId)
To set these parameters you can use:
- business process instance variables, e.g. processDefinitionName=${proc_name}, where proc_name is a variable that contains process name.
- constant value, e.g. processNodeName = SimpleProc, where SimpleProc is a process node name
- preset values: current process definition name ( ${currentDefinitionName} ), current node name ( ${currentNodeName} ), current process instance identifier ( ${currentInstanceId} )
Message data structure allows to set the correspondence between sender and receiver variables on any of the sides (or on both sides).
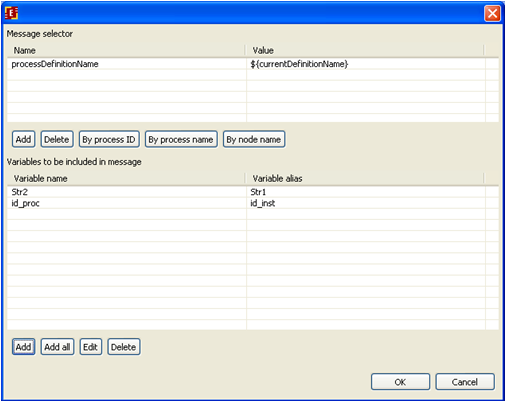
Below you can see an example of message receiver configuration:
Message selector is set to current process name. The following correspondence between variables is set: Str2 process variable will be set to message variable Str1 value, also id_proc will be set to id_inst value.
If business process name is used to identify message receiver and currently there's no instances of that process running the message waits till the first instance is available and delivers its parameters values to it in "receive message" node.
If there are several instances of the given process running simultaneously the message is delivered to all of them.
A simple example of process communication
Processes scenario
Simple processes that illustrate process communication in RunaWFE (implemented with the help of messages) are reviewed below.
SimpleMessageSend sends data typed by user to SimpleMessageReceive process, receiver process is selected by process name.
SimpleMessageReceive receives data and shows it on form.
Creating process graph
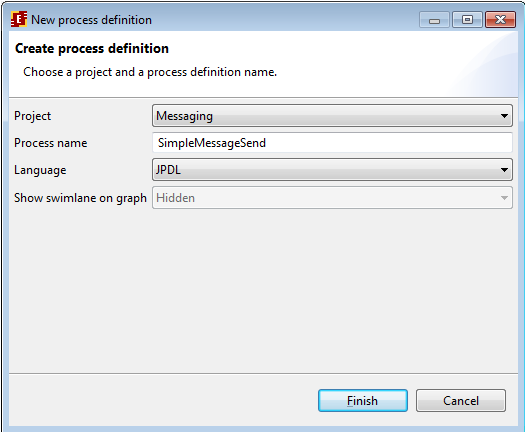
Create a new project in Developer Studio, then left-click on "new process" command. In the shown dialog type “SimpleMessageSend” as process name. Use JPDL for this process.
Likewise create SimpleMessageReceive process.
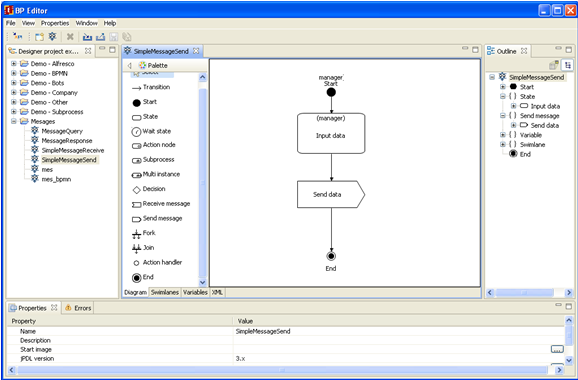
Make a double-click on the «SimpleMessageSend» string. You will see a business process diagram window. Draw the following business process graph by selecting corresponding palette elements:
The following elements are used here: “Start”, “End”, “Action node” and “Send message” node. To set the element name select the graph element by clicking on it, then click on the element again.
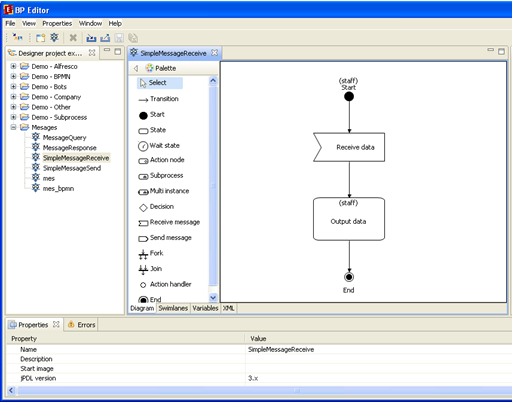
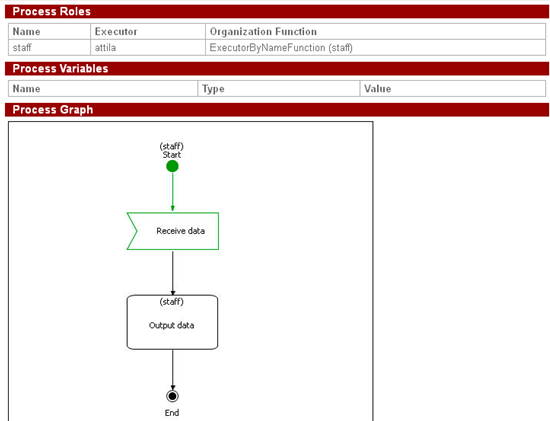
Draw the following graph for SendMessageReceive process:
Unlike in SimpleMessageSend, here the element “Receive message” is used to receive data.
Swimlanes
Swimlanes description
The following swimlanes are used in created processes:
- manager is used in SimpleMessageSend, and will be initialized by the user who starts the process.
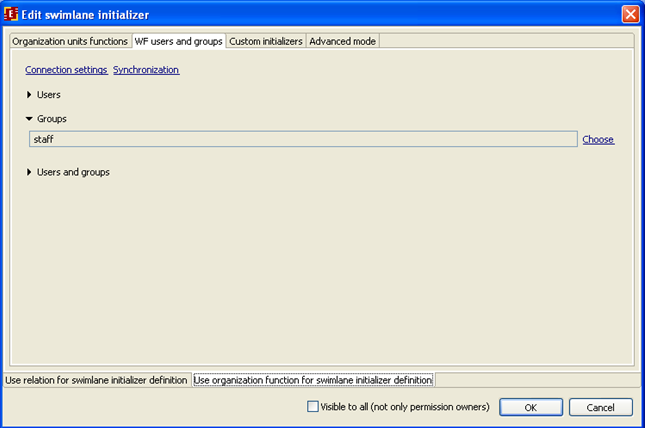
- staff is used in SimpleMessageReceive, it has initializer and will be initialized by the member of the staff group who starts the process:
Variables creation
Description and initialization of variables
“msg_send” variable of String is used in SimpleMessageSend and meant to be sent in a message. The variable is initialized by the value that is typed in by the user in "Input data" node, then it is delivered to SimpleMessageReceiver process via message communication.
“msg_rec” variable of String is used in SimpleMessageReceive and its value is set in the message from SimpleMessageSend
Variable creation
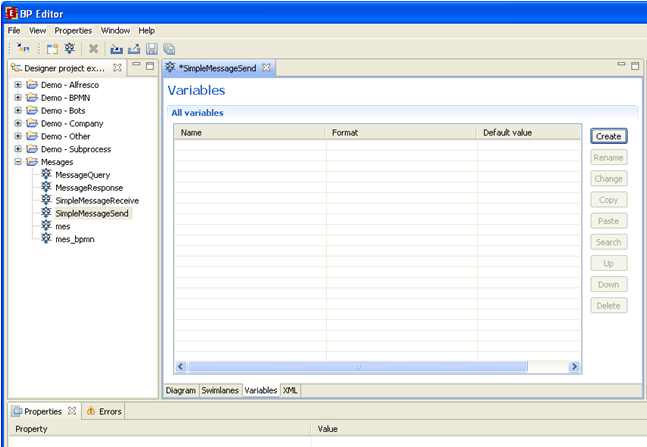
Click on the "Variables" tab. Click on the "Create" button
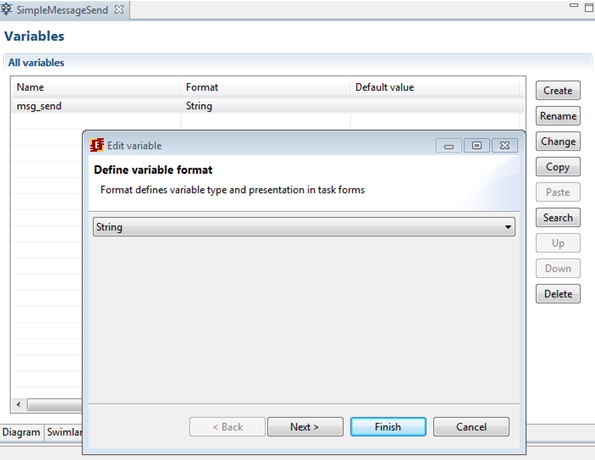
Type the variable name – msg_send, and choose String as variable format.
Likewise create msg_rec variable in SimpleMessageReceive process
Forms creation
Using form constructor to create forms
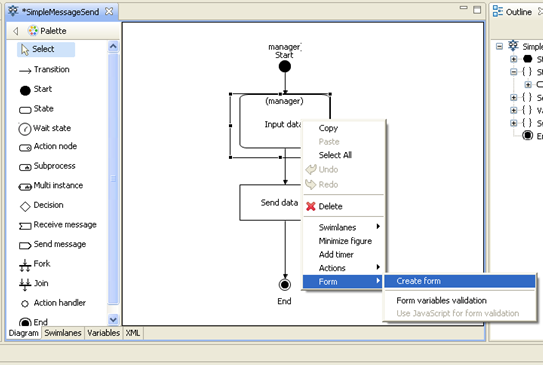
Right-click on the "Input data" node in SimpleMessageSend process graph and choose command "Form" > "Create Form":
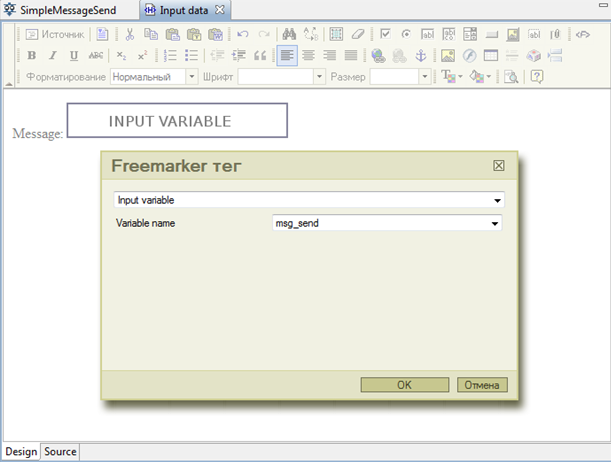
In the new form put Input Variable tag for msg_send variable:
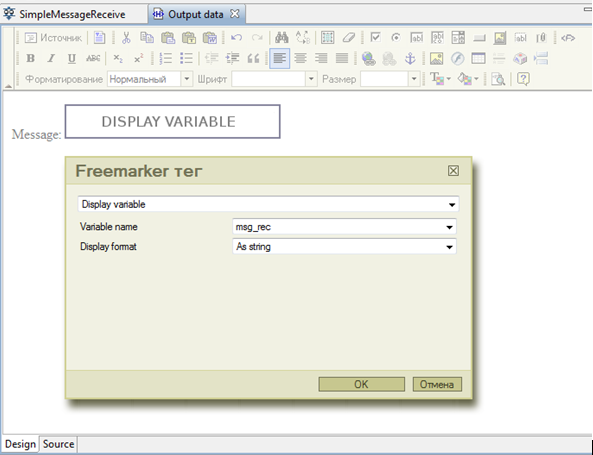
Likewise create form for “Output data" node in SimpleMessageReceive process. Place ftl tag for "DisplayVariable" to show the msg_rec value:
Validation
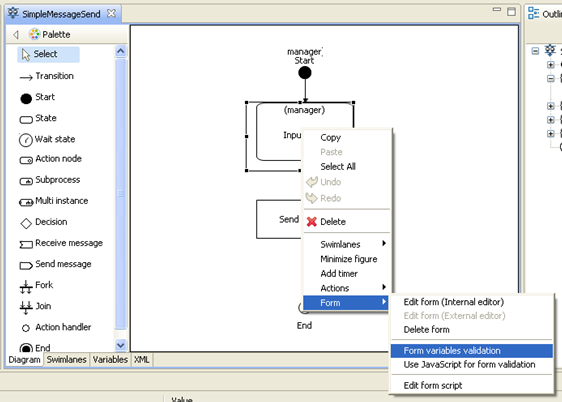
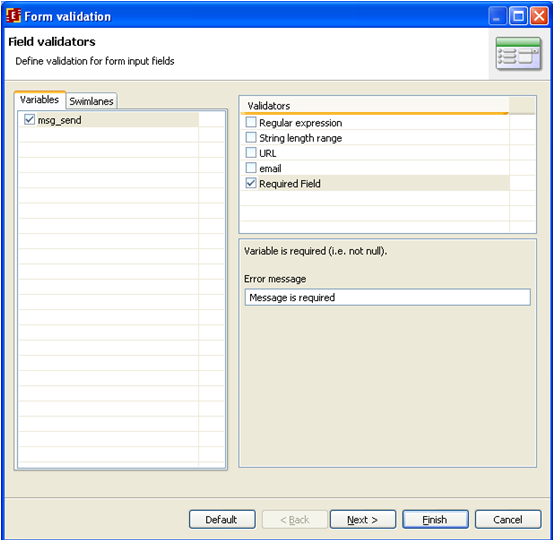
Set msg_send variable validation in SimpleMessageSend by choosing "Required field" in the validation options. In order to do so right-click on the data input node and choose "Form > Form variable validation":
In the shown form there is msg_send variable. Choose this variable, set the "Required field" validator in the Validators list and type the error message text:
Process communication configuration
Sender configuration
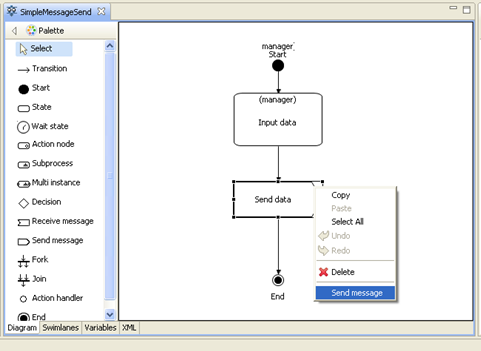
To configure message sending in SimpleMessageSend process right-click on "Send data" node and choose "Send message" option:
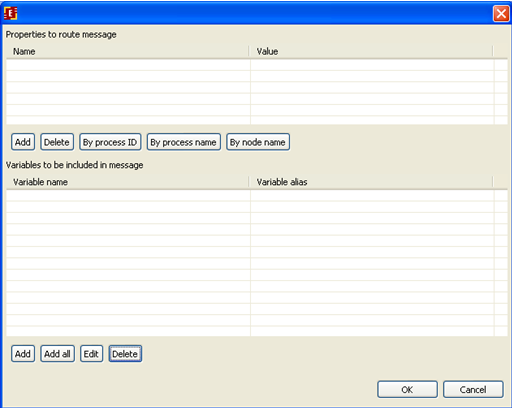
On the shown form it is necessary to add routing properties and data that will be sent:
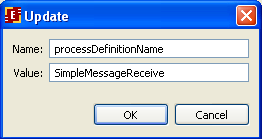
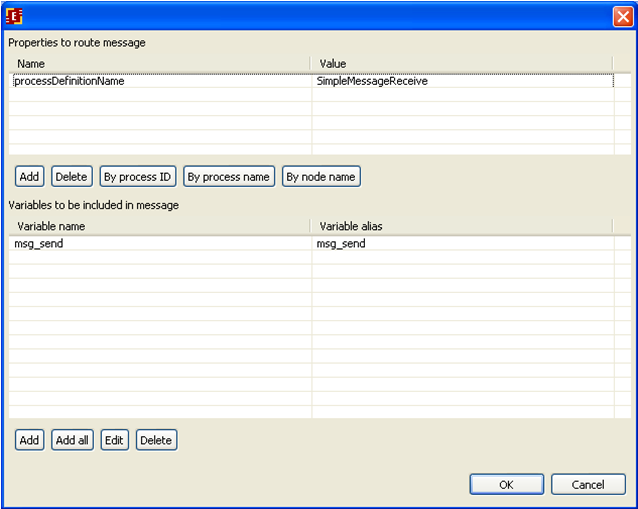
We will send message by process name, click on the corresponding button and type the process name (SimpleMessageReceive)
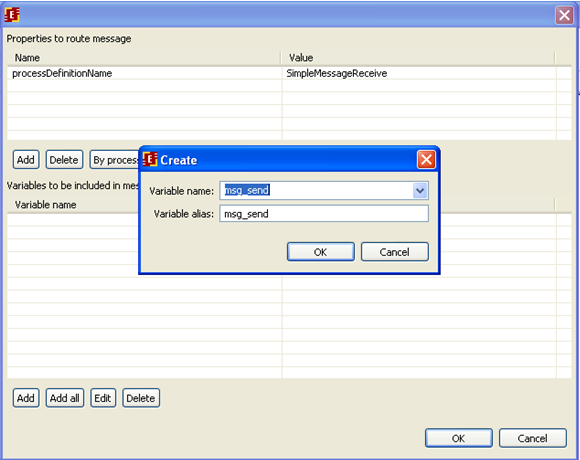
Then set the variables that will be sent in the message. Click add button in the bottom of the form and choose msg_send variable. It is possible to set a name (alias) here that will be used for the chosen variable in the message:
We have the following configurations:
Receiver configuration
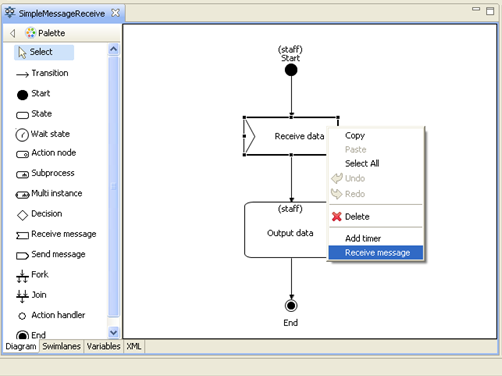
To configure message receiving in SimpleMessageReceive process right-click on "Receive data" and choose "receive message":
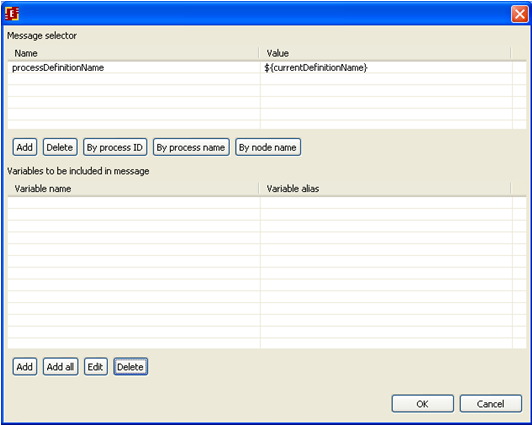
On the shown form it is necessary to add routing properties and data correspondence for message receiving. We will use receiving by the process name. Click on the corresponding button and there will be the following set: processDefinitionName = ${currentDefinitionName}
where currentDefinitionName is the current process name
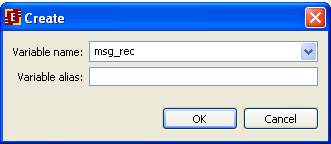
It is also necessary to add variables that are received in the message, press add button in the bottom of the form and choose variable name msg_rec
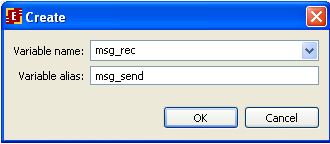
Then in the field of the message variable name type msg_send
So we set the correspondence between msg_send variable from SimpleMessageSend process that is sent in the message and msg_rec variable in SimpleMessageReceive process.
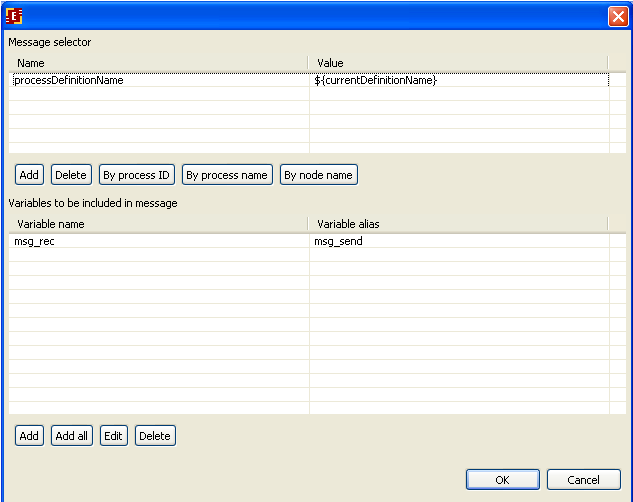
We have the following configurations:
Creating .par archive file and deploying it to the system
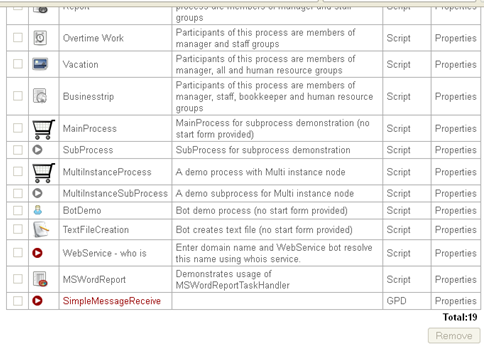
The steps are completely similar for any other business process .par file creation and deployment. Use "HelloWorldProcess" (https://runawfe.org/doc/Process-editor_User_guide#Process_definition_archive_creation) as example.
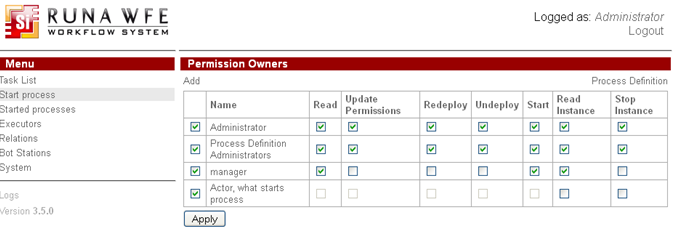
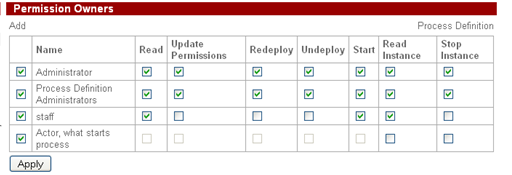
It is necessary to set permissions for given processes after their deployment:
For SimpleMessageSend add manager group to permission owners
For SimpleMessageReceive add staff group:
Process execution
A short description of process communication
SimpleMessageSend and SimpleMessageReceive show a simple example of process communication via messages.
User starts SimpleMessageSend process instance, types message text, then the message is sent to all SimpleMessageReceive instances that are currently running. SimpleMessageSend process ends.
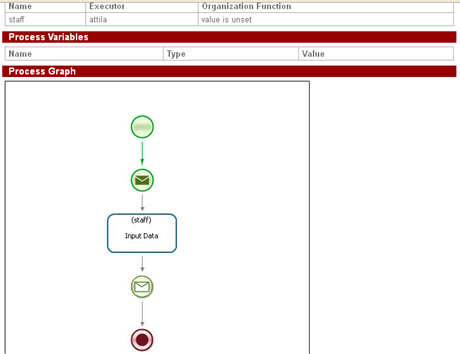
User that is a member of staff group starts SimpleMessageReceive process instance, then the control flow stops on "Receive data" node and waits for data.
The message is delivered to all SimpleMessageReceive instances that wait for it, the received variable value (message text) is shown on the form, and then the SimpleMessageReceive instances also end.
Let us consider two examples of the developed communication
One receiver
In order to start SimpleMessageReceive instance it is necessary to log in as staff group member and click on this process name in the Start process list:
The process instance will start and the control flow will stop on "Receive data" node waiting for the message.
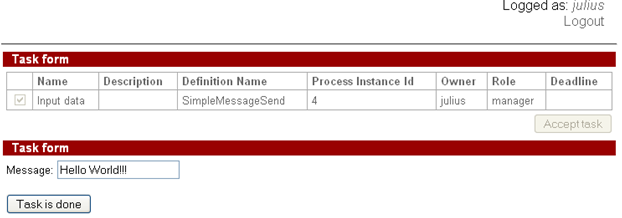
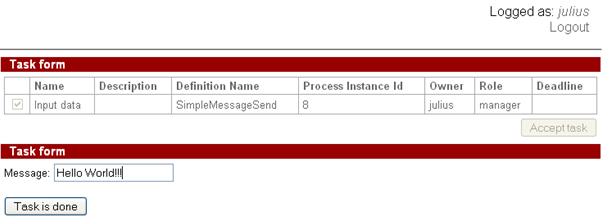
Then a member of manager group(say julius) starts SimpleMessageSend instance and types the message text:
SimpleMessageSend instance ends.
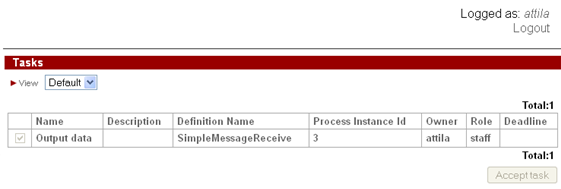
SimpleMessageReceive instance receives the message and control flow goes to the "Output data" node,
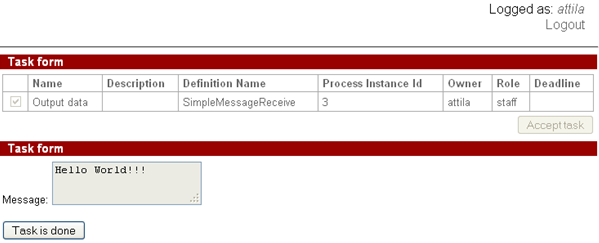
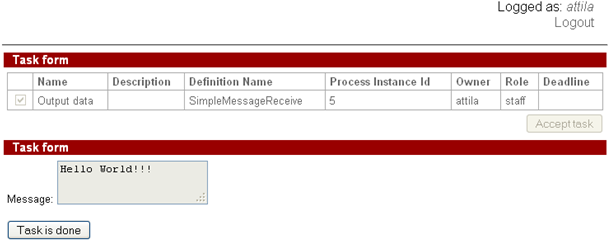
user attila can see the sent message on the form:
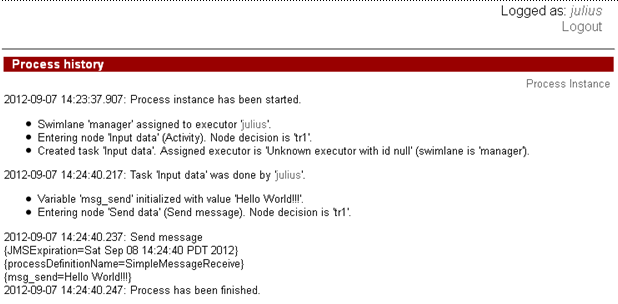
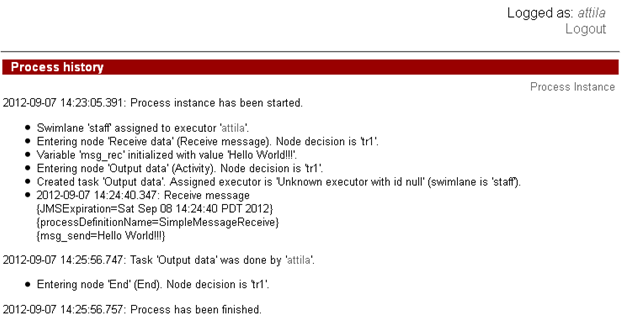
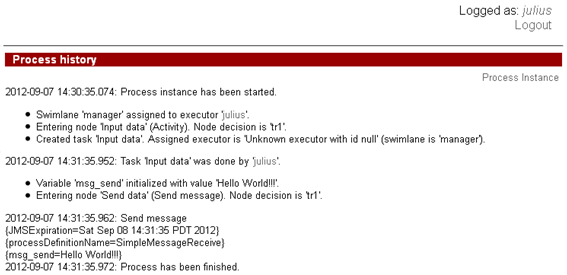
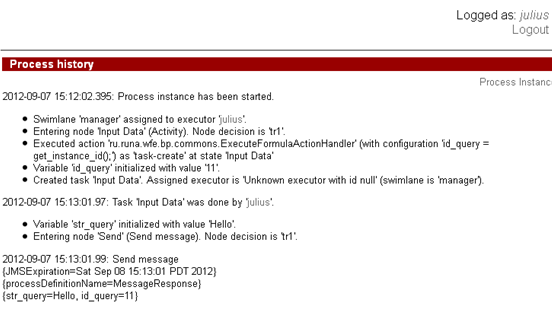
The history of the described process is shown below:
Several receivers
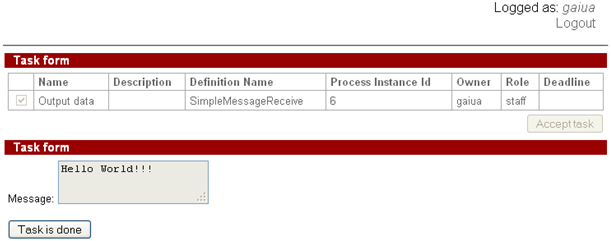
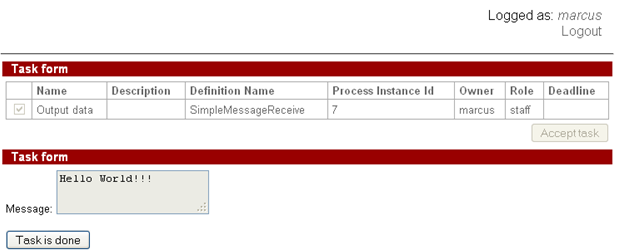
The second considered example is sending the message to several SimpleMessageReceive instances simultaneously
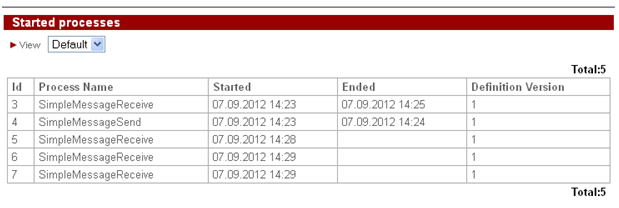
Start SimpleMessageReceive instances using all users from staff group:
- Attila
- Gaiua
- Marcus
Start SimpleMessageSend instance using user from manager group, and type the message “Hello World!!!” like in the first example.
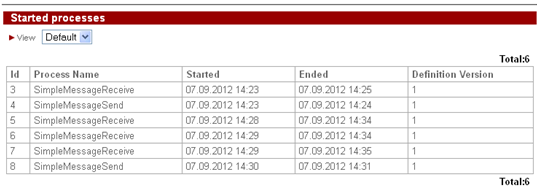
Then the message will be delivered to all SimpleMessageReceive instances that wait for it.
Execution history:
An example of complex process communication via messages
Processes scenario
MessageQuery sends a message to MessageResponse using "by process name" routing. Message data includes user input string and MessageQuery instance id.
MessageResponse receives data, user changes the received string value, then the message is sent back to MessageQuery using "by process id" routing
Creating graph
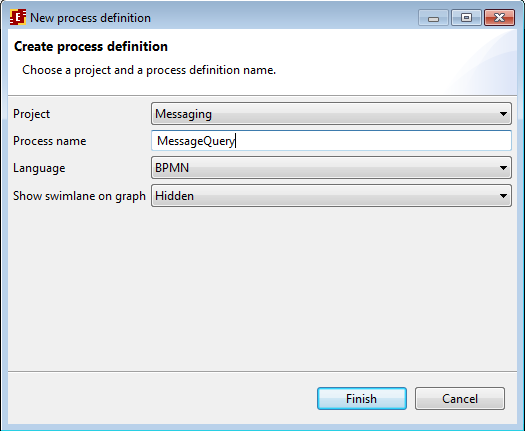
Create a new project, then left-click "New process" command. Type "MessageQuery" as new process name. We'll use BPMN for this process.
Likewise create MessageResponse process.
Double-click the "MessageQuery" in the processes list. You will see a process diagram tab. Draw the following process graph by choosing palette elements:
The following elements are used: "Start", "End", "Activity node", "Send message"/"Receive message", and also "Script task".
To change element name select element by clicking on it, then click once again.
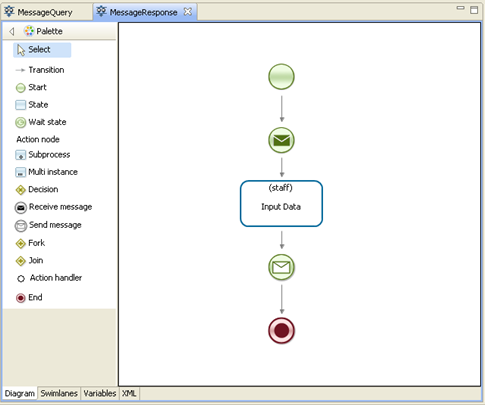
Likewise draw MessageResponse:
As you can see on the process diagrams both processes use elements of sending and receiving the message unlike in previous example with SimpleMessage.
Swimlanes
Swimlane descriptions
The following swimlanes are used in created processes:
- manager is used in MessageQuery and will be initialized by the user who starts the process.
- staff is used in MessageResponse and will be initialized by the user who starts the process.
Variables creation
Variables description
The following variables are used in MessageQuery process:
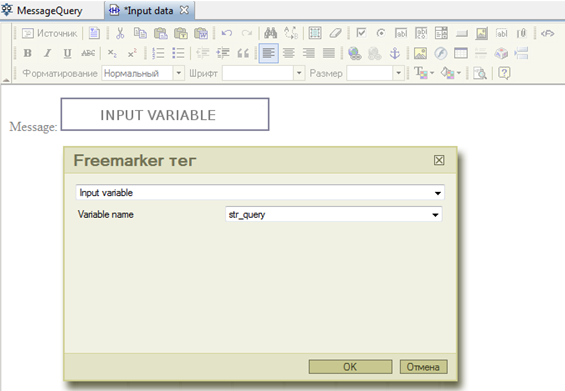
- str_query of String is input by user in “Input data” node and is sent to MessageResponse instances.
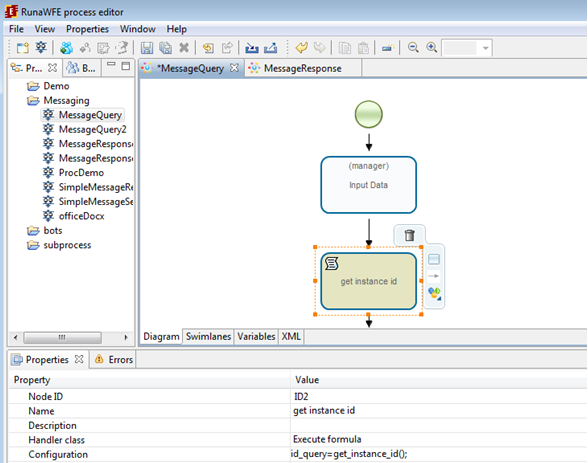
- id_query of String contains MessageQuery instance id and is also sent in message. This variable must be initialized in script task "get instance id" with the help of ExecuteFormulaActionHandler.
The following variables are used in MessageResponse:
- str_response of String that is received from message, processed and is sent back to MessageQuery instance
- id_query of String contains MessageQuery instance id. The value comes from message and is required to determine the receiver for the next message. It is used in routing properties.
Variable creation
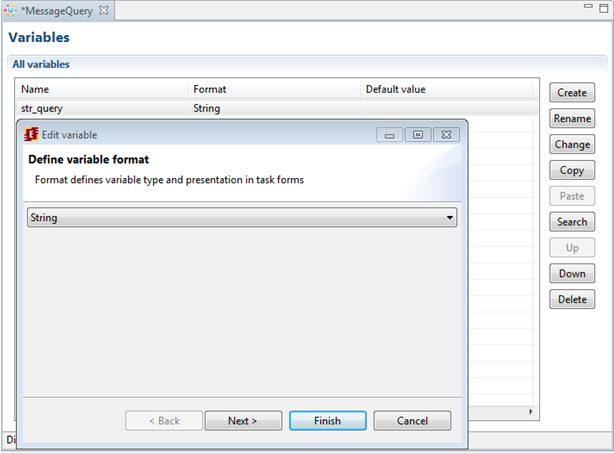
Click on "Variables" tag. Click on "Create" button, select str_query and choose String.
Likewise create str_response in MessageResponse process
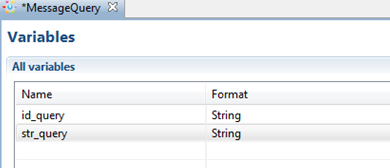
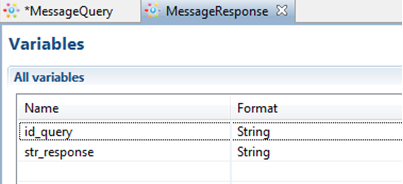
Also it's necessary to create id_query variables in corresponding processes:
Creating handler
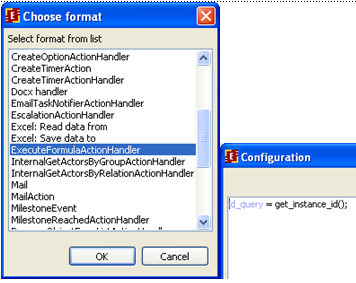
In MessageQuery process it's necessary to create ExecuteFormulaActionHandler. The id_query variable is initialized with instance id in this handler. Select "Script task" node
Then choose ExecuteFormulaActionHandler handler and set the configuration:
where get_instance_id() is a function that returns instance id
Forms creation
Creating forms via forms constructor
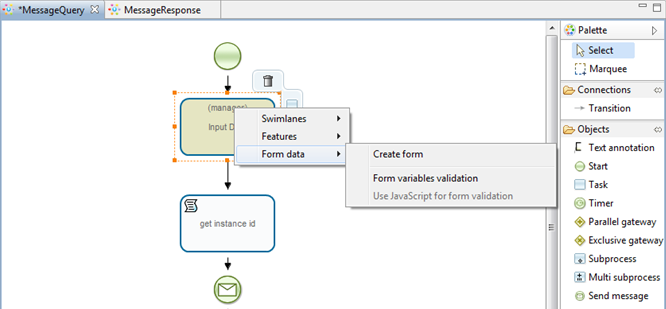
Right-click on "Input data" node of MessageQuery process graph and choose "Form > Create":
An empty form will appear.
Add a new Input Variable tag for str_query variable:
Likewise create form for "Input data" node in MessageResponse process. Use tag InputVariable for str_response editing:
It's also necessary to create a form to show the value of the variable after process communication.
Right-click on "Output data" node of MessageQuery process and choose «Form» > «Create form», then place ftl tag DisplayVariable for variable output on the created empty form for str_query value.
Process communication configuration
Sender configuration in MessageQuery process
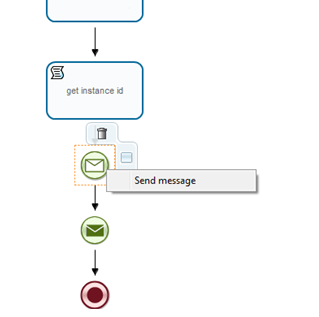
Right-click on "Send message" node and select "send message" option:
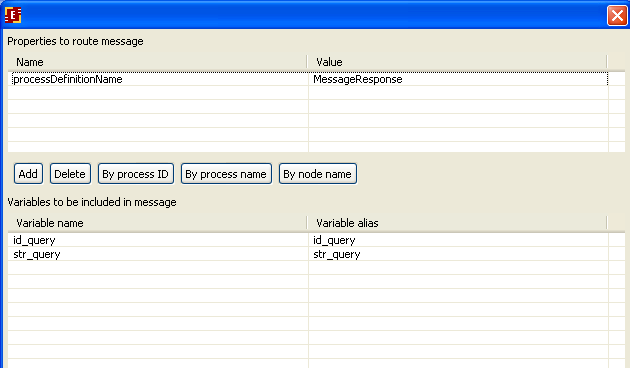
In properties of route message set the following:
So we send id_query and str_query variables to MessageResponse process ("by process name")
Receiver configurations in MessageResponse process
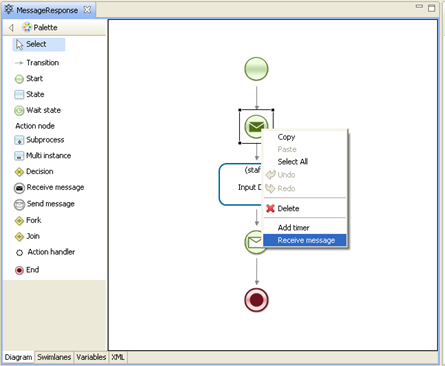
Right-click "Receive message" node and select "Receive message" option:
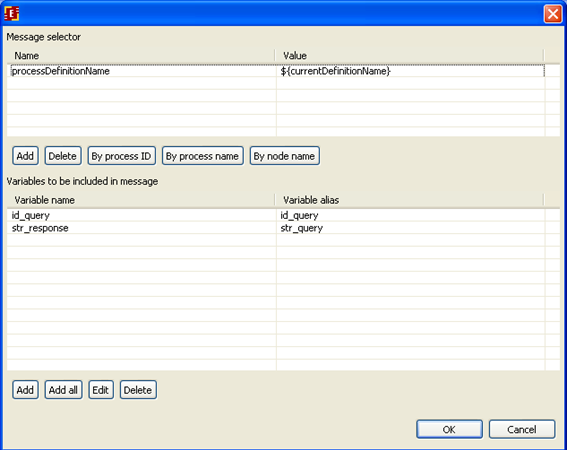
In properties of route message set the following:
So we receive id_query value from the message and save it to id_query variable of MessageResponse process, while str_query goes into str_response variable.
Sender configuration in MessageResponse process
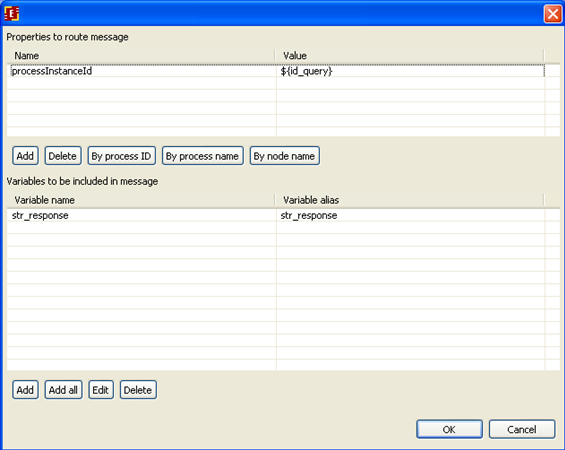
After receiving and processing the message MessageResponse process returns the data to MessageQuery instance. The following configurations are used for it:
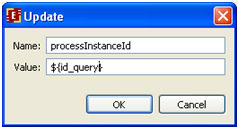
Add a routing property:
This implies that receiver is selected by process id and the id value is stored in id_query variable
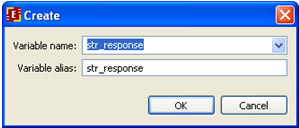
Add variables:
We have the following:
Receiver configurations in MessageQuery process
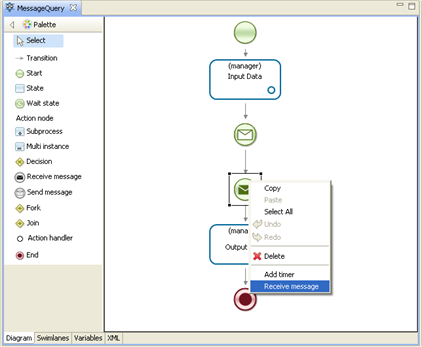
Data processed in MessageResponse is being returned to MessageQuery, we have to configure "Receive message" node as following:
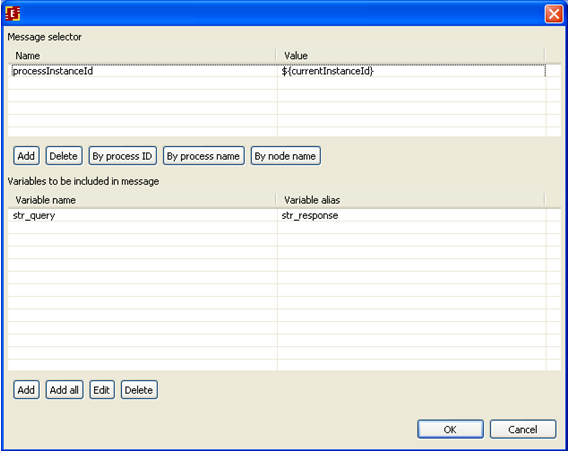
Set route property as processInstanceId = ${currentInstanceId}, that is "by process id", and set the correspondence of variables str_query=str_response, so that the value sent in str_response is stored in str_query variable.
Creating .par archive file and deploying it to the system
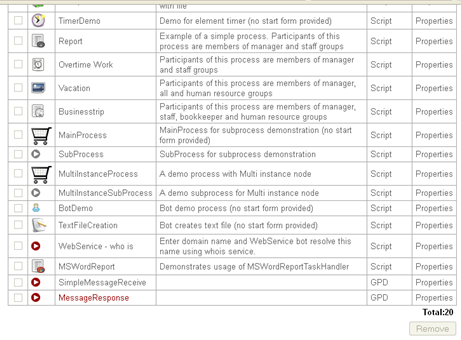
Deploying created processes with the help of menu "File > Process export" and export directly to WFE server. After deployment we shall configure processes permission owners by adding manager group for MessageQuery process and staff group for MessageResponse process
Process execution
Process communication description
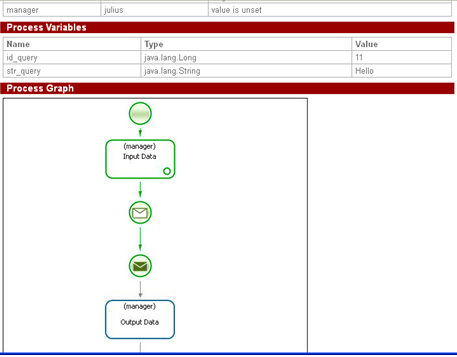
User starts MessageQuery process, inputs the message text to str_query variable. In this node action handler determines current instance id. Then message is send to MessageResponse instance with values of str_query and id_query variables. MessageQuery process goes to the next node and waits for the message with the resultant variable values.
User from staff group starts MessageResponse process. The control flow stops on "Receive message" node and waits for data. After the message is received the data is placed in str_response and id_query variables. Then the control flow enters "Input data" node where user edits str_response variable value. Then the edited value is sent back to MessageQuery instance, the id_query value is used.
MessageQuery receives str_query value from the message and goes to “Output data” node.
Process execution step by step
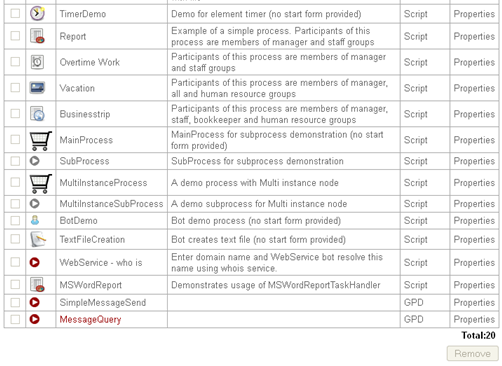
To start MessageQuery log in as user from manager group and click on the process name in the start process list:
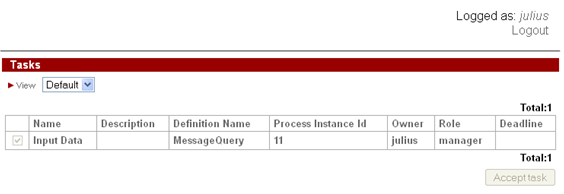
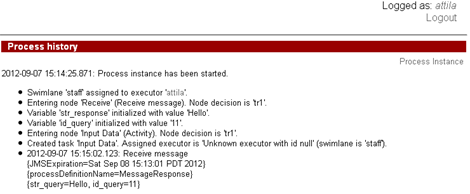
A new instance starts, control flow goes to “Input data” node
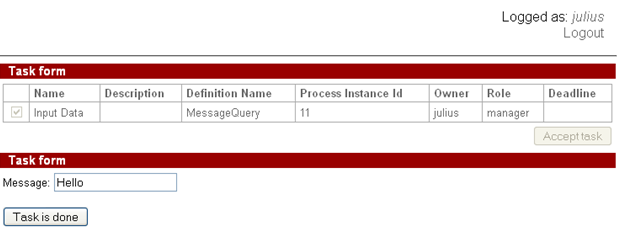
Type the message text, e.g.: “Hello”
The instance id is determined and message with str_query and id_query is sent.
Control flow goes to "Receive message", and it waits here until the message comes from MessageResponse process.
To start MessageResponse instance log in as user from staff group
After start the control flow stops in "Message receive" node and waits for message.
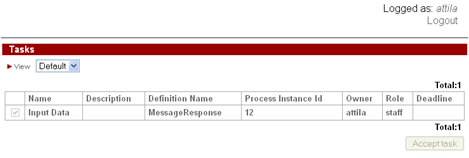
After the message is received the control flow goes to "Input data" node:
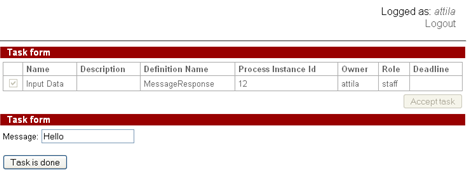
Here the user edits the received message text:
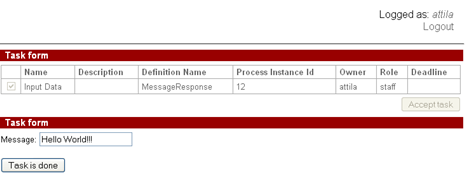
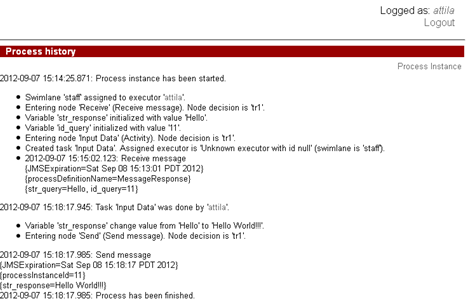
Then the message (Hello World!!!) is sent to instance with given id and MessageResponse instance ends:
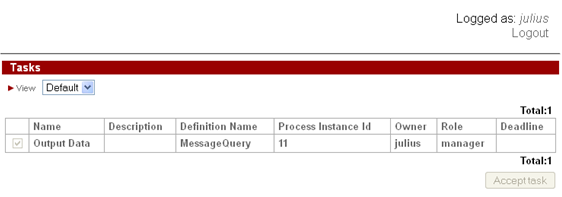
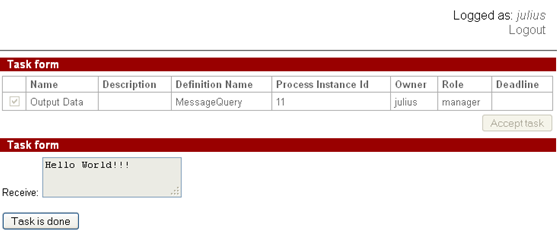
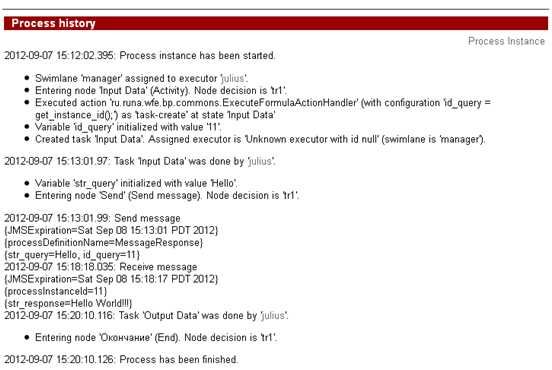
MessageQuery instance receives the message with str_response variable and stores its value to str_query (Hello World!!!), then it is being displayed in the form of “Output data” node.
The process ends:
