InstallationGuide
Installation guide
RunaWFE Free Workflow System (BPMS) Version 4.5.0
© 2003 - 2015, Consulting Group Runa
© 2015 - 2025, "Process Technologies" Ltd, this document is available under GNU FDL license. RunaWFE Free is an open source system distributed under a LGPL license (http://www.gnu.org/licenses/lgpl.html).
# System requirements
Server machine must have RAM >= 1Gb, free HDD space 2Gb, OS – MS Windows XP or higher, Linux Debian 7.0 or higher, Fedore 19 or higher, AltLinux 7.0 or higher, Sun Solaris 10.
Client machine must allow installing web-browser that supports HTML 4.0
# Software requirements
J2SE SDK JDK 7.0 can be downloaded from here
Note. To find out installed Java version on your machine use
for Linux and Macintosh
java -version
$JAVA_HOME/bin/java -version
for Windows
java -version
%JAVA_HOME%/bin/java -version
# RunaWFE Distribution
# Specialized distributive installation
Specialized distributives are the installation packages for different OS (rpm/deb for Linux, installer exe for Windows). They can be downloaded here
Here is the list of components that can be installed from specialize distributives:
Client side components:
- Client (web-interface)
- Developer Studio
- Business process simulator
- Task Notifier
Server side components:
- WFE Server
- Bot station
Components interaction:
WFE Server is started on one server.
Bot stations can be started on several servers.
Browser with system web-interface and task notifier are started on clients computers. (A browser with RunaWFE web-interface is opened in task notifier window).
Developer Studio and process simulator can be run on the client computers.
Components features:
WFE Server contains deployed business process definitions and started business processes instances.
Bot stations contain bots, that check out WFE Server periodically.
If started business process instances have tasks for bots, bots perform the tasks and return results to the WFE Server process instances.
Via RunaWFE web-interface user can:
- receive, filter, perform the tasks of business process instances
- start new business process instances
- view the properties of started business process instances
- deploy new business process definitions (if permission is granted)
Via RunaWFE web-interface administrator can:
- create/remove actors and groups
- include/exclude actors to/from groups
- grant permissions on system objects to actors and groups
- forcibly stop business process instances
- add/change actors substitutions rules
Via Developer Studio analyst can
- develop business processes and export them to the archived files into file system
Via business process simulator analyst can
- test developed business processes on the simulated configuration on the analyst client computer without(before) deploying new processes to the enterprise system.
Note. WFE Server contains a local bot station. That's why it is possible to install bot station as a separate component only on the computer where the WFE Server is not installed.
Note. WFE Server and simulator must not be installed on one and the same computer.
# Windows OS
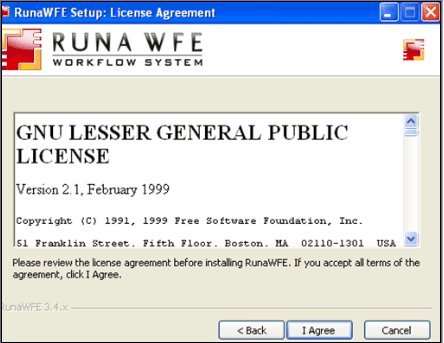
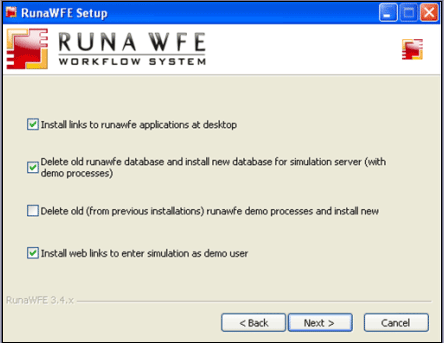
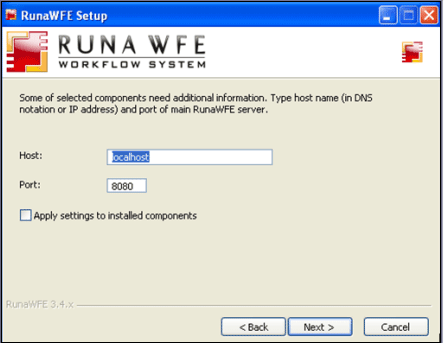
Run RunaWFE-Installer.exe (if you have it as exe-file) or insert disk into drive (in case you have it on disk). The LGPL license notice will appear.
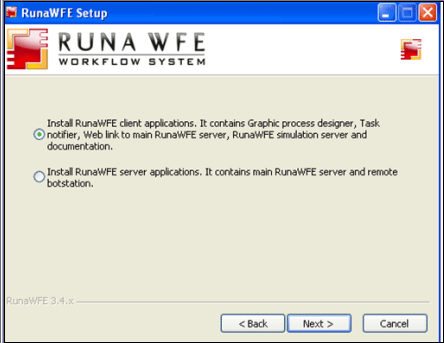
After confirming it you'll have to choose what components you are going to install - client side or server side.
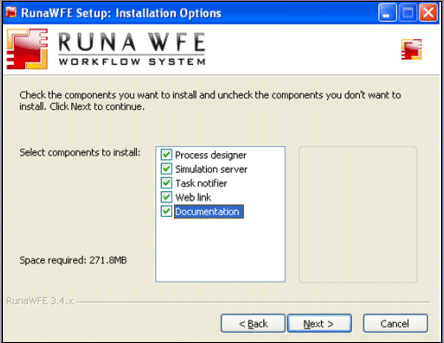
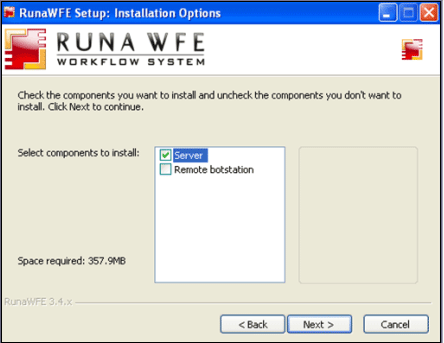
Then you'll have to specify the particular components from the list.
client side
server side
Next
Next
Next
For the first glimpse of the system it is recommended to install the client side components. Simulator client side component is an adapted for a workstation version of the WFE Server and contains a local bot station. That's why the client side components are sufficient to get to know all RunaWFE features.
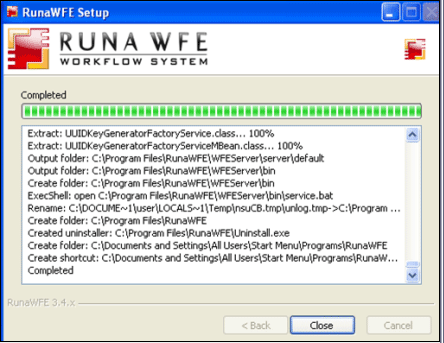
After client side components installation, you can start it via system menu (Start / Programs / RunaWFE) or icons on the desktop.
In order to start and execute business process you should start WFE Server (simulator). It can be done for example via menu command Start / Programs / RunaWFE / Start Simulation. Then run program web interface Start / Programs / RunaWFE / Simulation Web Interface. Default administrator login is "Administrator" (case sensitive) and password is "wf".
The main component is the WFE Server (in client side installation version - it is Simulator). All other components are optional. When the WFE Server (Simulator) is installed web browser is sufficient to work with the system.
# Linux OS
Note. Linux distributions are created with a long delay. We therefore recommend that in the case of Linux and MacOS use distributions in the form of Binary distibutive.
Linux OS distributives consist of rpm or deb packages. Download packages for your OS here (packages are in Distributives/Distributives for Linux).
Here is the list of supplied packages:
- jboss-as-vanilla — jboss application server
- runawfe4-server — WFE Server
- runawfe4-gpd - Developer Studio
- runawfe4-notifier - Task Notifier
Currently there are RunaWFE specialized distributives for the following Linux based OSes:
- Ubuntu (12.04, 14.04) 4.1.0+
- Debian (7.0) 4.0.6+
- Linux Mint (13.0, 14.0, 15,0) 4.0.6-
- Fedora (19.0) 4.1.0+
- ALT Linux (Sisyphus, p7)4.0.6+
- Arch Linux 4.0.6-
# Debian, Ubuntu, Linux Mint
At first make sure that software sources for dependences search and installation are correctly set. Use "Software Sources" or turn on necessary repositories in /etc/apt/sources.list file.
To install server download jboss-as-vanilla and runawfe4-server packages into separate directory, go to directory with deb packages and run the following command:
sudo dpkg -i *.deb ; sudo apt-get -f install
Packages dependencies will be downloaded and installed automatically.
Note. Superuser permissions are necessary to install WFE Server that's why "sudo" command usage is obligatory.
WFE Server configuration files can be found in /usr/share/jboss-as/standalone/configuration
For Developer Studio installation:
1). Download package into в /tmp/runa
2). In /tmp/runa directory run
sudo dpkg -i * ; sudo apt-get -f install
3). To start Developer Studio use the label in the applications list of menu or command
runawfe4-gpd
Task Notifier is installed similar to Developer Studio. You can start the Task Notifier from applications list or with the command
runawfe4-notifier
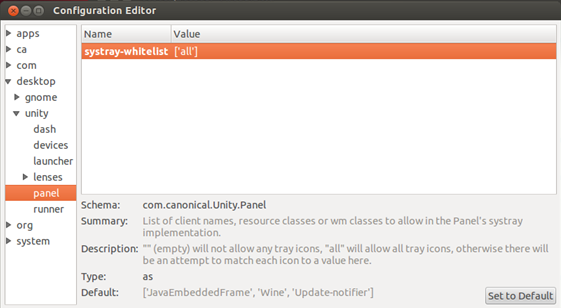
Note: in case of Unity shell use to be able to see Task Notifier icon in the system trey additional setting is necessary. Install Unity control package - dconf-tools,
sudo apt-get install dconf-tools
Then run dconf-edtior and in desktop → unity → panel set systray-whitelist parameter to 'all'
For Ubuntu 12.04 to turn on tray icons use:
gsettings set com.canonical.Unity.Panel systray-whitelist "['all']"
see more http://www.webupd8.org/2011/04/how-to-re-enable-notification-area.html
For Ubuntu 14.04
sudo apt-add-repository ppa:gurqn/systray-trusty ; sudo apt-get update ; sudo apt-get upgrade
Note. If current version in main repository is newer then update from this url: http://ppa.launchpad.net/gurqn/systray-trusty/ubuntu/pool/main/u/unity/
# ALT Linux
RunaWFE can be installed from Sisyphus repository.
To turn on Sisyphus [1]
For example, for x86-64 it's necessary to add the following lines to /etc/apt/sources.list
rpm http://ftp.altlinux.org/pub/distributions/ALTLinux/Sisyphus x86_64 classic
rpm http://ftp.altlinux.org/pub/distributions/ALTLinux/Sisyphus noarch classic
Update repository and install packages
sudo apt-get update && sudo apt-get install runawfe4-gpd runawfe4-notifier runawfe4-server
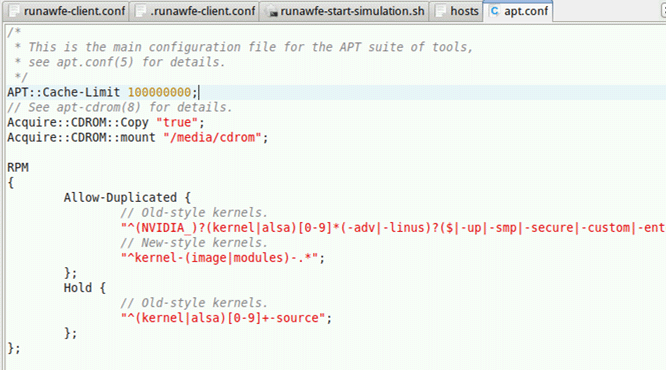
Note. For the correct work of Sisyphus repository sometimes it is necessary to add a string:
APT::Cache-Limit 100000000
to /etc/apt/apt.conf file.
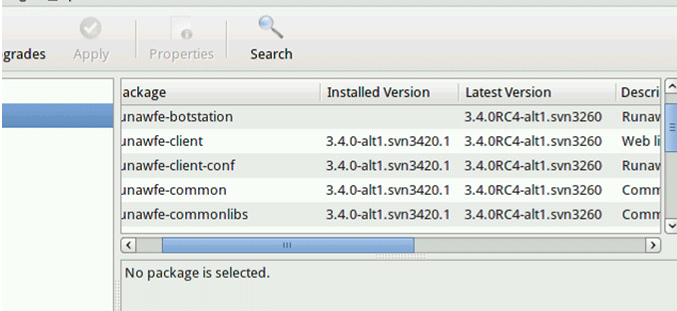
You must consider that the version of runawfe in repository may be not the latest one.
For example:
To install downloaded rpm packages of RunaWFE use commands
sudo apt-get update && sudo apt-get install runawfe4-gpd runawfe4-notifier runawfe4-server
WFE Server configuration files can be found in /usr/share/jboss-as/standalone/configuration/
To install Developer Studio and RunaWFE Free Notifier separately:
1). Download package to /tmp/runa
2). In /tmp/runa run
sudo apt-get install *.rpm
To run Developer Studio use icon from menu or command
runawfe4-gpd
To run RunaWFE Free Notifier use icon from menu or command
runawfe4-notifier
# Fedora
To install rpm packages of the distibutive run
sudo yum install *.rpm
Dependencies will be resolved automatically.
Note. Unlike in Ubuntu, Debian, Mint, ALT Linux, Arch Linxux in Fedora runa configuration files can be found in /var/lib/runawfe4-server/configuration/
For Developer Studio installation:
1). Download package in /tmp/runa
2). In /tmp/runa directory run
sudo yum install *
3). To start GPD use
runawfe4-gpd
RunaWFE Free Notifier is installed similarly to Developer Studio
To run RunaWFE Free Notifier use icon in menu or command
runawfe4-notifier
Note. To show RunaWFE Free Notifier in the tray use "super + m" keys combination (see more in http://stackoverflow.com/questions/17460705/the-missing-system-tray-icons-on-fedora-19-desktop-edition)
# Arch Linux
Download jboss-as-vanilla and runawfe4-server packages
To install them use:
sudo pacman -U *
Dependencies will be resolved automatically.
Binary distibutive
This distribution is an archive file, that contains compiled source, configured JBoss server and all required libraries. You can download the archive here.
# JAVA_HOME setting
For Windows OS: Right click on Contol Panel -> System -> Advinced -> Environment variables. Set variable name as JAVA_HOME and add it's value, which is the JDK installation folder
For Linux OS: export JAVA_HOME=/path/to/jdk
# Check java
Run java -version command.
# Install the WFE Server
Download system runawfe_Free-wildfly-*.zip. Unpack runawfe_Free-wildfly-*.zip archive to any folder on the server, folder name must not contain spaces. This folder will be here forth named $DIST_ROOT. Unpack archive file.
# Install Developer Studio
Download Developer Studio (Process Designer) RunaWFE_DeveloperStudio-*.zip for the required OS Unpack archive file.
Install TaskNotifier
Download TaskNotifier runawfe-rtn-*.zip. Unpack archive file.
# Installing RunaWFE from the source code
For WFE Server installation detailed description see WFE Server Developer Guide.
For Developer Studio installation detailed description see Developer Studio Developer Guide.
For Task Notifier installation detailed description see Task Notifier Developer Guide.
# Macintosh OS
Currently there are no distributive for Mac. To install the system use binary distributives:
# Check java
Run java -version command.
Java version 1.6 or higher is required. (http://support.apple.com/kb/DL1572?viewlocale=en_US)
# Install the WFE Server
Download archive from https://runawfe.org and extract the contents.
Go to bin directory in terminal session.
Start Server with ./standalone.sh command.
To shut down the WFE Server press Ctrl+C in the terminal session.
# Install Developer Studio
Download archive according to your java (32 or 64 bit) here and unpack it.
Run runa-gpd.
In case of any problems see http://otvety.google.ru/otvety/thread?tid=5724e1b658473315
Working with the system
Starting the RunaWFE server (Simulator)
Note. By default WildFly/JBoss is available only on local interface (because of security reasons). When you install Windows OS version of system with the help of installer, you have WildFly/JBoss already configured for network connections. To make WildFly/JBoss available on all set interfaces run standalone.bat (.sh) with "-b 0.0.0.0" parameter. Or you can place this parameter into standalone.bat(.sh) script.
Note. You must have permissions to run applications that listen to ports that are used by application server (that is a part of RunaWFE system) (by default the ports are 10098, 10099, 8083, 4444, 4445, 8080)
# Windows OS distibutive
Simulator can be run on the client computer via system menu Start / Programs / RunaWFE / Start simulation or via desktop icon "Start simulation".
If you've installed WFE Server or remote bot station, then WildFly/Jboss is installed as service and it will be started automatically every time the system is started.
# Linux OS distibutive
Use the following command to start the WFE Server:
sudo runawfe4-server
Note. To start the WFE Server superuser permissions are required that's why it's obligatory to use sudo command.
Note. To start the WFE Server with the possibility to close terminal use "screen" package.
"Screen" package installation:
sudo apt-get install screen
With "screen" the WFE Server can be started by:
screen sudo runawfe4-server
To disconnect window from terminal use CTRL+A then D.
To reconnect to the session use:
screen -r
Note. By default H2 (WildFly/Jboss7) is used in the system, DB is recreated with the Server restart.
To configure DB connection see https://runawfe.org/rus/doc/ServerConfigurationGuide#DataSources
When starting the WFE Server “deployment timeout” error can occur. For solution see https://runawfe.org/rus/doc/Troubleshooting
# Binary or source code distibution
Go to $JBOSS_HOME/bin directory and run
WildFly/Jboss7
standalone.bat (Windows)

standalone.sh (Linux)
Jboss4
run.bat (Windows)
run.sh (Linux)
Halting the RunaWFE server (Simulator)
# Windows OS distributive
The simulator on the client computer can be stopped via system menu Start / Programs / RunaWFE / Stop simulation or via desktop icon "Stop simulation".
If you've installed the WFE Server or remote bot station, you should stop jboss service to stop the system.
# Linux OS distributive
To stop the WFE Server in console press CTRL+C
# Binary or source code distribution
If the console is available you can use Ctrl+C to stop the Server.
Or go to $JBOSS_HOME/bin directory and run
WildFly/Jboss7
jboss-cli.bat --connect --command=:shutdown (Windows)
Jboss4
shutdown.bat -S (Windows)
# How to log in
Open web browser with http://wfserver:8080/wfe or https://wfserver:8080/wfe url.
<wfserver> - is server web address. If RunaWFE is installed and started locally <wfserver> must be replaced by localhost (http://localhost:8080/wfe)
Note. In case of AltLinux 4.0 port 8080 is used by system services, that's why you should use another port. Usually port 28080 is used. So in AltLinux OS case the url is http://wfserver:28080/wfe
Note. If SSL protocol is used the url is: https://wfserver:8443/wfe
The page with user login and password fields must appear in web browser.
Default administrator login and password (case sensitive):
Login: Administrator
Password: wf
Note. Demo processes files can be found in $DIST_ROOT/samples.
Starting Developer Studio
Windows OS distributive
Developer Studio can be run via system menu Start / Programs / RunaWFE / Developer Studio or via desktop icon "Developer Studio".
Linux OS distributive
Developer Studio can be run via system menu Start / Programs / RunaWFE / Developer Studio or via desktop icon "Developer Studio".
Binary or source code distribution
For Windows OS: Go to the main directory (RunaWFE_DeveloperStudio...). Run runa-gpd.exe
For Linus and macOS: Go to the main directory (RunaWFE_DeveloperStudio...). Run runa-gpd
Starting Task Notifier
Windows OS distributive
Task Notifier can be run via system menu Start / Programs / RunaWFE / Task notifier or via desktop icon "Task notifier".
Linux OS distributive
Task Notifier can be run via system menu Start / Programs / RunaWFE / Task notifier or via desktop icon "Task notifier".
Binary or source code distribution
For Windows OS: Go to the rtn directory of unpacked archive file. Run run.bat For Linus and macOS: Go to the rtn directory of unpacked archive file. Run run.sh
