Difference between revisions of "DocxXlsxExample"
doc>Natkinnat |
m (1 revision imported) |
Latest revision as of 06:37, 23 November 2020
Developing processes with handlers for docx, xlsx files
RunaWFE Free Workflow System (BPMS) Version 4.5.0
© 2003 - 2015, Consulting Group Runa
© 2015 - 2026, "Process Technologies" Ltd, this document is available under GNU FDL license. RunaWFE Free is an open source system distributed under a LGPL license (http://www.gnu.org/licenses/lgpl.html).
# Introduction
This guide demonstrates development and execution of processes with the following handlers
- office.excel.handler.ExcelReadHandler
- office.excel.handler.ExcelSaveHandler
- office.doc.DocxHandler
They are used for docx, xlsx files handling.
This handlers configurations description can be found in Using handlers
Creating and running example process "officeExcel" with Excel handlers
Process scenario
This process is an example of Excel handlers usage. It reads data from the input file (via "Excel: Read data from" handler), then the data is presented to user in editable form. Next Excel handler "Excel: Save data to" saves the edited data into file using input template. Then process goes to "Download xlsx" and user can download the resultant .xlsx file.
Creating business process graph.
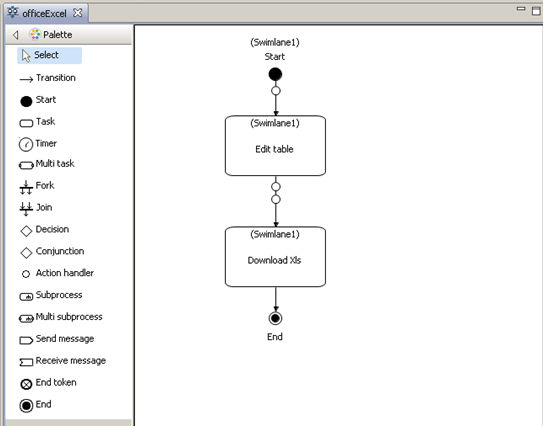
Let's use JPDL language to create officeExcel process. Draw the following business process graph by selecting and using "Start", "End", "Action-node", "Transition" elements from the palette:
Place action handlers on the transitions. Handlers class and configuration are set further on.
Creating variables and swimlanes
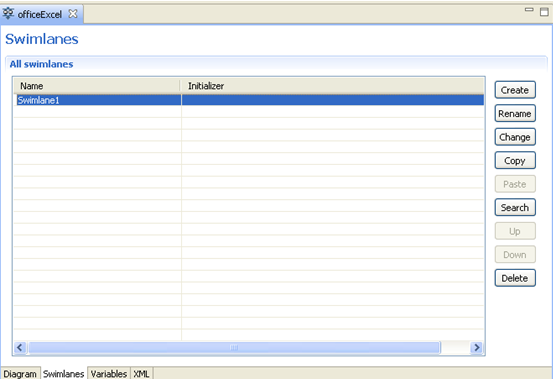
There is only one swimlane used in this process. In order to create it go to the "Swimlane" tab and click on "Create" button. Next type the swimlane name "Swimlane1" in the dialog:
There's no initializer for this swimlane because it is used in the Start state and is initialized by the user who starts the process. This swimlane is used for all the rest nodes that require a set swimlane. To set a swimlane select the node and in its properties in the Swimlane/Value field choose "Swimlane1".
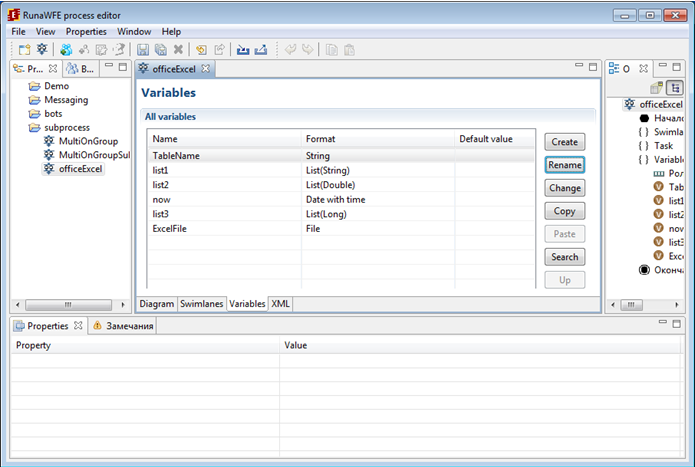
Next create variables. Go to the "Variables" tab and click on "Create" button. Type in the new variable name and select its format.
| Variables description: |
| Variable | Type | Description |
| TableName | String | Table name |
| list1 | List(String) | The first column of the table |
| list2 | List(Double) | The second column of the table |
| list3 | List(Long) | The third column of the table |
| now | Date with time | Date and time of .xlsx file creation |
| ExcelFile | File | File variable for the created .xlsx file |
See more detailed description of the variables further on.
Graphic form creation and variables validation
There are 2 forms in this process: one for "Edit table" task and another one for "Download Xlsx". Do the following to create them:
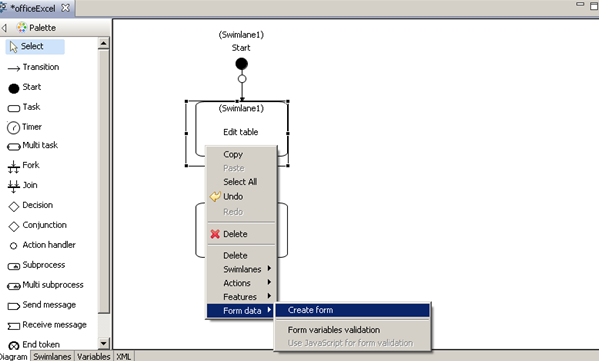
Right click on the action node and choose "Form" > "Create form" command.
We use «HTML form + freemarker tags» type
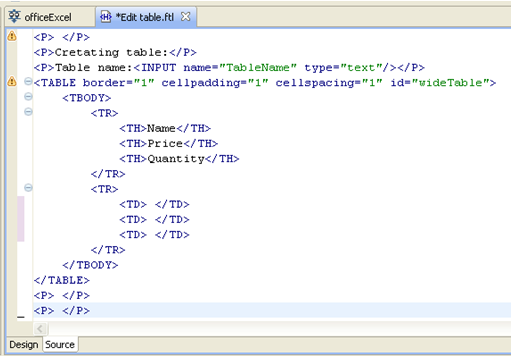
In “Edit table” node go to the “Code” tab, and create html:
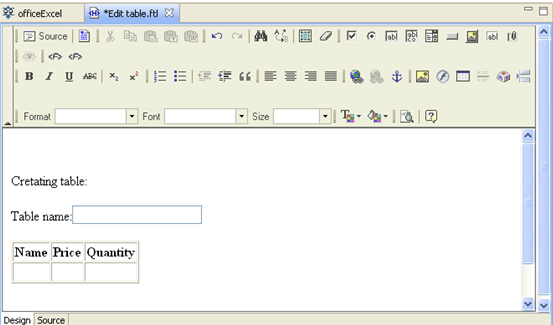
Then go to the "Design" tab:
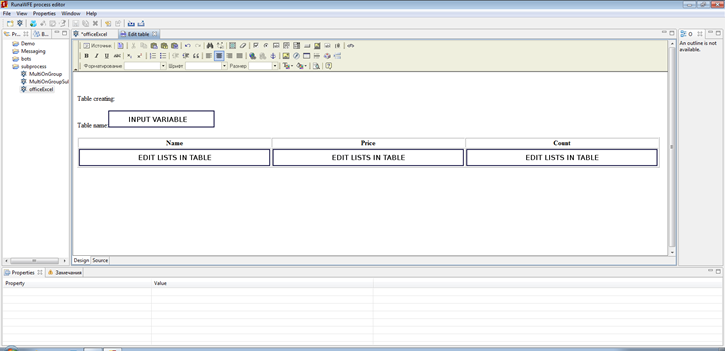
Place the following elements here:
- Freemarker tag "Variable input" to input "TableName" variable.
- Three Freemarker tags "EditLinkedLists" to fill/edit lists for the table creation
In “Variable name” field select “list1”, “list2”, “list3” respectively for each of the three tags, that are placed in cells “Name”, “Price”, “Count”.
The resultant form are the following:
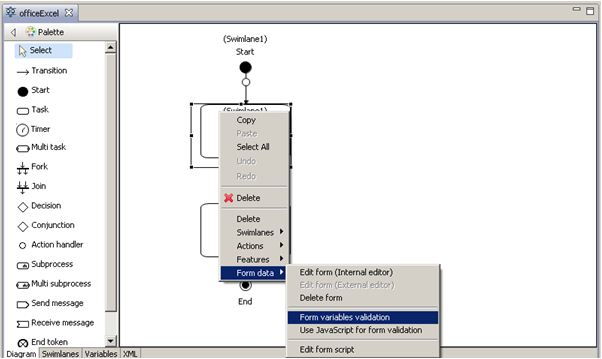
Next we create validation file and configure variables validation:
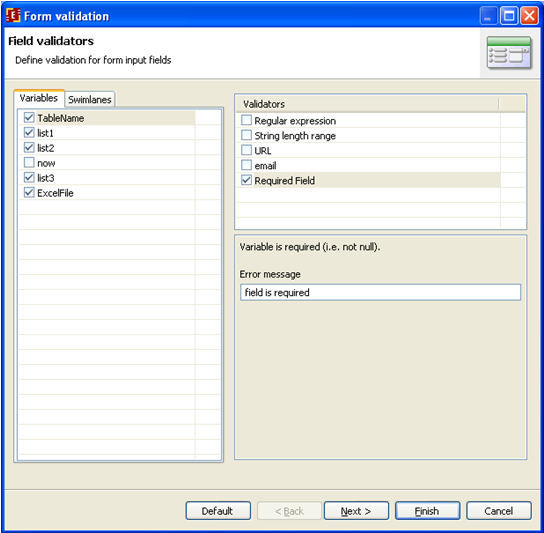
Use “Required field” validator:
Similarly the form for "Download xlsx" is created. It is used to download the resultant .xlsx file with table.
The form looks like the following:
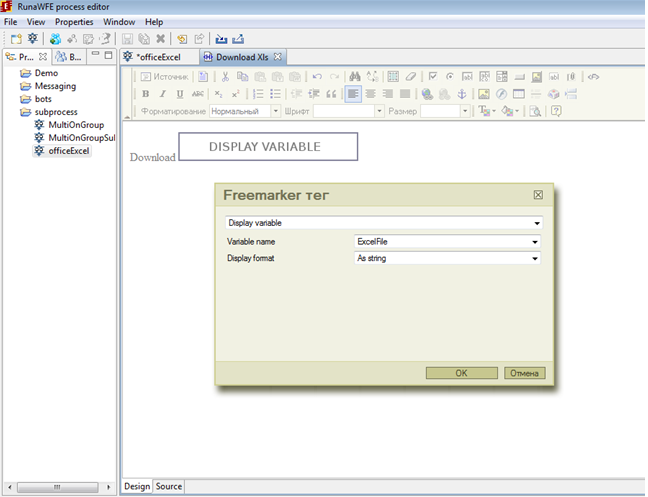
Freemarker tag “DisplayVariable” is used here, the "Variable name" field is set with “ExcelFile” variable
Action handlers configuration
The first handler is used to read data from Excel file.
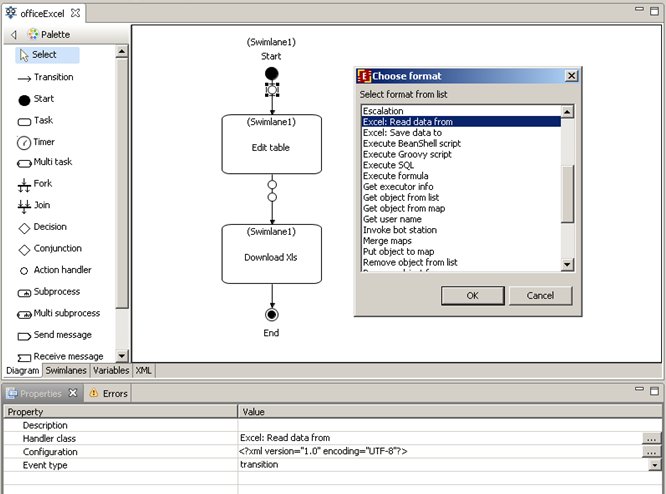
Handler class is “Excel: Read data from”
Configuration:
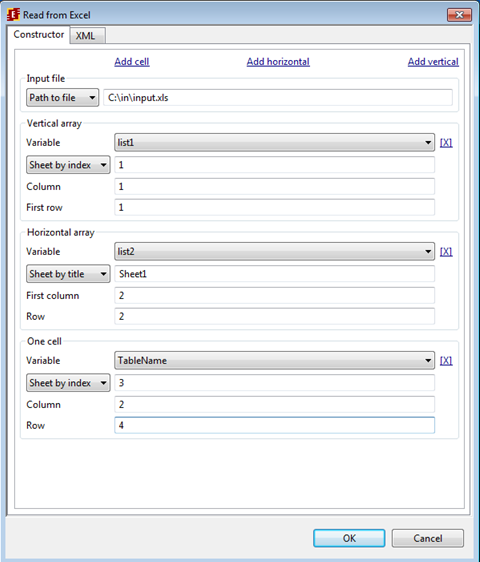
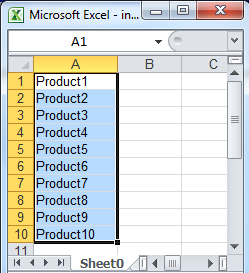
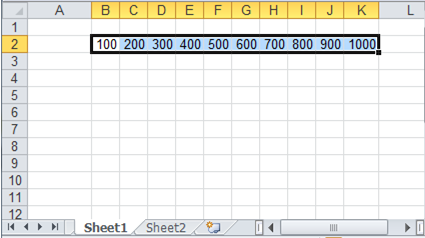
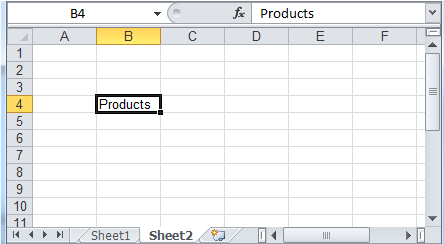
Input file is set as file path and contains the following data:
Sheet “Sheet0”
The data is saved into “list1” (Page by number 1, first row 1, column 1, vertical array)
Sheet “Sheet1”
The data is saved into “list2” (Page by number “Sheet1”, first column 2, row 2, horizontal array)
Sheet “Sheet2”
The data is saved into the "TableName" variable (the one cell on page 3, column 2, row 4)
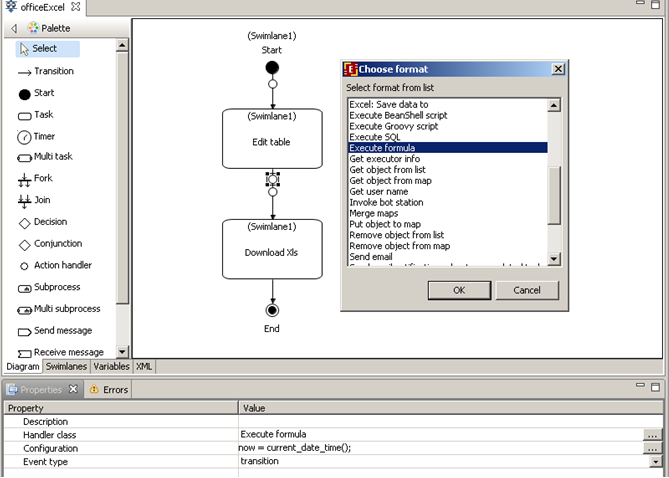
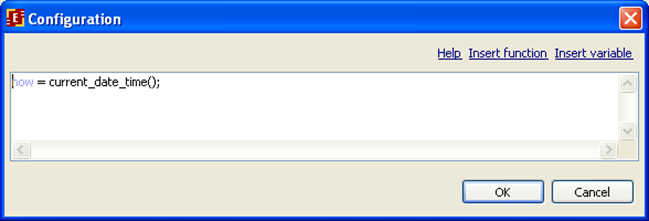
The second action handler defines the date and time of .xlsx file creation.
The handler class is ExecuteFormulaActionHandler,
configuration:
The "now" variable are initialized with the result of the “current_date_time()” function.
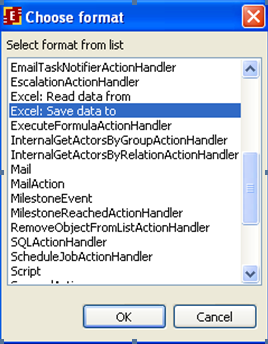
The third action handler is "Excel: Save data to" is used to save data to Excel file.
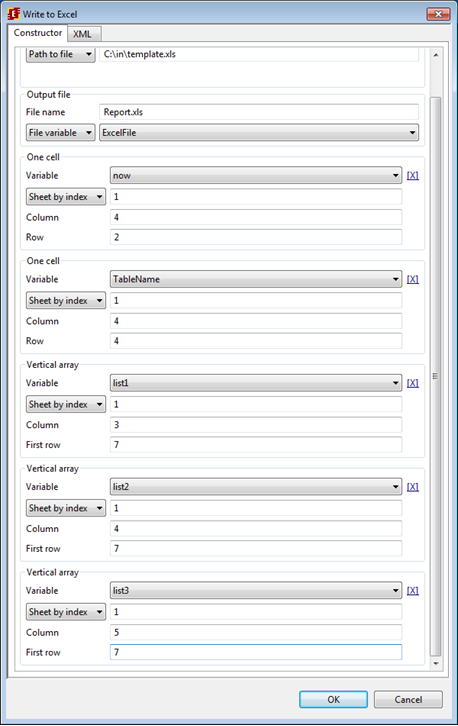
Configuration:
"Input file" set by template file name and path:
"Output file" name is Report.xls, we use file variable of ExcelFile type;
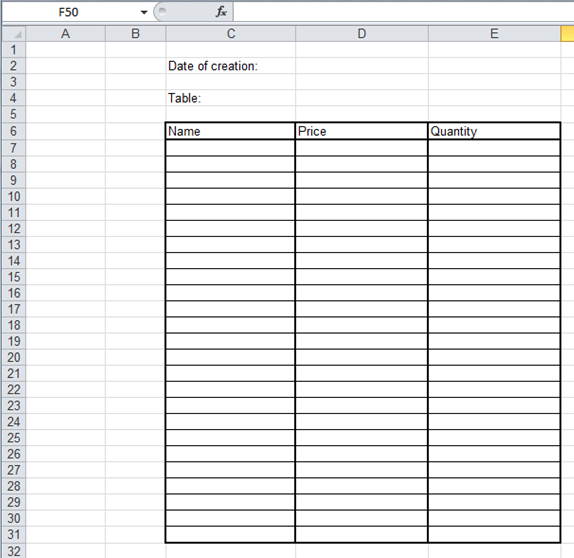
The rest parameters are set according to data positions of the input template file.
So the action handler produces the Excel Report.xls file with table in the template filled with data from variables "TableName", "now", "list1", "list2", "list3";
Deploying and running the process
To deploy created process to the WFE Server use "Export process archive" with "Export to WFE server" option set.
After starting the process the Excel handler triggers and data from the input file is saved into variables.
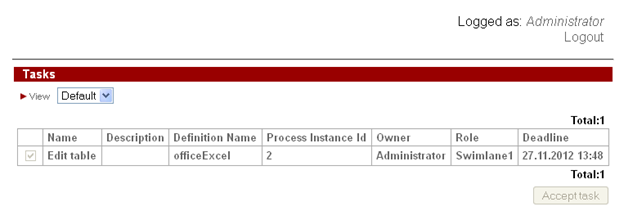
go to the task list:
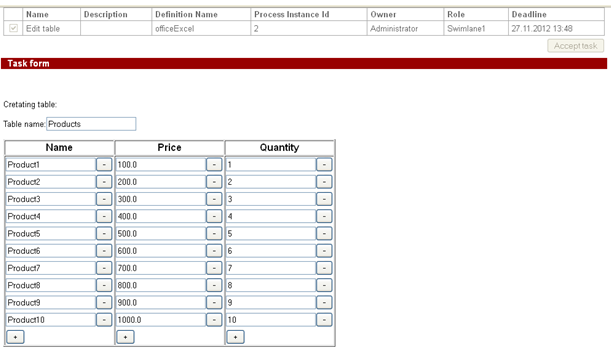
In “Edit table” task type the table name, edit the current data and fill in the third table column:
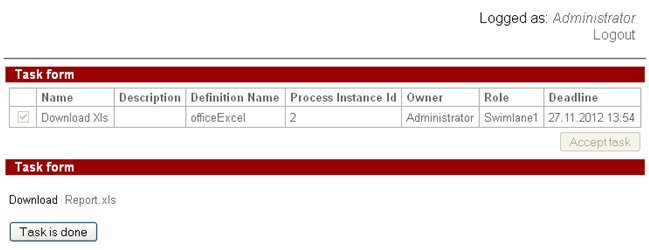
If all data is set the action handler that saves data to Excel file Report.xls is triggerd and next task "Download Xls" is presented:
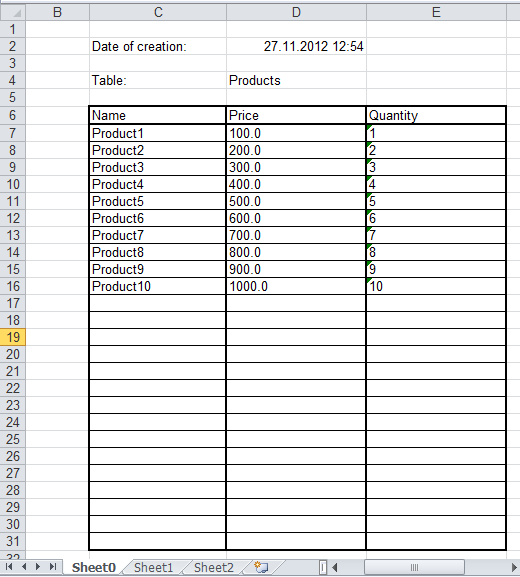
Click on Report.xls link to download the file. The resultant file looks like the following:
This file was created with the help of given handler configuration and input template file.
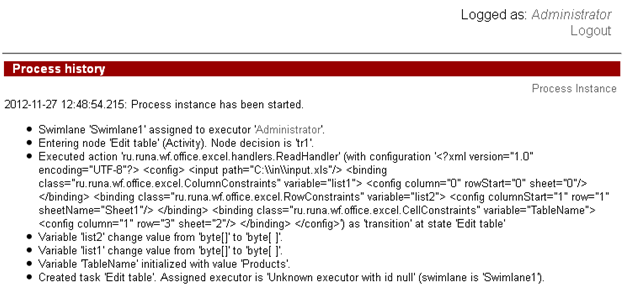
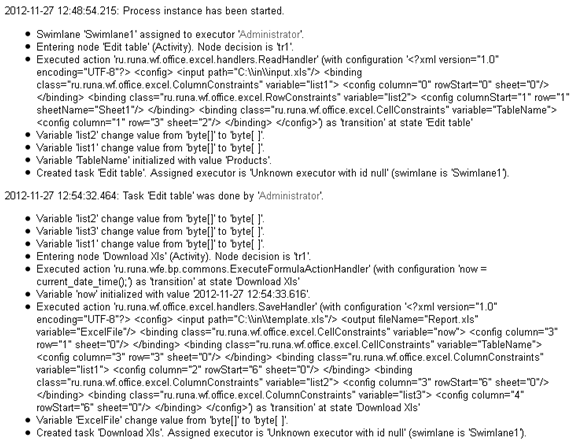
Process execution history:
Creating and running example process officeDocx with Docx action handler
Process scenario
On the start form of the process user creates table, fills it in with data, types in its name. Then DocxHandler is triggered. It creates .docx file using input template file and then the style is applied to the table. Then a link to download the created file is generated.
Creating business process graph
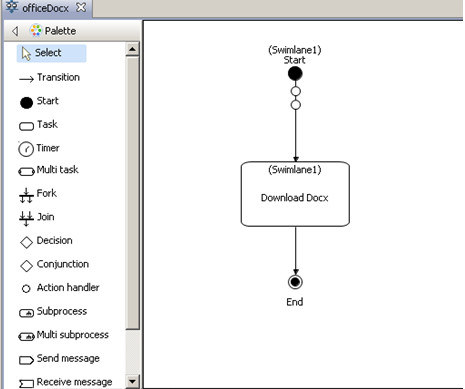
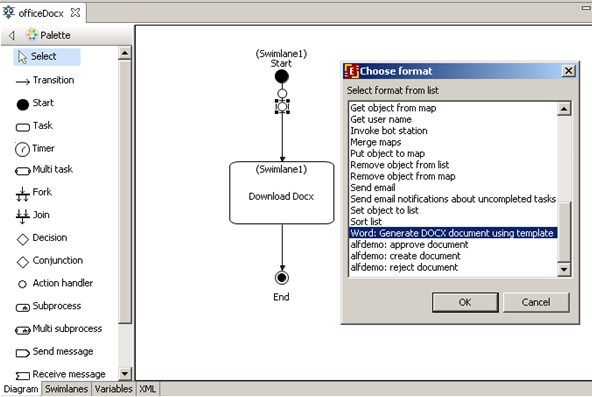
We will use JPDL language for officeDocx process creation. Select "Start", "End", "Action node", "Transition" elements from the palette to draw the graph as following:
Place 2 action handlers on the transition to the action node. Handlers class and configuration will be set further on.
Creating variables and swimlanes
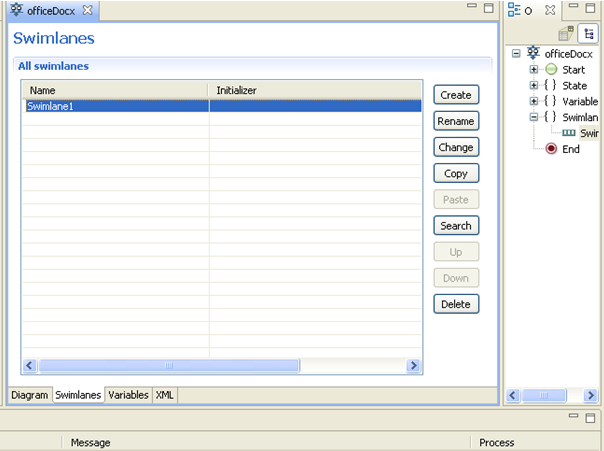
There is only one swimlane in this business process. Go to the Swimlane tab and click on the Create button. Type "Swimlane1" in the dialog:
"Swimlane1" has no initializer because it is used in the Start state and is initialized by the user who starts the process. Also this swimlane is used in action node “Download Docx”. To set the swimlane select the node and in its properties in the Swimlane/Value select "Swimlane1".
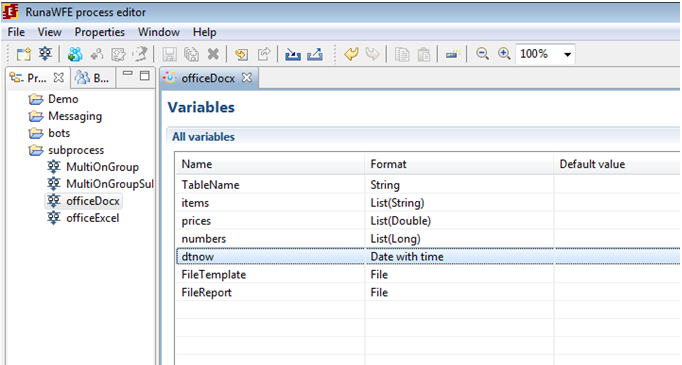
To create variables go to the Variables tab and click on Create button. Type in the variable name and select its type in the dialog.
| Variables description: |
| Variable | Type | Description |
| TableName | String | Table name |
| items | List(String) | The first column of the table |
| prices | List(Double) | The second column of the table |
| numbers | List(Long) | The third column of the table |
| dtnow | Date with time | Date/time of .docx file creation |
| FileReport | File | Result file variable |
A more detailed variable description is further on.
Graphic forms creation and variables validation
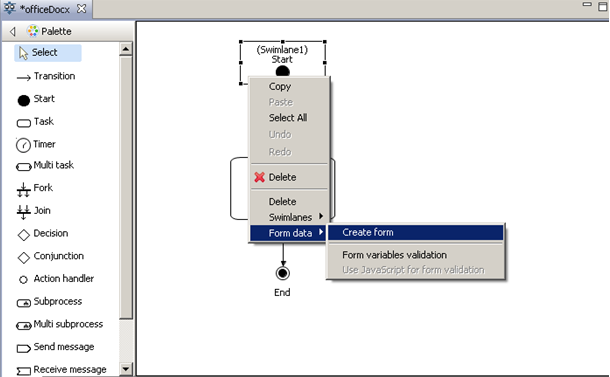
Right-click on the Start node of the business process graph and select "Form" > "Create form":
We use the «HTML form + freemarker tags» form type
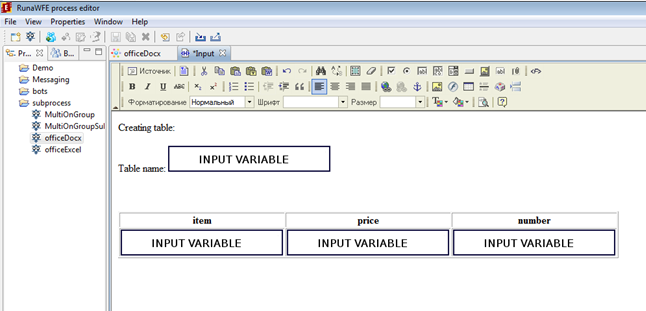
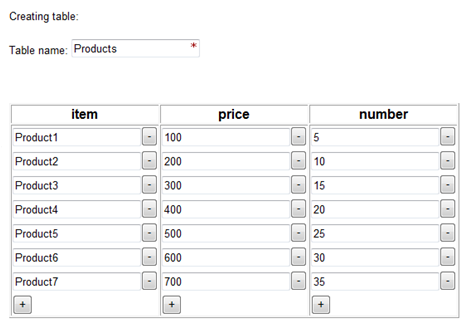
Let's create the following form:
The following elements are placed on the form:
- a Freemarker tag “InputVariable” for “TableName” variable;
- three Freemarker tags “InputVariable” to fill lists with data for table creation;
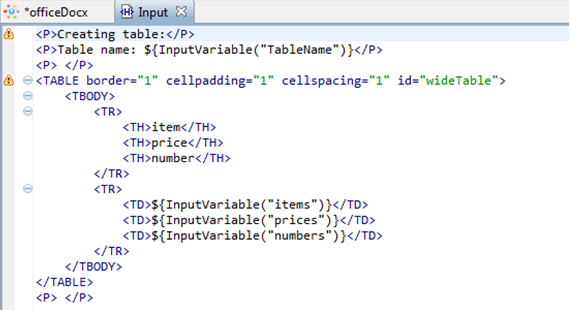
The resultant form code:
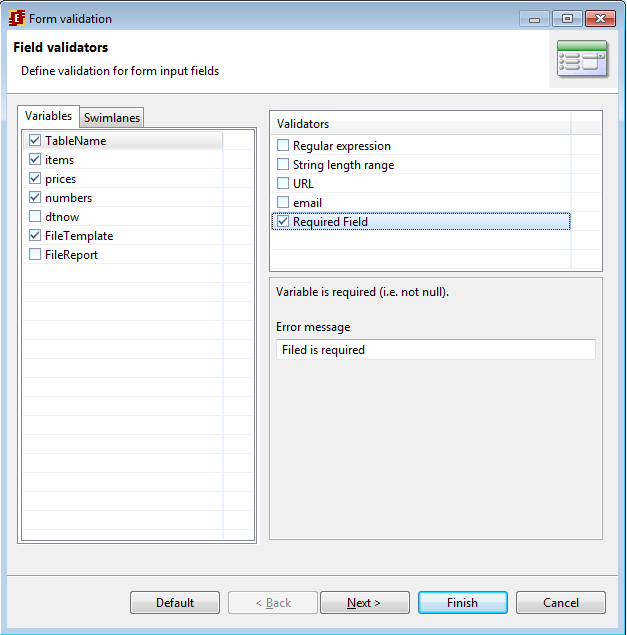
Then we create validation file and set the variables validation.
All the variables on this form must be set, so we use "Required field" validators.
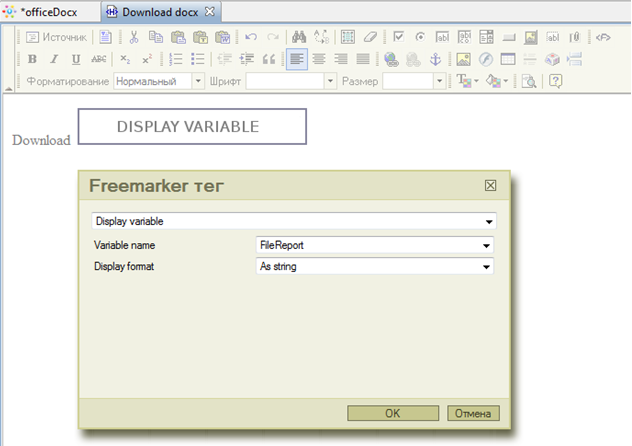
Similarly a form for “Download Docx” is created. It is used to download created .docx file with table.
The form looks like following:
We use freemarker tag “DisplayVariable” here and set “FileReport” variable in the Name field of the configuration.
Handlers configuration
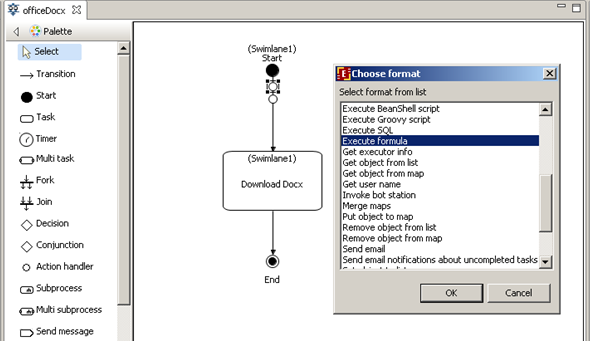
The first handler is used to define the date and time of the .docx file creation.
Handler class is ExecuteFormulaActionHandler,
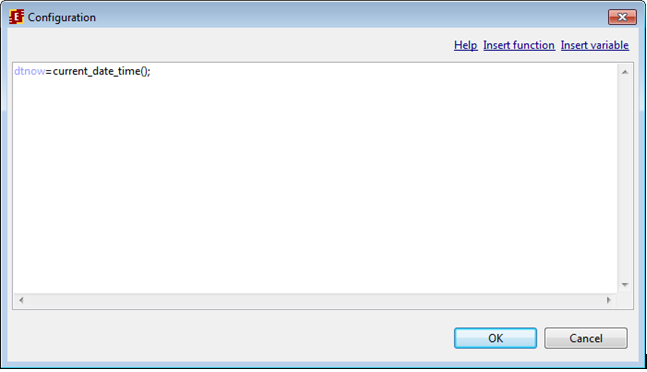
configuration:
The “dtnow” variable will be initialized by the result of “current_date_time()” function
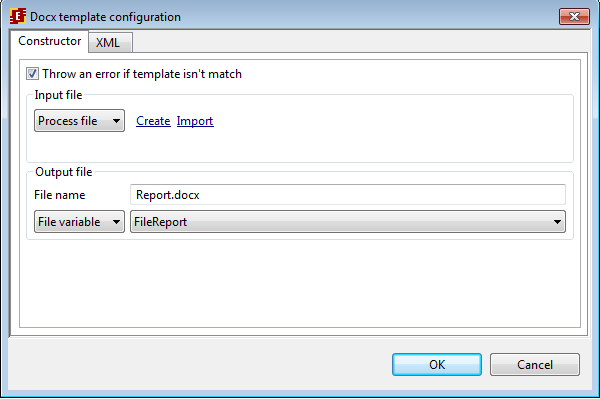
The second handler is “Docx handler”. It is used to save file in .docx format.
Configuration:
Let's create input file (template) right in business process, see details in the next section.
As the output file we use file name Report.docx and file variable that will contain link to the created docx file.
Creating template
Let's create docx template file right in the business process.
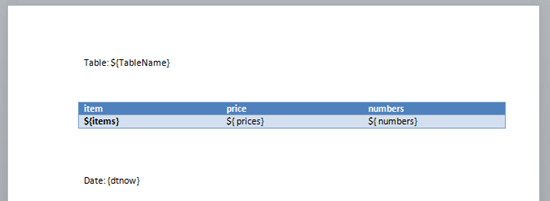
Click "create" in handle configurator dialog in the "input file" section and form a template as the following:
Where:
- ${dtnow} will be replaced by the value from "dtnow" variable with the date and time of the .docx resultant file creation;
- ${TableName} will be replaced by the value of TableName variable;
- ${items},${prices},${numbers} are table columns;
Creating style
In order to create new table style in template open the corresponding menu by ALT+CTRL+SHIFT+S shortcut and select "Create style"
Then set the created style for the table.
The steps to create style differ depending on the office version and can be found in the office help.
Deploying and running the process
Deploy created process to the server with the help of "Export process archive" with the "Export to WFE server" option set.
When the process instance starts we get the following form.
Type the table name, table data and select template file:
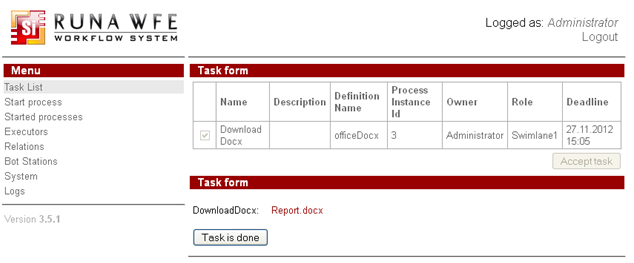
If all data is set the handler creates .docx file and the process control flow goes to "Download Docx" node:
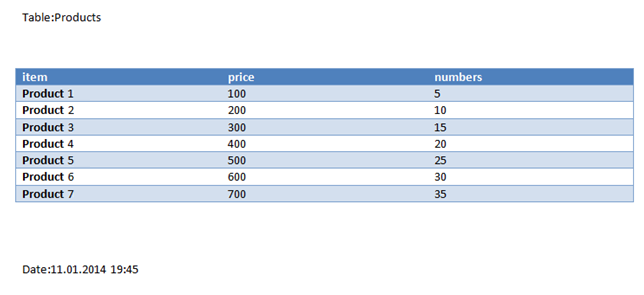
By clicking on Report.docx link you can download the created file:
This file was created by the configuration set for the handler and "mystyle" style was applied afterwards.
