Difference between revisions of "BatchPresentations"
doc>WikiSysop |
m (1 revision imported) |
(No difference)
| |
Latest revision as of 06:36, 23 November 2020
Details of table display views
RunaWFE Free Workflow System (BPMS) Version 4.5.0
© 2003 - 2015, Consulting Group Runa
© 2015 - 2026, "Process Technologies" Ltd, this document is available under GNU FDL license. RunaWFE Free is an open source system distributed under a LGPL license (http://www.gnu.org/licenses/lgpl.html).
Details of table display properties
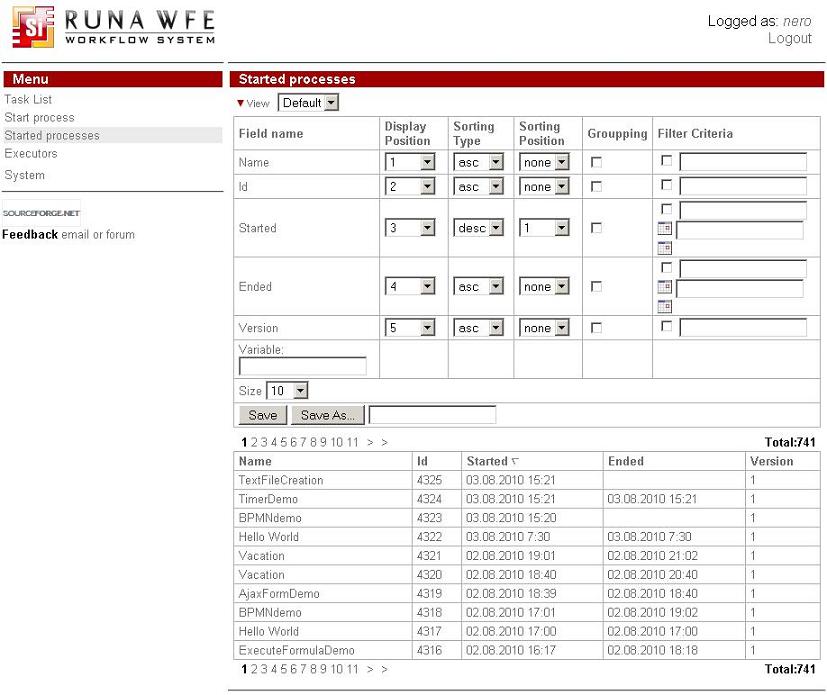
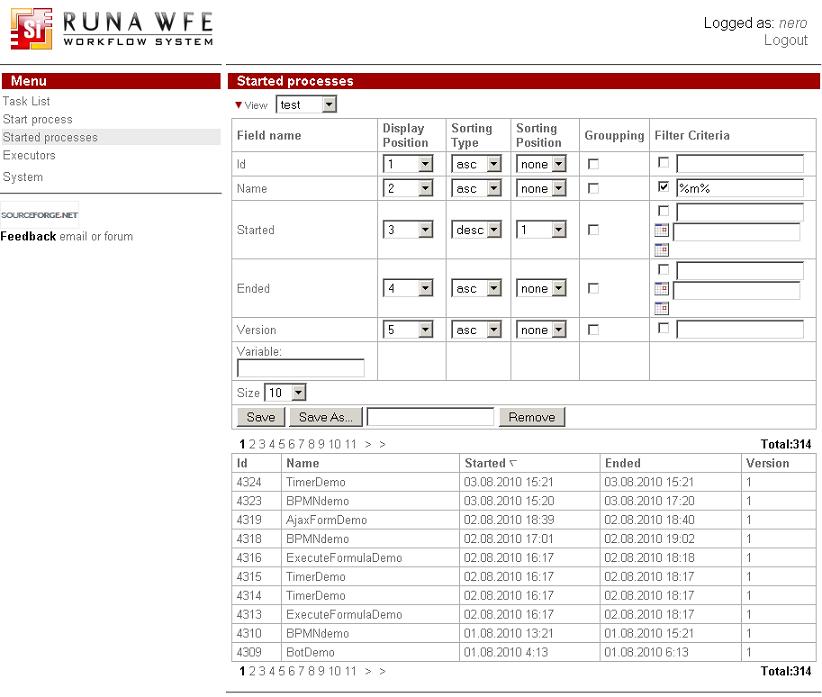
Tasks grouping, sorting and filters are described in WFE Server user guide. Here we consider it in more details. Let's navigate to started processes page.
The upper part of the page contains a “View” command, represented by a red triangle (![]() ) and a "View" link.
) and a "View" link.
A click on this icon or link opens a table with view properties:
In view properties you can:
specify the position of a column on the display;
specify sorting type and position;
set grouping options;
set filtering criteria;
create a new profile based on the current one. Here are some detailed examples of these properties.
Note. In online demo application you should use not "Save" but "Save As" your profile with some name other then "Default". (As it is described in the example 5). Then the following examples will work with your new profile. It is done so for the sake of keeping "Default" profile configuration stable while many other users share the same login (thus the same configurations) in demo.
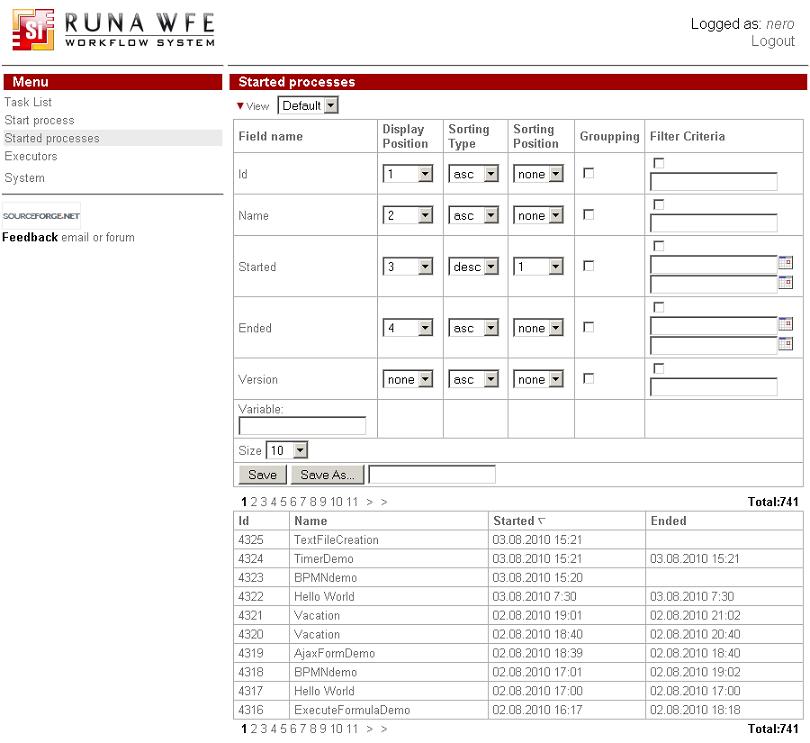
1. Let us swap the “Name” and “Number” columns and remove the “Version” column:
set display position 2 for the “Name” column;
set display position 1 for the “Number” column;
set display position “none” for the “Version” column. After saving, the view will look as follows:
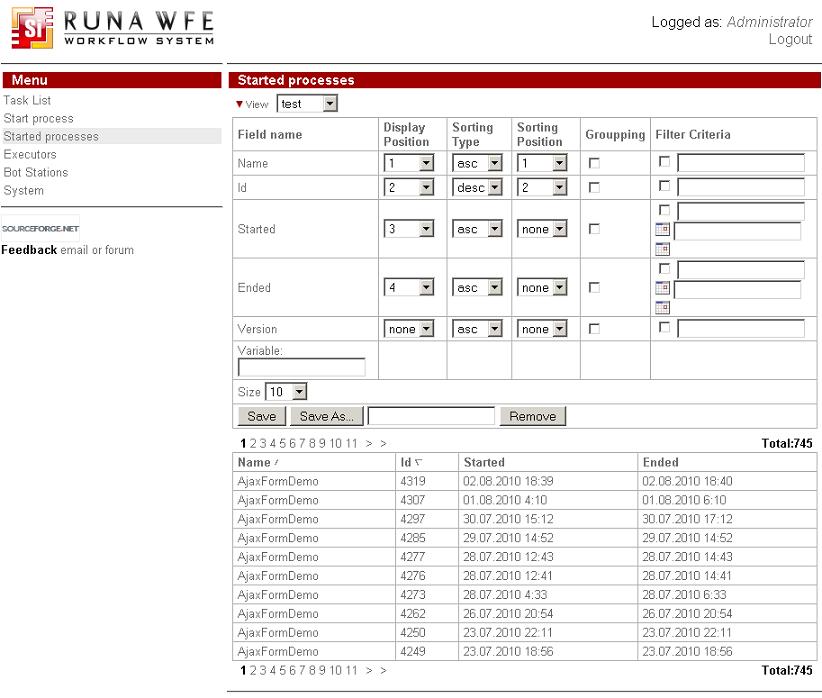
2. Let us first sort by process name in the ascending order and then by number in the descending order:
set sorting type “asc” (ascending) and sorting position 1 for the “Name”;
set sorting type “desc” (descending) and sorting position 2 for the “Number”. After saving, the view will look as follows:
Note. To change the sort order, just click the column name.
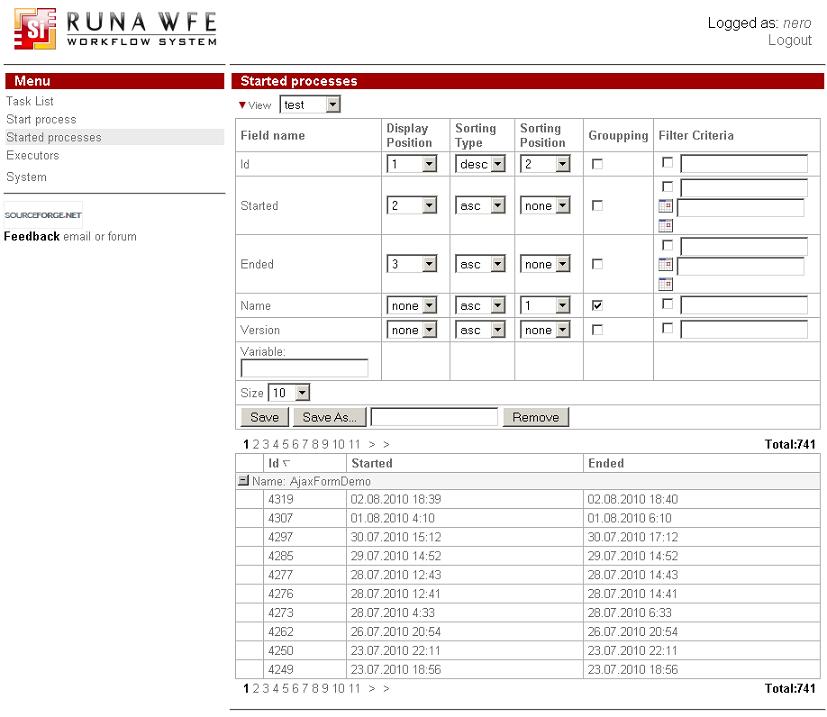
3. Specify grouping by “Name”;
For the “Name” line, check the box in the “grouping” column and execute a Save command.If you open the “Report” line, the view will be as follows:
4. Set the filtering criteria – to display a task, if the name of its process contains letter “m”:
For the “Name” line, check the box in the “Filter Criteria” field and enter the text: *m*
After a Save command is executed, the lines of the “Business trip”, “Report”, and “Hello World” processes will disappear from the view:
Note. You can enter a string for a direct match search or use wildcards (a “*” symbol, denoting any string, including an empty string).
5. Let us create a new profile, based on the current one.
Enter “Profile Example” in the “Save As” field. Execute a Save As command.In the upper part of the screen, the current profile will change to “Profile Example”, and the choice element will now have two values: “Default” and “Profile Example”. Now if you change properties and click Save command the current profile (that is one selected in the choice) will be changed.
Minimize the view properties (by clicking the ![]() icon) You can switch between saved profiles selecting one from the choice without opening the view properties.
icon) You can switch between saved profiles selecting one from the choice without opening the view properties.
One can now change the view by switching it in the choice element.
If it's necessary to set one view for several users then a shared view can be used.
Administrators group members can make a view visible in other users profiles. In order to do so administrator selects "share view" option or "share view and set as default" and saves the view. After it this view will be present in other users views list (after they log in to the system next time).
