ServerUserGuide
WFE Server user guide
RunaWFE Free Workflow System (BPMS) Version 4.5.0
© 2003 - 2015, Consulting Group Runa
© 2015 - 2026, "Process Technologies" Ltd, this document is available under GNU FDL license. RunaWFE Free is an open source system distributed under a LGPL license (http://www.gnu.org/licenses/lgpl.html).
# Logging In
In order to be able to log in to the system, the WFE Server (simulator) must be running.
For Windows OS distributive Simulator can be run on the client computer via system menu Start / Programs / RunaWFE / Start simulation or via desktop icon "Start simulation". If you've installed WFE Server or remote bot station, then jboss is installed as service and it will be started automatically every time the system is started.
For Linux OS distributives Simulator can be run on the client computer via system menu or via desktop icon "Start simulation". If you've installed WFE Server or remote bot station, then jboss is installed as demon and it will be started automatically every time the system is started.
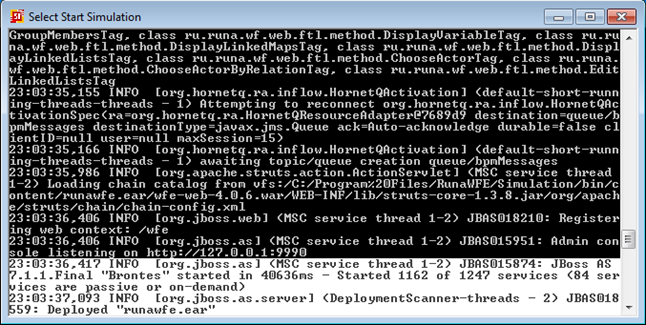
If you used "Start sumulation" command, a console window will appear:
The following lines «…JBoss AS 7.1.1.Final "Brontes" started in …» «…INFO [org.jboss.as.server] … Deployed "runawfe.ear" mean that simulator is started.
After it web-interface can be used to access the system. It can be done via Task Notifier or web browser. The simplest way to start web-interface is via start menu command «...RunaWFE / Simulation Web Interface» or via label on the desktop.
Graphical Interface
Once the system is installed, its graphical interface is available at: http://<servername>:8080/wfe. <servername> is the address of the server where the system is installed.
Note. In case of AltLinux, port 8080 is used by system services, so a different port should be specified in the URL (see “System Installation Instructions”). Under AltLinux, the following URL is usually used for the graphical interface: http://<servername>:28080/wfe.
Note. If the SSL protocol is used for the graphical interface, use the following URL: https://<servername>:8443/wfe
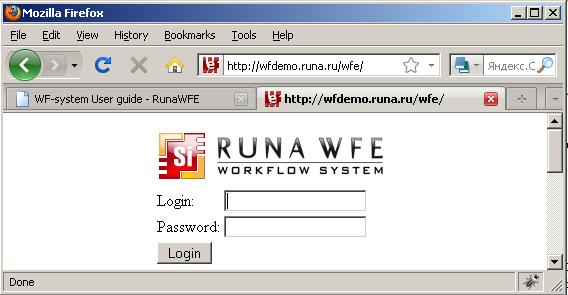
A web-browser, opened at the above address, should display a page to enter user login and password.
Administrator login is «Administrator» (case sensitive) and password is «wf».
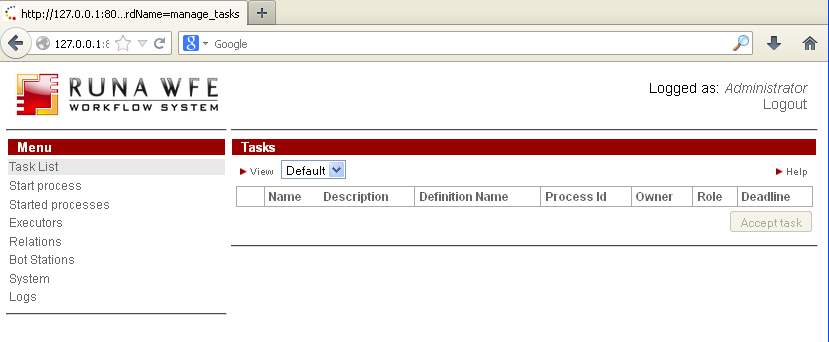
After entering the system user will see system menu in the upper left part of the page. The menu includes the following items:
- Task List
- Start process
- Started processes
- Executors
- Relations
- Bot Stations
- System
- Logs
Here is a short description of menu items. More details will be given in the following chapters.
"Task List". When "Task List" is selected the current user task list opens. By selecting task from the list user can open task form, type in data into it and execute the selected task. Also user can search, group, filter and sort tasks as well as use process variables as filter criteria. Those variables values can be also displayed in the task list items.
"Start Process". "Start Process" opens a list of business process definitions. User can start a new business process, view business process graph, description and other business process properties. If user has proper permissions s/he can deploy a new business process definition into the system or deploy a new version of existing process.
"Started Processes". This menu item opens a list of started business processes which can be viewed by the current user (user must have "read" permission on the business process instances). By selecting business process from the list user can see the current state of the business process execution on the process graph, current business process variables and swimlane values and business process events log (history). If user has proper permission s/he can stop business process execution. Also user can search, group, filter and sort instances as well as use process variables as filter criteria. Those variables values can be also displayed in the business process instance items.
"Executors". This menu item opens a list of possible task executors (users and user groups) which can be viewed by the current user (user must have read permissions on particular executors). A new executor can be created or it can be deleted and executors can be included or excluded into/from groups. Executor status (active/inactive) can be set here. The list of substitutions for inactive user can be set on this page.
"Relations". This menu item opens a page with relations controls. Here you can see the list of relations, create, edit and delete them.
"Bot Stations". RunaWFE bots are specialized software that can execute business process tasks the same way as human users do. Bot station is an environment for bots execution. Bots from bot station periodically query WFE Server. If the current task of process instances is intended to be executed by bot then bot executes the task and returns results to the WFE Server. "Bot Stations" page contains a list of registered bot stations. By selecting bot station from the list the list of bots can be viewed as well as bot station properties. By selecting bot the list of its task with properties can be viewed. On the "Bot Stations" page user can create, edit, import or export a bot station as well as start/stop bots periodic activation. A new bot can be imported to bot station, on the bot page new task can be added as well as the individual tasks properties can be changed.
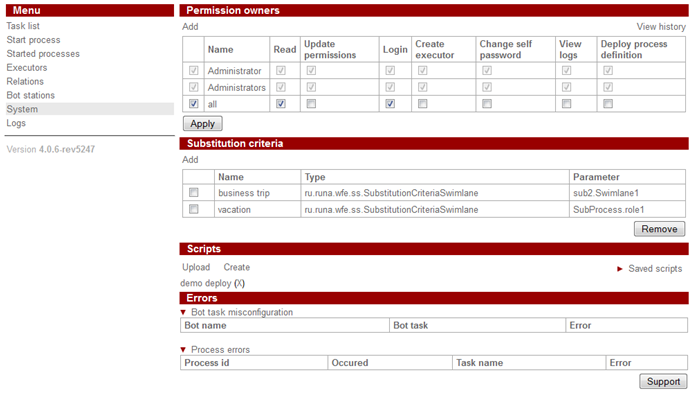
"System". This page contains a list of system operations permissions given by administrator for selected executors. New types of substitution criteria can be added here. A list of bot tasks errors and processes errors can be viewed if any present on the system currently. Starting from version 4.0 WFE scripts controls are added here.
"Logs". This menu item opens a page with system log. A convenient log viewer can be found here. It can page, search and update log information.
Task List
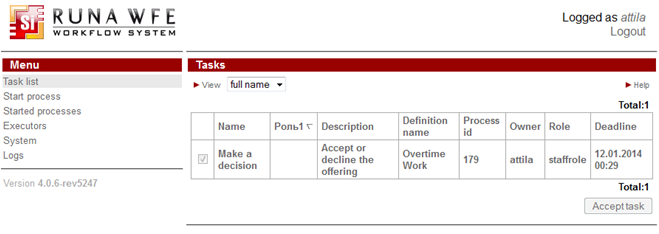
The page of the “Task List” menu item contains a list of tasks for the user.
By default task name, business process name, business process id, swimlane value, and some other information is displayed.
Task list with one task for attila is displayed below.
If bold font is used in the name of the task, the user hasn't viewed the task yet (hasn't opened the task form). Under the task list to the right there is a button "Accept task". If the task is assigned to the group of users, it appears on the list of every member of the group. When user clicks "Accept task" the task disappears from task lists of other members of the group and stays only on the list of the user that accepted the task.
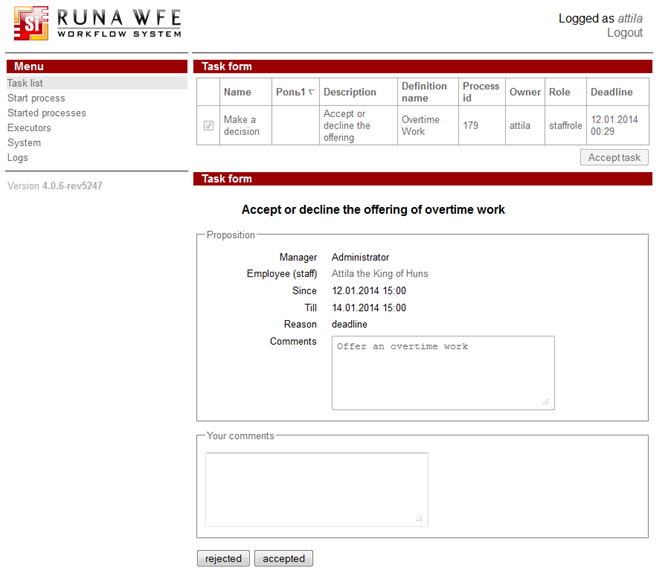
When user clicks on the name or description of the task the corresponding form appears:
Task Sorting, Grouping and Filtering
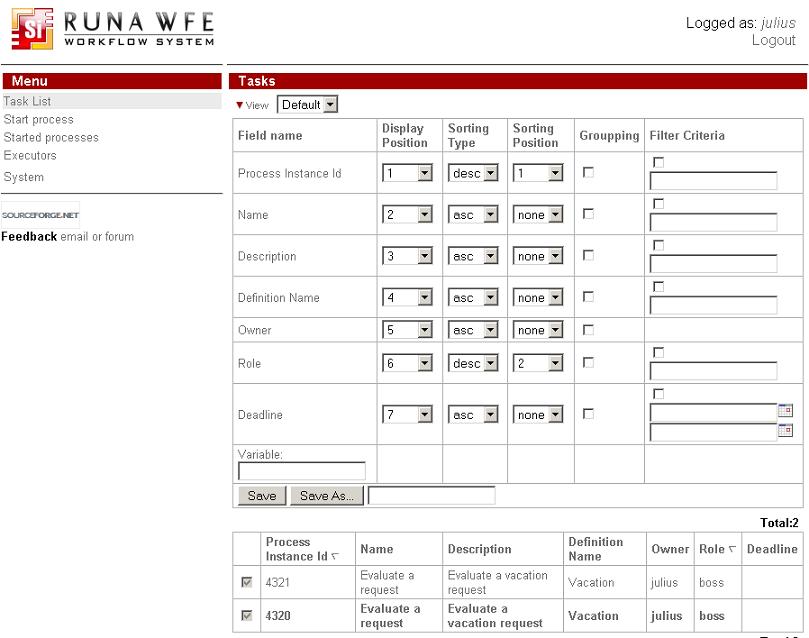
Click the small red triangle or "View" link near it in the upper part of the task list, and a sub-form with sorting, grouping and filtering properties will appear (to close the sub-form click the triangle again):
Note. When you check a field in Grouping column the Display position value for the corresponding row is automatically set to "none". You may want to change the Display position value. Because when Display position is set to "none" for the name and the description fields there's no way to navigate to task form from the task list.
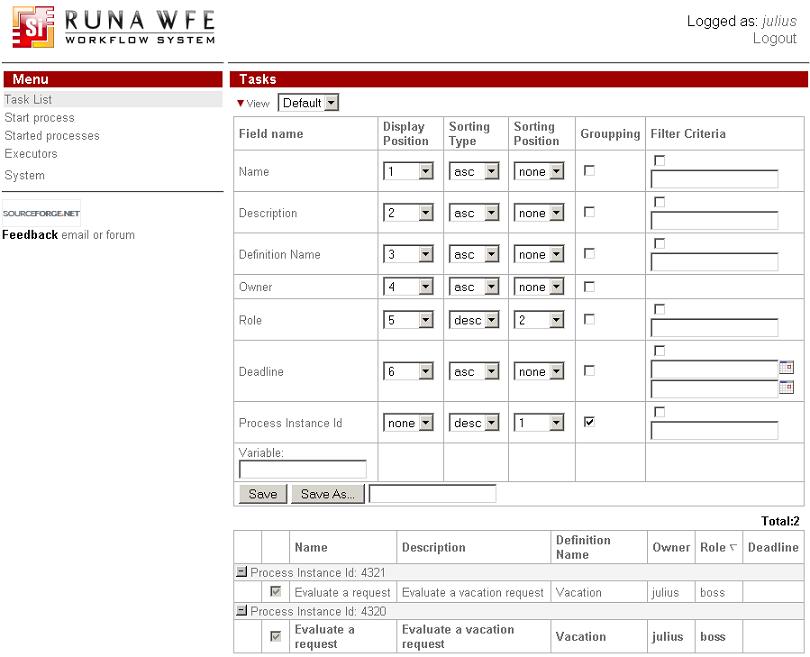
An example of grouping properties, grouping tasks by process instance id:
Clicking the “Save as” button in the sub-form will create a new profile with the current properties of the sub-form. The name of the profile should be specified in the field to the right of the button. Once the new profile is saved, its name appears in the selection field next to the red triangle and "View" link. When a profile is selected in the selection field, the representation of the current tasks changes according to the properties in the selected profile.
The sub-form also contains an “empty” field. This field allows to sort, group and filter tasks by values of a business process variable. To do so, enter the name of the variable in the "empty" field. Click "Save" or "Save As". Now the sub-form contains a new line with the name of the variable and fields to make sorting, grouping and filtering by its value. Enter desirable parameters and "Save" again. The filter will be applied to all the tasks for business process instances that contain a variable with this name.
Adding output of process starter full name
Often it's convenient to display process starter full name in a separate column.
It's possible in WFE client web-interface to add such column. Either a swimlane or a variable with full name of process starter can be used, if such variable exists in business process.
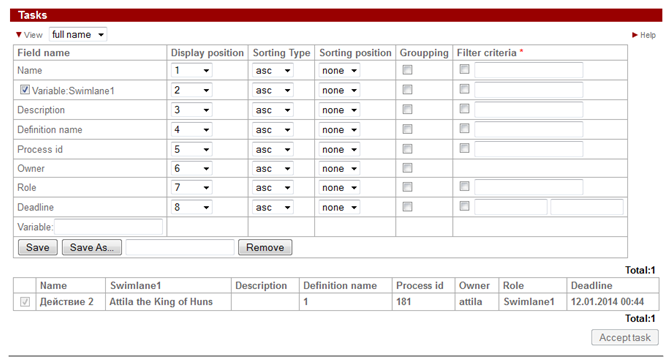
Click on "View" in the task list page. Then in the Variable line input variable (or swimlane) name with employee full name. Then type in a new name for this view near the "Save as" button and press the button. In appeared line with variable (or swimlane) name in "position" column select the number of column to show employee full name in. Press "Save" button. The view is ready. You can press "View" link again to hide the view settings.
Now to see the tasks with process starter full name column just select the saved view from the view list.
Note. In order to initialize employee full name variable in business process use GetExecutorInfoHandler when developing process. See for more details handler description.
Start process
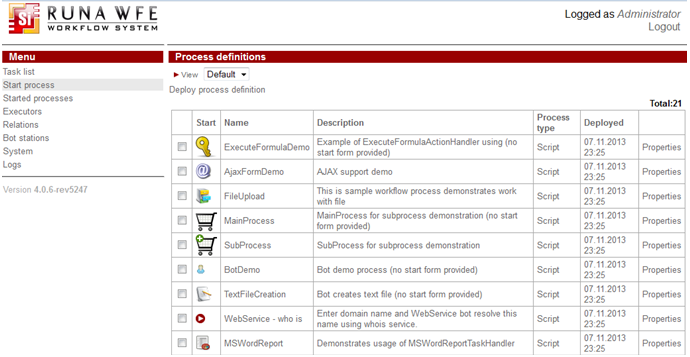
The page of the “Start process” menu item contains a list of business process definitions, accessible to the logged in user for reading.
Business processes names and icons that are available to be started by current user are direct links. Clicking on them will show business process start form or start business process instance if there's no start form for this process.
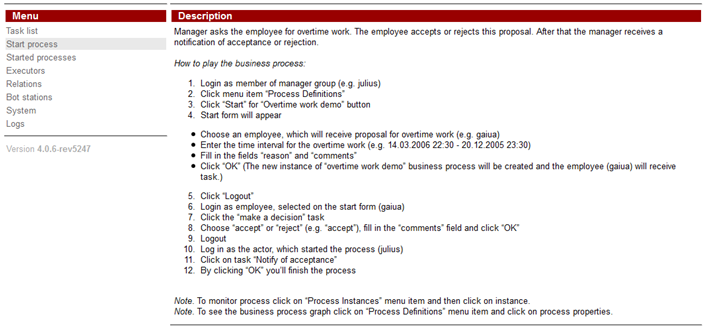
In "Description" field there's a short process description. By clicking on it a full description can be accessed.
Business Process Sorting, Grouping and Filtering
Click the small red triangle or "View" link in the upper part of the definitions list, and a sub-form with sorting, grouping and filtering properties will appear (to close the sub-form, click the triangle again):
The sub-form properties are similar to those of the sub-form for tasks.
How to Start a Business Process
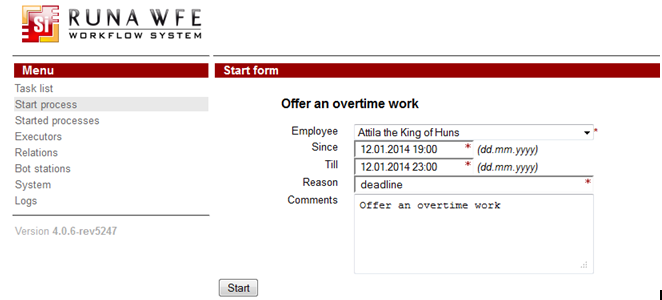
Clicking the name of a business process or process icon will start a new business process instance or a start form will be opened, if it is present in the process definition. If a start form is present, then the process instance will be started only after the start form is filled and executed.
An example of a filled starting form:
When "Start" button is clicked a new business process instance is created and started for execution.
How to View a Business Process Properties
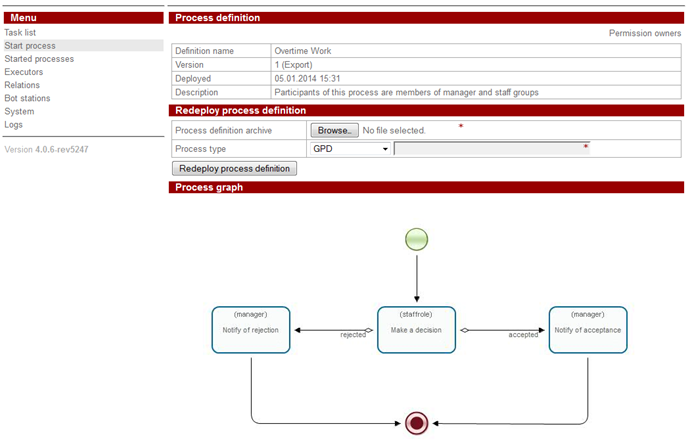
Click the “Properties” command if you want to open a page with business process properties.
Here you can see process name, version, deployment date and description.
By clicking on "Export" link in version line you can save this version of business process .par file. A new version of business process can be deployed by selecting .par with it with "Browse" button, followed by pressing "Deploy process definition" button.
Also there's a business process graph on this page.
By clicking on "Permission owners" link in the upper right corner of the page a table with this process permission owners can be accessed:
Started processes
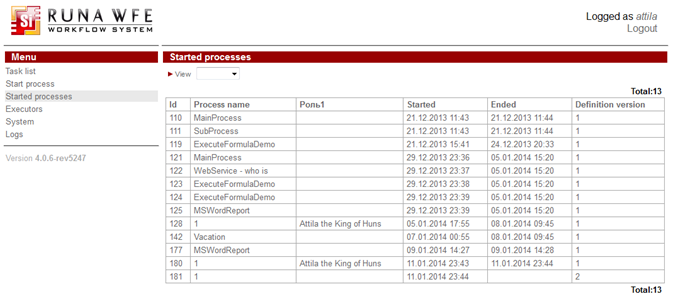
The page of the “Started processes” menu item contains a list of business process instances, accessible to the logged in user for reading.
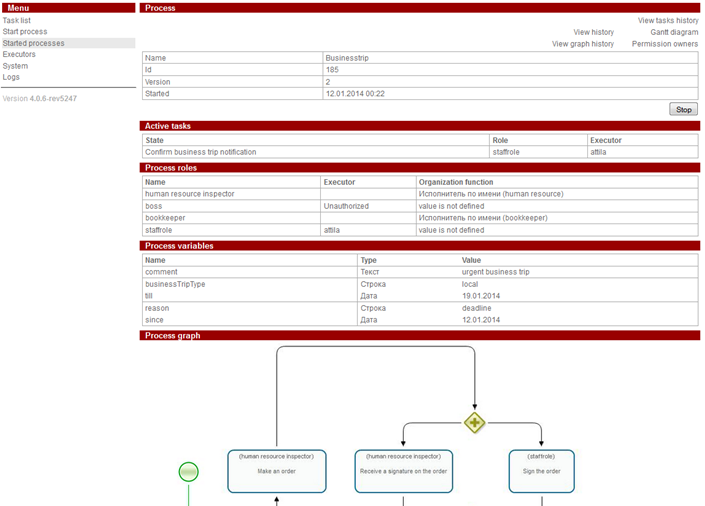
Click on business process instance name to see it properties.
Besides main information (business process name, version, start date, number) you can see active tasks executors, swimlanes with values, variables with values and process graph.
It's also possible to terminate business process instance execution by pressing "Stop" button if current user has permissions for this action.
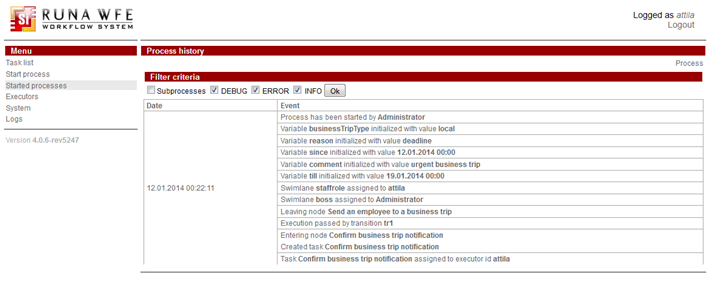
By clicking "History" in the upper right corner of the page you can see this process instance execution history:
Sorting, Grouping, and Filtering Business Process Instances
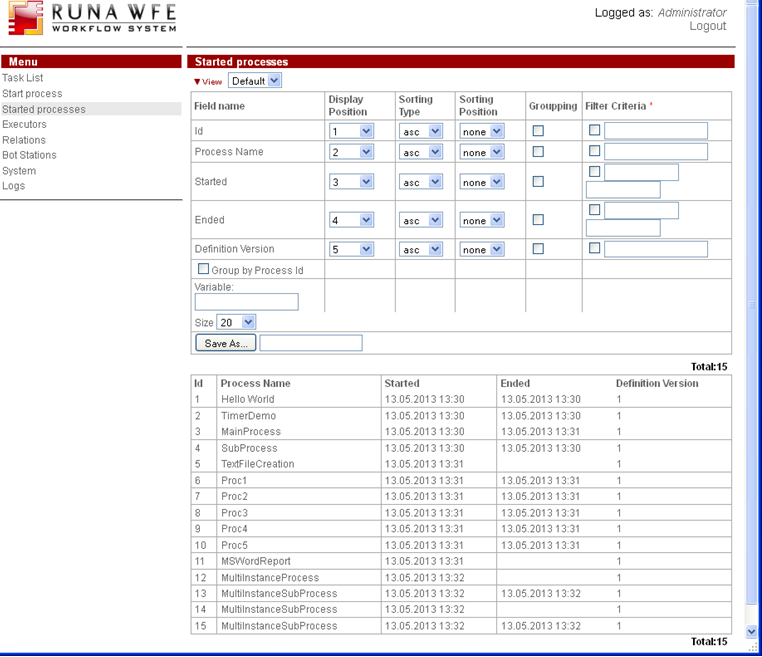
By clicking on the red triangular or the "View" link on the upper part of the form a subform with sorting, grouping and filtering settings will appear. (If you click on the triangular or "View" link again the subform will be hidden.)
There is a slight difference between this subform and its counterpart for the tasks. Process instances can be grouped by the following fields: "Number", "Name", "Started", "Ended", "Version". They can also be grouped by variable, but the main difference is grouping by subprocesses.
In the above example there are several instances with subprocesses:
- MainProcess->SubProcess (id 3, 4)
- Proc1->Proc2->Proc3->Proc4->Proc5 (id 6, 7, 8, 9, 10)
- MultiInstanceProcess-> MultiInstanceSubProcess, MultiInstanceSubProcess, MultiInstanceSubProcess (id 12, 13, 14, 15)
Let's perform grouping by subprocesses.
Let's check the group by subprocesses option, type in the name of new profile ("sub" for example) to the textfield to the right of the "Save as" button, then click this button. The saved profile name will be available in the profiles list near the "View" link. When you choose a profile the view of the list will change according to the profile settings.
Let's see what we've got:
There's a new column near the main processes (id 3,6,12) with plus signs. This is the grouping by subprocesses. When plus is clicked the group is opened to show the subprocesses tree under the main process name (the read permissions are followed):
Each subprocess is placed in its own group in the hierarchy order, that means that the indent size corresponds to the level in hierarchy. If user has no rights to read process the process won't be shown for him/her.
Subprocesses lines differs in color from main processes lines.
The "Total" field indicates the total number of the main processes without counting subprocesses.
Subprocess grouping can be combined with other groupings by fields and variables as well as with sorting and filtering but it will be applied only to main processes (subprocess are ignored).
Executors
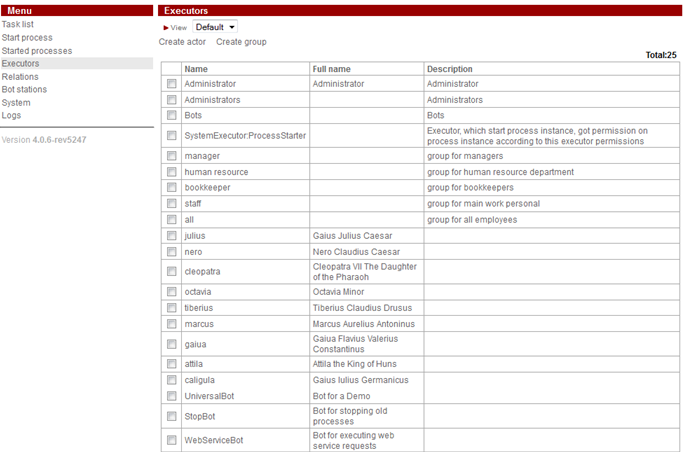
The page of the “Executors” menu item contains a list of potential task executors (actors or groups of actors), accessible to the logged in user for reading.
Clicking an executor will open a page of executor properties.
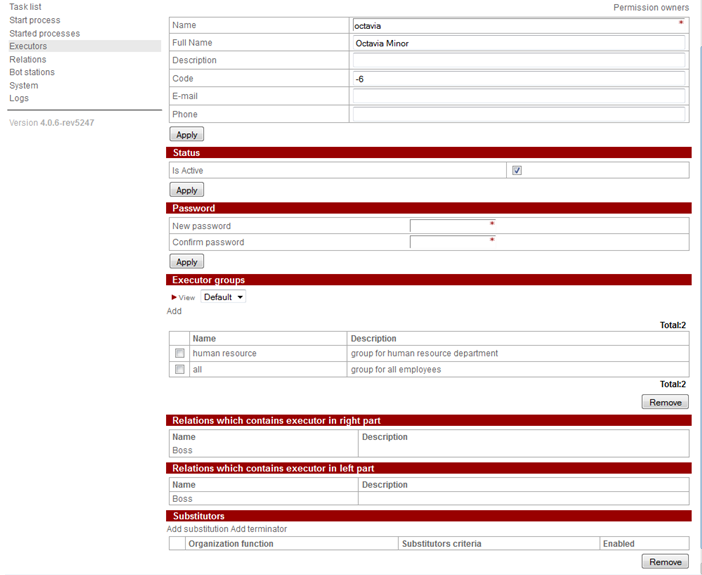
If it's a user then this page contains:
- Executor properties with user information
- A status that is checked if user is active
- A field for changing password
- Executor groups that this user belongs to
- Relations that this user takes part in
- Substitutors. Here you can see a list of substitution rules
It's also possible to view the permission owners for this user by clicking on "Permission owners" link in the right upper corner of the page.
Notes.
- User can see only those parts of this page which s/he is authorized to see.
- If status "Is active" is not checked then the substitution rules become activated for the user and his/her tasks are sent to substitutors. See more details Executors substitution
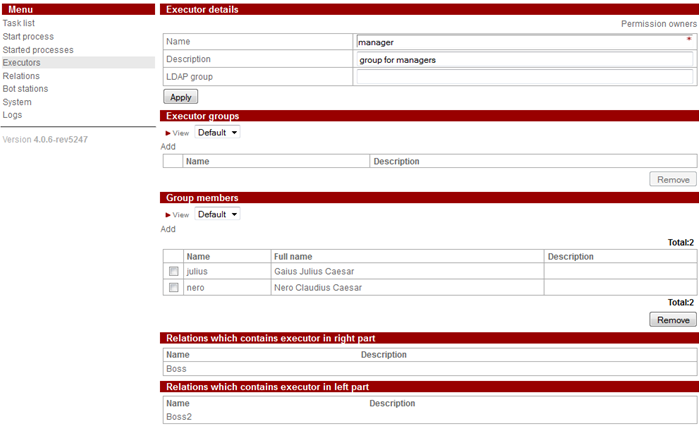
If it's group page contains group information, permission owners link, a list of groups that belong to this group and a list of groups to which this group belongs to:
Executor Sorting, Grouping, and Filtering
The settings are similar to "View" settings for tasks.
Relations
This page allows to control relations in RunaWFE. The table of relations contains their names and descriptions.
Click on "Create relation" link to open the page for a new relation creation. Type in relation name and description here.
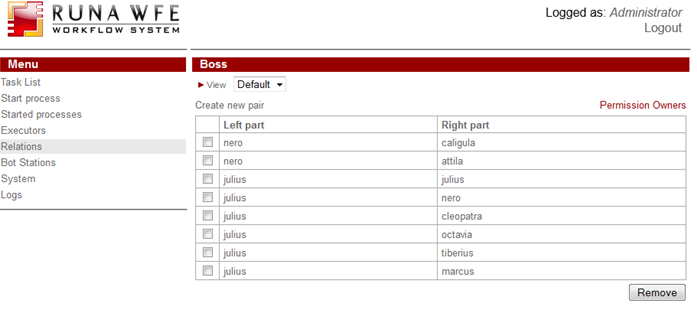
Click on the relation name or description to get to the page of relation properties. Here user can manage the relation sets of executors. A new pair can be added, or an existing one edited\deleted.
See a more detailed relations guide here Also you can find there how to use relations for swimlane initialization.
System
On the system page there's a link to system permission owners setting, substitution criteria and administrative scripts, also "Export and import of data file". Permission owners settings are handled by administrator.
Also on this page there's a list of errors that currently occur during processes execution and in bots configurations.
Work with Tasks
In a workflow system the activities of an enterprise are represented as a set of business processes. A business process is a time-ordered set of tasks, executed both by people and corporate information systems and aimed at achieving a predefined business goal within a predefined time period.
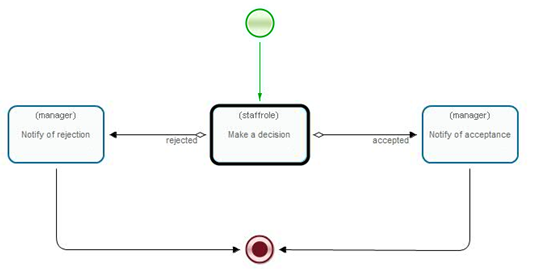
A business process can be represented as a mathematical graph – a set of nodes, called “Activities” and “route nodes” that are interconnected by possible transitions. The token moves along these transition lines. When the token is transferred to a particular Activity, a task is sent to the corresponding executor.
An example of business process "Overtime work" graph. You can see it by clicking on "Started processes" in menu and selecting this process from the list:
Here the token (execution flow) goes to the "make a decision" state. A corresponding node on graph is highlighted by the bold frame. When business process enters this state the executor "staffrole" receives a new task in the task list.
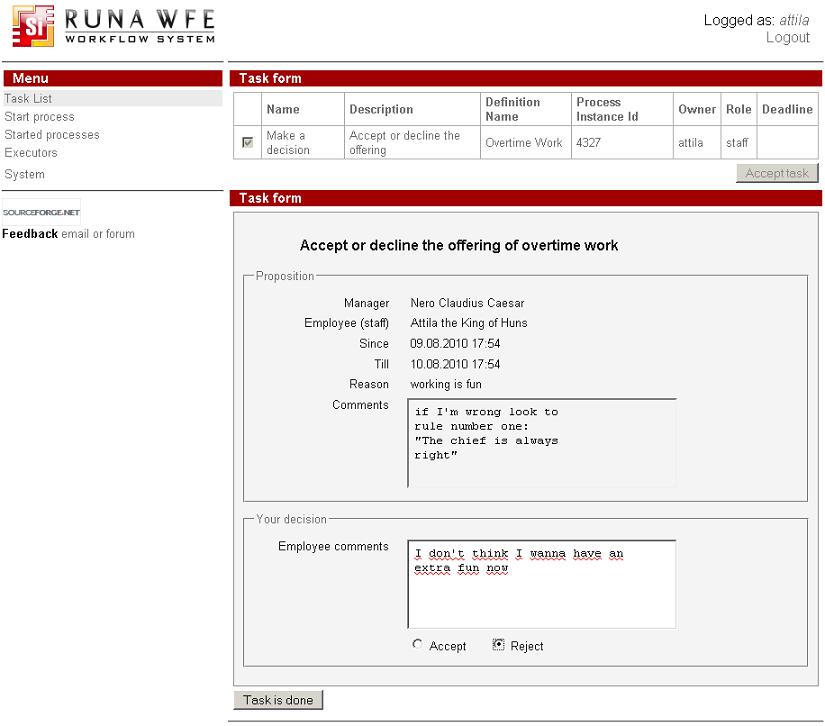
A click on the task will display a form for this task. Once the task has been performed, the employee must fill in the data entry fields of the form and click “Task is done”:
Once the task has been executed, the token moves to the next Activity of the business process.
If a task can be performed by a group of actors, it will appear in the task list of every group member. However, only one actor will actually be able to perform the task – the one who will be the first to do it.
# Add Substitutions
If current task executor is not active (is sick or in a business trip) it's possible to pass his/her tasks to other executors. Substitution mechanism is used for it. See more details Executors Substitution
Action Confirmation in RunaWFE
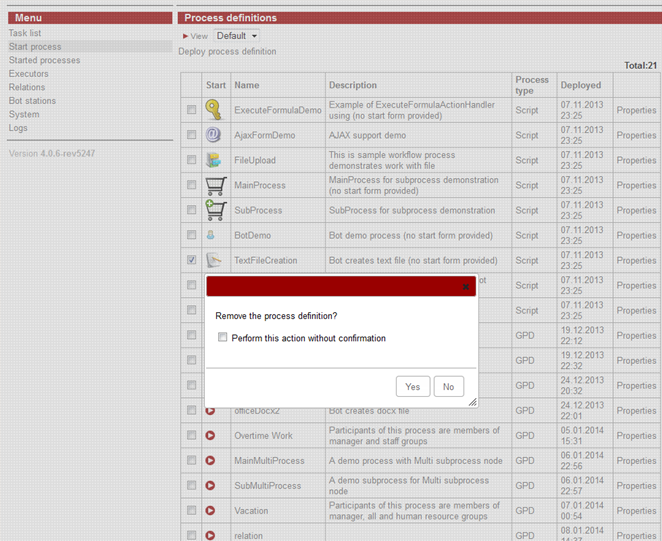
There is an action confirmation routine in RunaWFE. For example, user marked a process on the "Start process" page, then clicked "Remove" button.
Before the actual removal takes place, user receives a notification dialog with a request to confirm removal. User can confirm or cancel the action. Such confirmations might be placed on all removals, including removing users from groups, import and export of business process, process instance stop and start, task execution, accepting task for execution. You can stop receiving such confirmation by marking the checkbox "Perform this action without confirmation" on the confirmation dialog. For detailed tuning of action confirmation address your RunaWFE administrator.
