Difference between revisions of "Tutorial"
doc>WikiSysop m |
m (1 revision imported) |
(No difference)
| |
Revision as of 06:37, 23 November 2020
Tutorial
RunaWFE Free Workflow System (BPMS) Version 4.5.0
© 2003 - 2015, Consulting Group Runa
© 2015 - 2026, "Process Technologies" Ltd, this document is available under GNU FDL license. RunaWFE Free is an open source system distributed under a LGPL license (http://www.gnu.org/licenses/lgpl.html).
# Quick Start
Windows OS
- Download Windows RunaWFE-Installer and run it (more details)
Linux/Mac OS:
- Download RunaWFE Free Server (required java jdk). Unzip RunaWFE Free Server archive,run bin/standalone.sh
- Download Developer Studio for Linux / Download Developer Studio for Mac OS. Unzip DS archive, run runa-gpd
More detailed information: download, installation guide
# Creating "Overtime Work" demo process
The process scenario
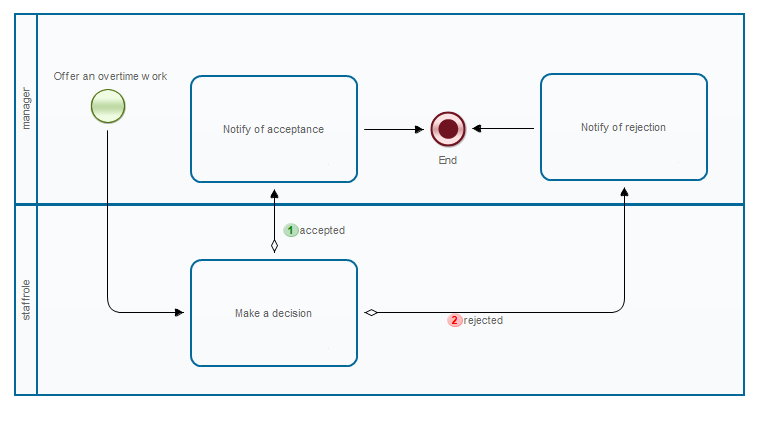
Manager offers an over time work to employee. Employee accepts or rejects the offer. Then manager receives the corresponding notification. It is supposed that all managers are members of group “manager” and all employees are members of group “staff”.
Graph creation
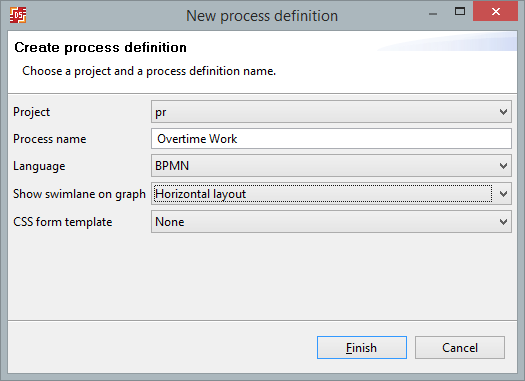
Create a new project. Open context menu by right clicking on project, then click on New Process command. Enter “Overtime Work” as the process name. This demo process was developed on BPMN. Choose bpmn language, show swimlane on graph - horizontal layout (the feature of swimlanes shown on business process graph)
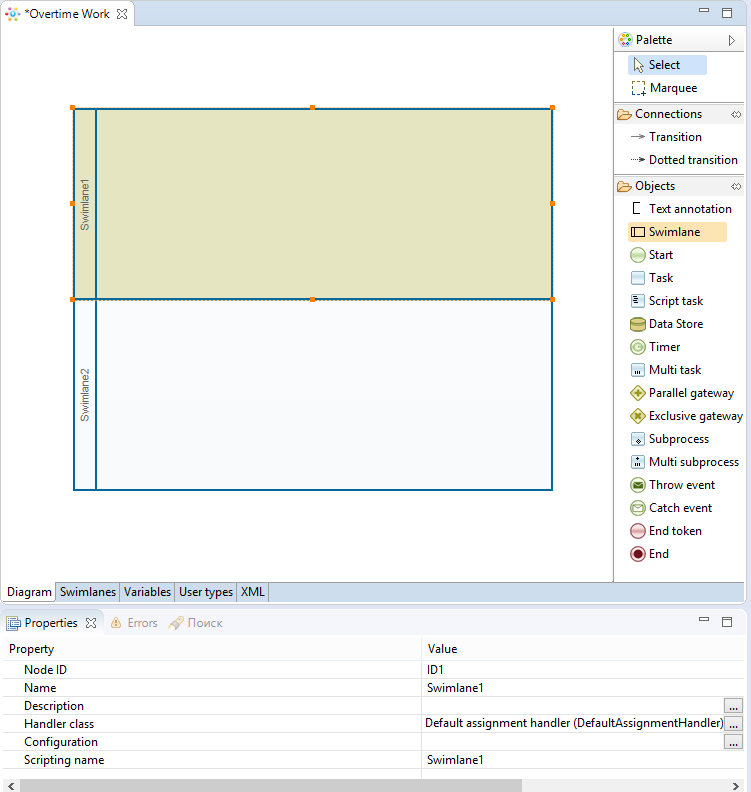
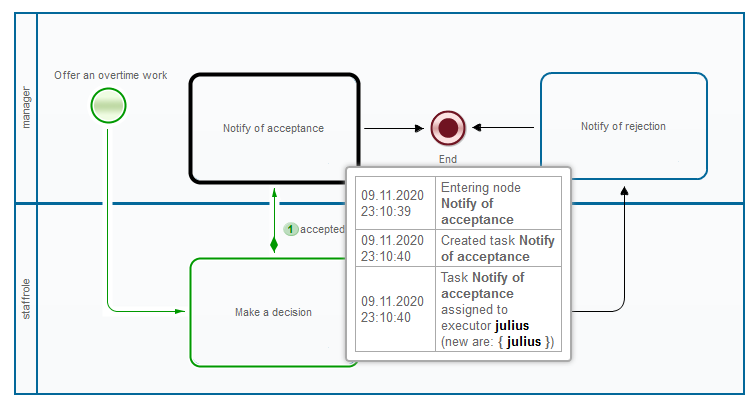
Business process “Overtime Work” has two swimlanes:
- manager
- staffrole
| Swimlane description: |
| Swimlane | Description |
| manager | Manager who starts the process |
| staffrole | The employee who is selected by manager in the start form and who is asked to work overtime. |
Add two elements "Swimlane" to the process diagram window.
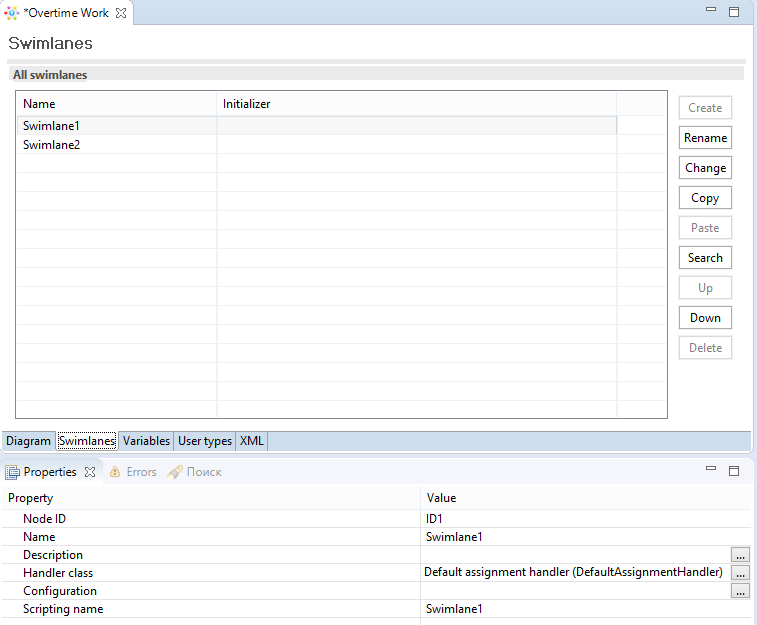
Click on "Swimlanes" tab.
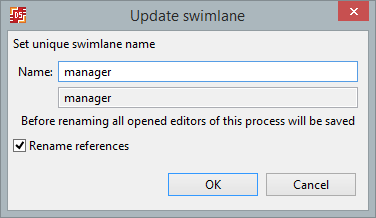
In the opened page select "Swimlane 1" and press "Rename" button. Set new name «manager» and press «ОК». This swimlane is used in the start node and the swimlane will be initialized with the user who starts the process. So there is no need to specify the initializer.
Similarly rename Swimlane2 to «staffrole».
By clicking at palette elements and process diagram window create the following graph for business process.
| Correspondence between business process nodes and swimlanes |
| Node | Swimlane |
| Offer an overtime work | manager |
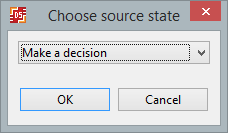
| Make a decision | staffrole |
| Notify of rejection | manager |
| Notify of acceptance | manager |
To change an element name, select an element by clicking on it, then set new name in its properties.
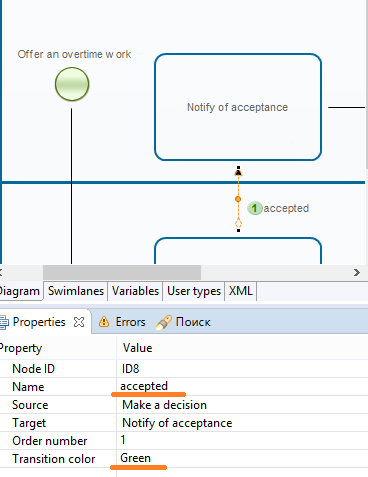
For transitions from the choice state "Make a decision" enter their explicit names "accepted" and "rejected" in their properties. Also select transition color.
Save process (Ctrl+s).
Creating variables
| The following variables are used in the Overtime Work process: |
| Variable | Type | Description |
| since | DateTime | DateTime when overtime work starts |
| till | DateTime | DateTime when overtime work ends |
| reason | String | Reason |
| comment | Text | Comment |
| staff_person_comment | Text | Employee comment |
Variables
- since
- till
- reason
- comment
are initialized in StartState “Offer an overtime work”.
Variables
- staff_person_comment
are initialized in State “Make a decision”
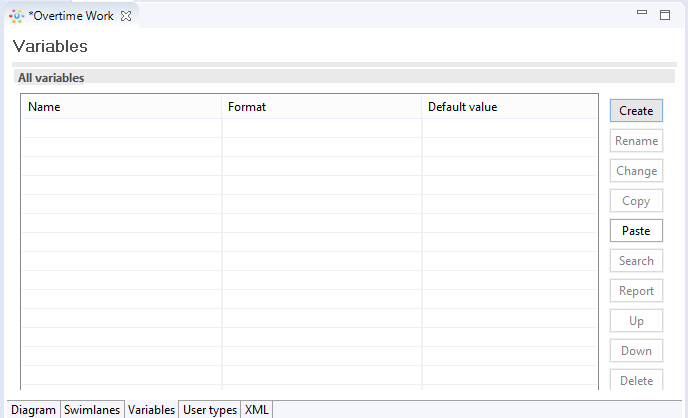
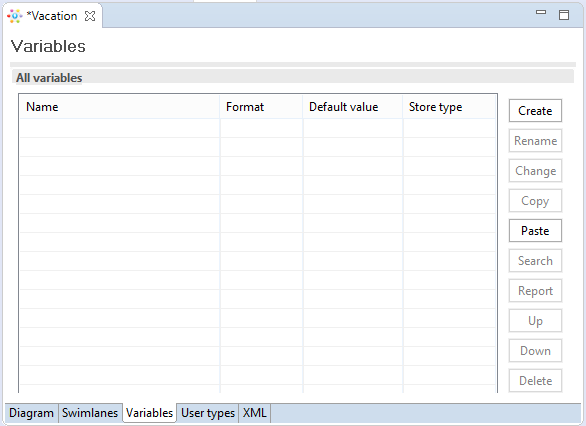
Click on “Variables” tab. Click “Create” button.
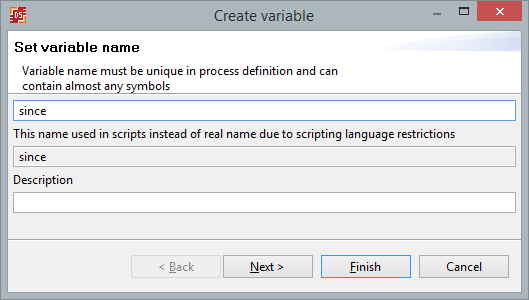
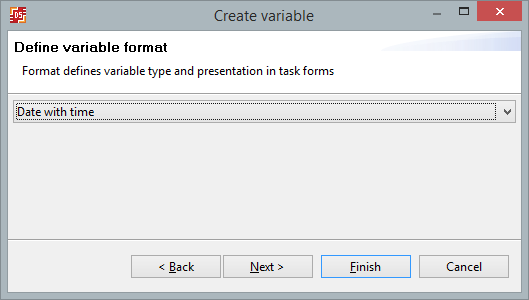
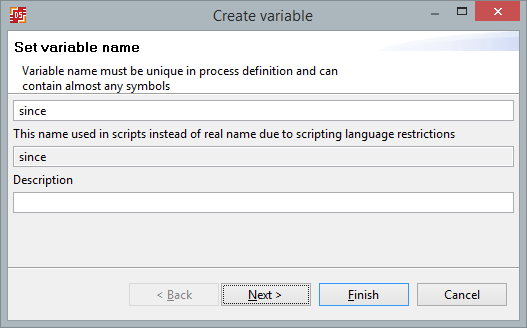
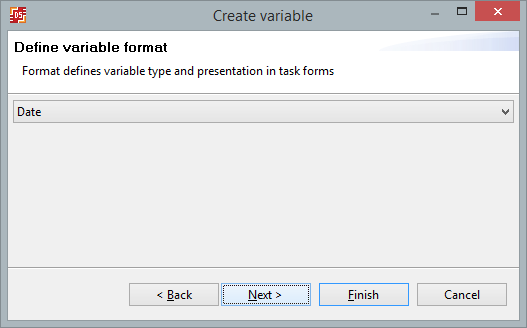
Type in the variable name "since" and click NEXT, then choose date with time as variable format and click "Finish".
Similarly create all the others variables of the business process.
Graphical forms creation
Forms components are used to present specific control elements and to present business process variables values in forms. In "Overtime Work" forms with components are used.
| Tags used in "Overtime Work": |
| Freemarker tag | Description |
|---|---|
| Selection from group, GroupMembers | Shows the list of group members. Group name can be specified via variable or by value. Also a swimlane that will be initialized with the selected group member ID must be set. In "Overtime Work" “staff” group is used, it is set by value. The selected group member is used to initialize “staffrole” swimlane. |
| Variable input, InputVariable | A field is created to input variable value according to its type |
| Variable output, DisplayVariable | Output the variable value in read only mode. |
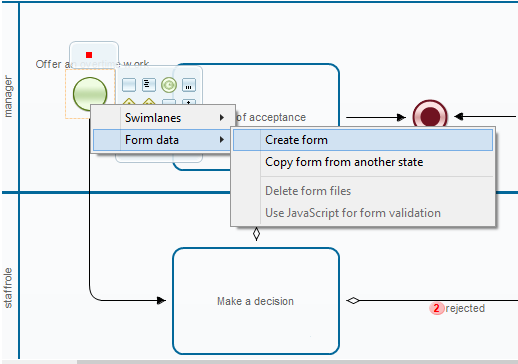
Click on “Offer an overtime work” state, then choose “Form data/Create form”.
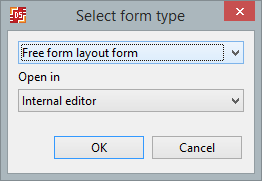
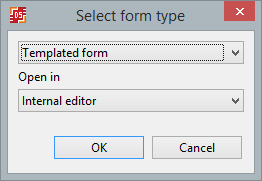
Select form type - "Free form layout form"
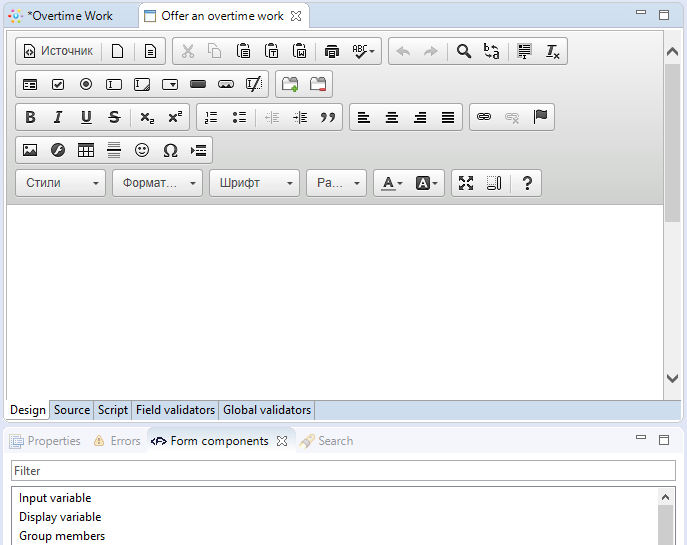
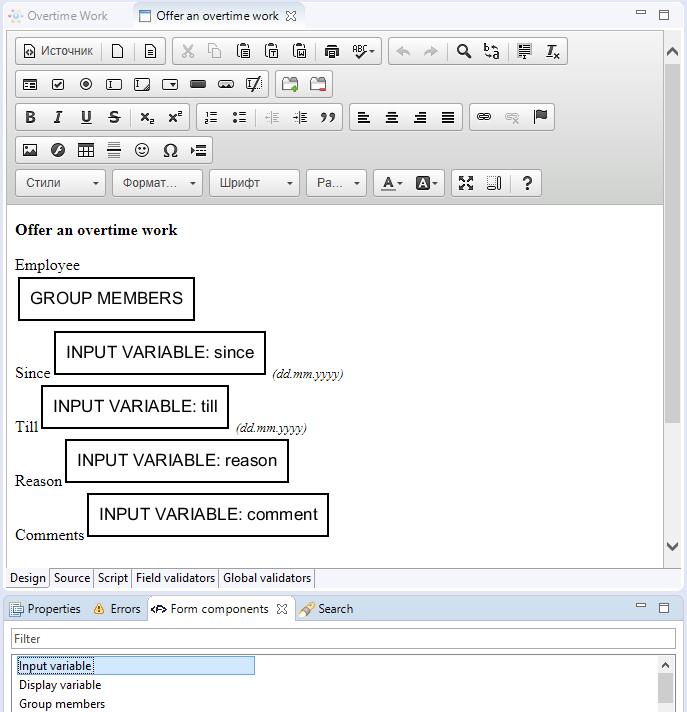
After choosing create (or edit) form option the graphical form design tab will open:
Drag components "Input variable", "Display variable" and "Group members" from the "Form Components" tab onto design window.
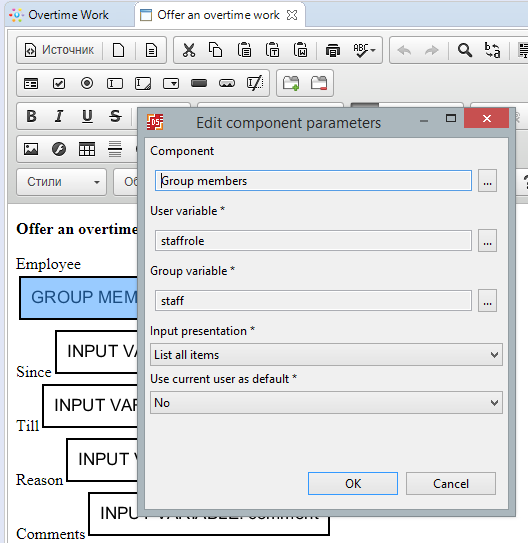
Double click on "Group members" component, select "staffrole" as "User variable" and type in value "staff" in the "Group variable" field.
Use "InputVariable" component to create input elements for the other business process variables:
- since
- till
- reason
- comment
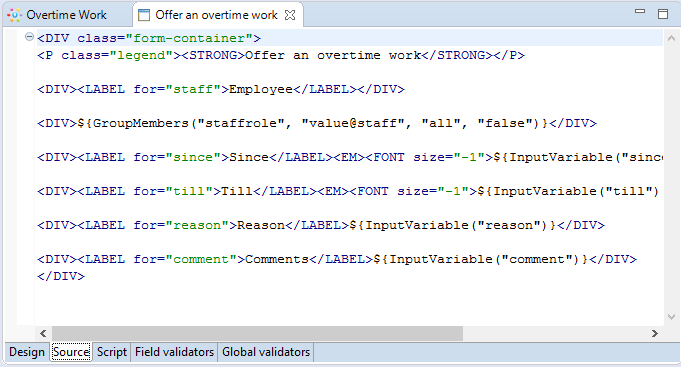
If you open "Source" tab you can see html code of the page
Create templated form for other action-nodes.
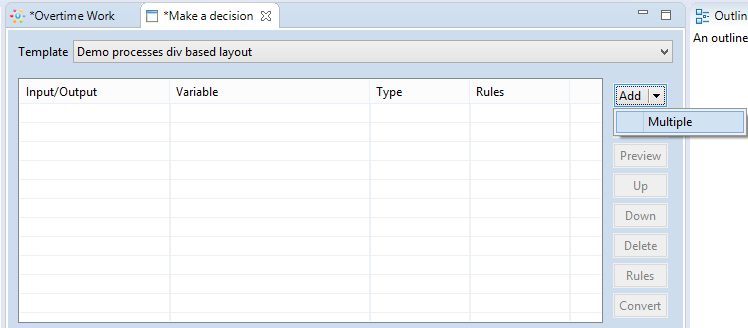
Click on “Make a decision” state, then choose “Form data/Create form”. Select form type - "Templated form"
Press "Add->Multiple"
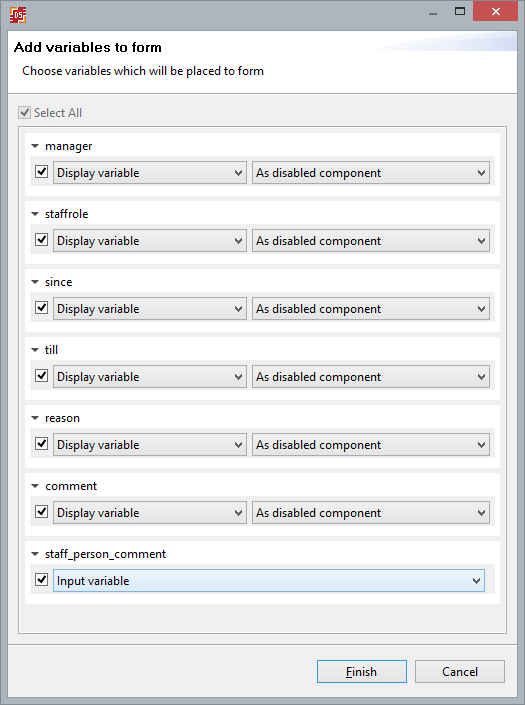
Choose variables which will be placed to form
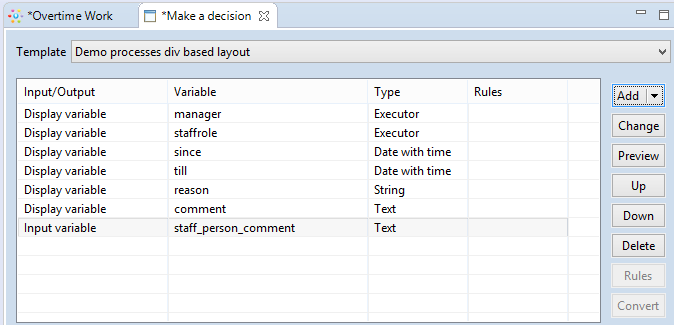
Display variable for "manager", "staffrole", "since", "till", "reason", "comment". And input variable for "staff_person_comment"
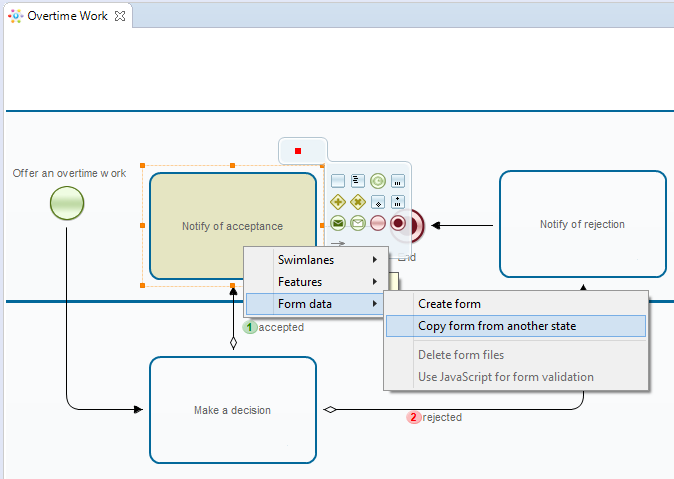
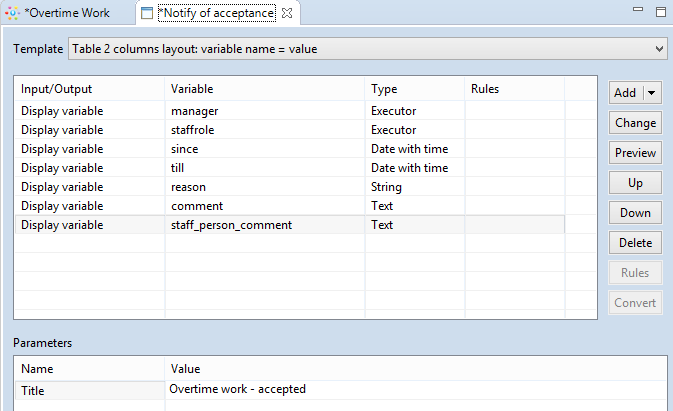
Copy templated forms for action-node "Notify of acceptance" from node "Make a decision".
- choose template "Table 2 columns layout: variable name = value",
- change "Dispay variable" for "staff_person_comment"
- set value "Overtime work - accepted" for "Title" parametr
- save fom and process
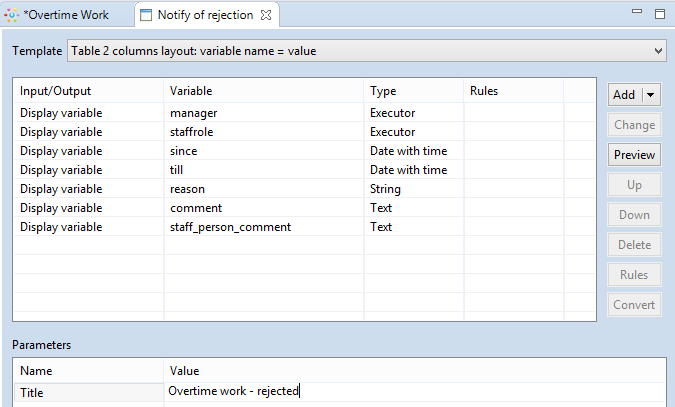
Copy templated forms for action-node "Notify of rejection" from node "Notify of acceptance"
- set value "Overtime work - rejected" for "Title" parametr
- save fom and process
Export process definition
The RunawWFE Server (simulator) must be running
Export process:
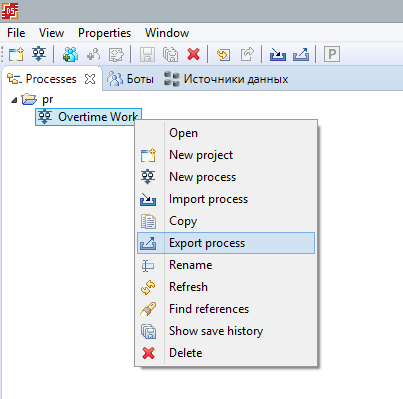
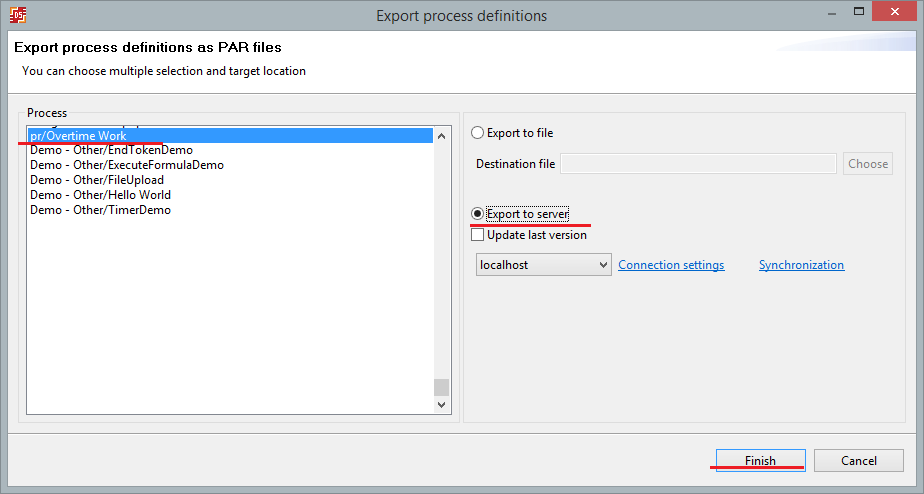
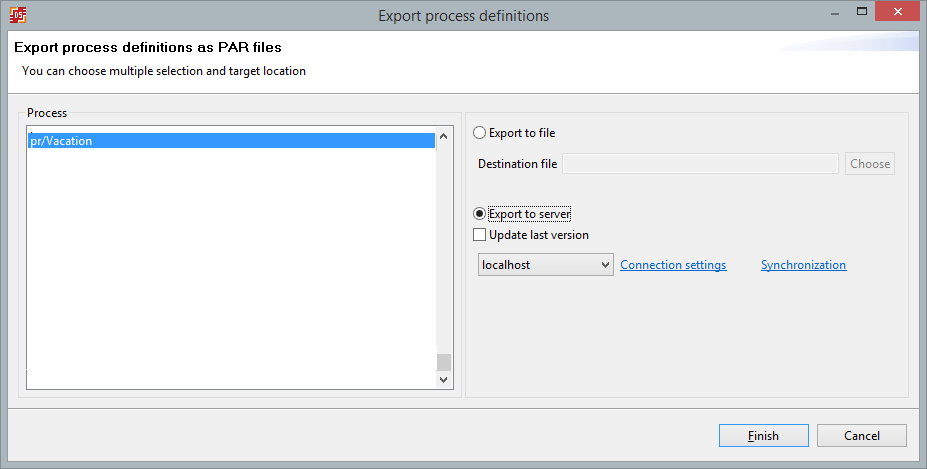
Click on process, choose "Export to server" and press "Finish"
Process execution
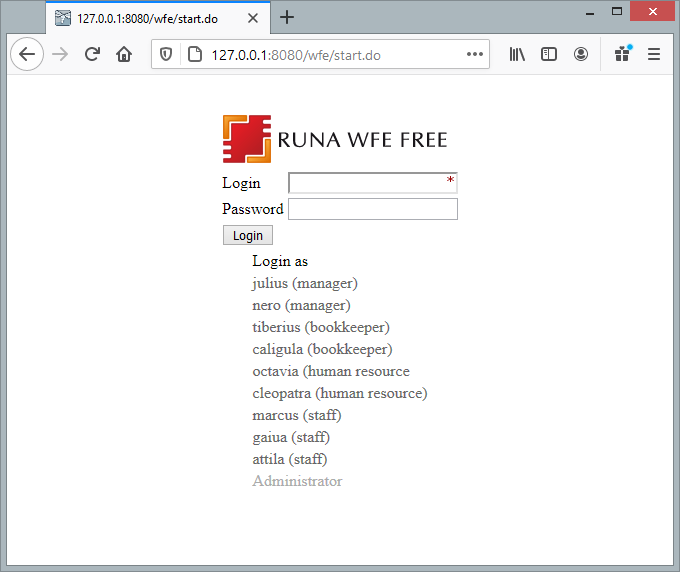
After starting the server (simulator), its graphical interface is available at http://localhost:8080/wfe
A web-browser, opened at the above address, should display a page to enter user login and password. (Administrator login is «Administrator» (case sensitive) and password is «wf»).
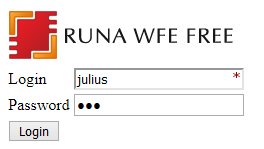
Log in as a user from the group of managers - "julius" or "nero" (password is «123»).
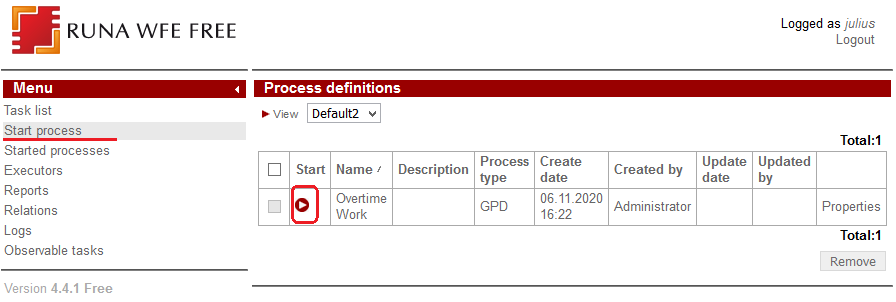
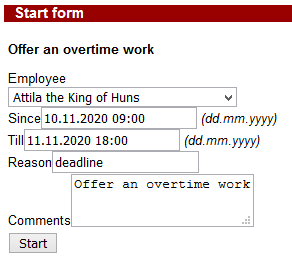
Start business process "Overtime Work"
Select an employee - "attila", choose dates and enter the reason for overtime.
Then click "Start" button.
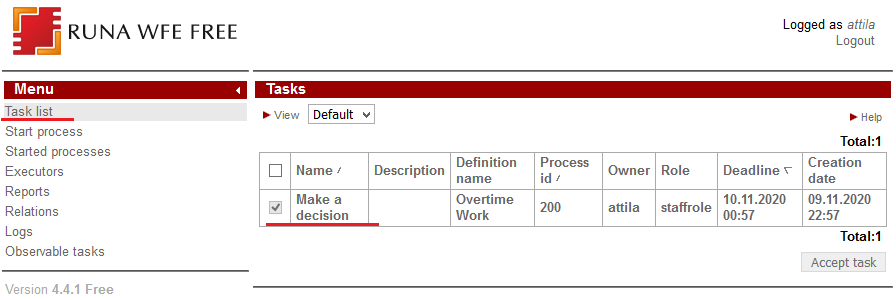
Log in as "attila" and open his task list. The page of the “Task List” menu item contains a list of tasks for the user.
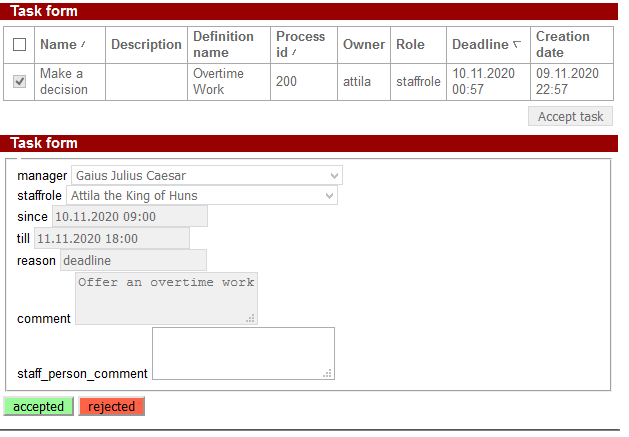
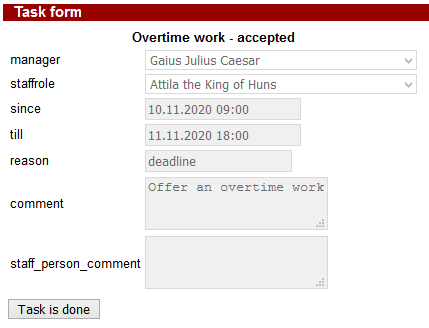
When user clicks on the name of the task the corresponding form appears:
Make a decision, choose accept or reject button. Manager Julius will be notified of your decision.
Log in as "julius" and open task "Notify of ..."
Complete the task by clicking the "Task is done" button.
Repeat the business process under other users.
# Creating "Vacation" demo process
The process scenario
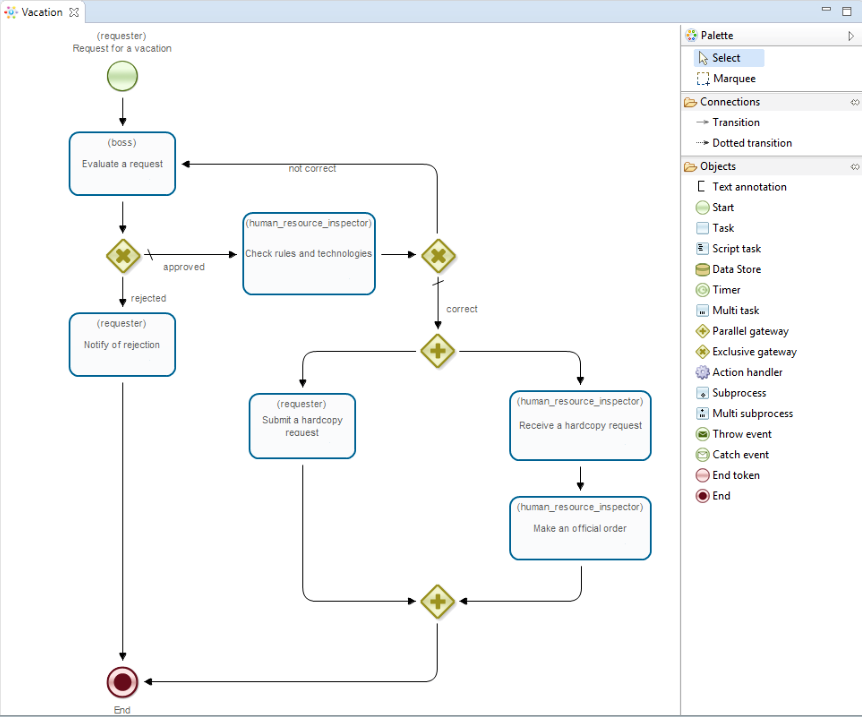
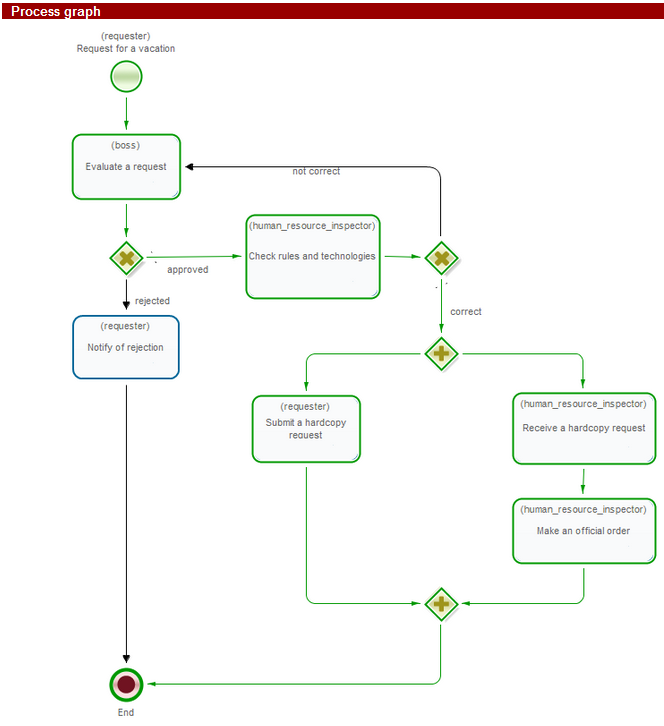
An employee submits a request for a vacation. The employee's boss approves or rejects the request. If the request is rejected the employee receives a notification. If the request is approved, then a request to the human resource department is formed and a human resource inspector makes a check if all the rules and technologies are followed correctly. If the human resource inspector doesn't approve the request it returns to the employee's boss, else if all the rules and technologies are followed correctly the business process passes to forming a hard copy request for a vacation and to signing the official order. The employee receives a task to "submit a hard copy request" to the HR department and simultaneously the HR inspector gets a task to "receive a hard copy request". After performing this task the HR inspector receives task to "make an official order". When all these tasks are performed the business process ends.
Graph creation
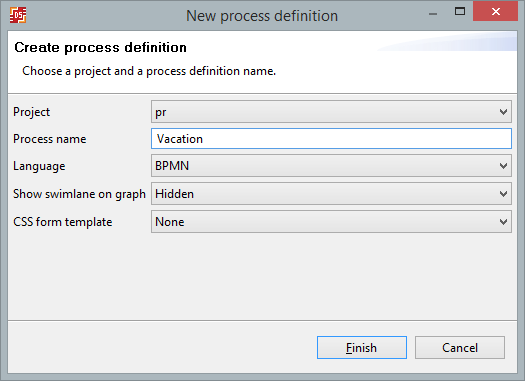
Create a new project, then right click on it and select "new process" command. Type "Vacation" as the new process name. Choose BPMN language, show swimlane on graph - hidden.
Make a double click on the "Vacation" process in the project process list opening the business process diagram tab. Selecting and applying the palette elements draw the following diagram of the business process:
Use the following elements: exclusive gateways, tasks, parallel gateways, start and end, transitions.
To change element name, in case they differ from default, make a click on the element change the name in element properties. For the transitions that come out of the exclusive gateways assign names «approved»/«rejected» and «not correct»/«correct» by clicking on them and changing their names in property tab in the bottom of the screen.
Swimlanes creation
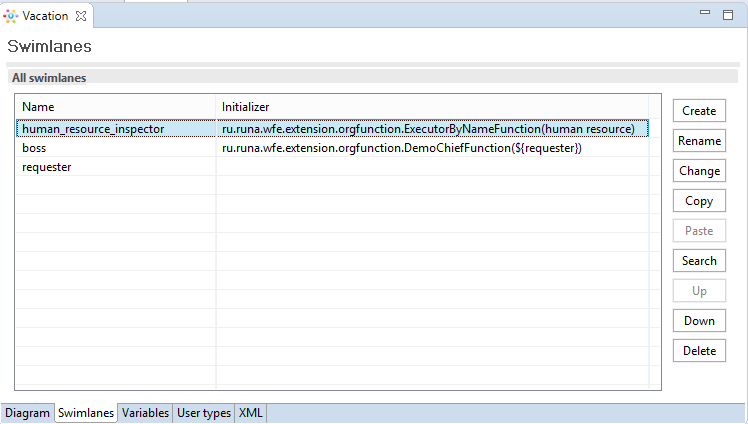
In this business process there are 3 swimlanes:
- requester
- boss
- human resource inspector
| Swimlane's description: |
| Swimlane | Description |
| requester | An employee who submits a vacation request |
| boss | A boss of the employee who started the business process |
| human resource inspector | One of the employees of the HR department (human resource group), who executes the check of the rules and technologies for the request and prepares and sees that the official order is signed. |
| Swimlanes and activity nodes relation: |
| Node | Swimlane |
| Request for a vacation | requester |
| Evaluate a request | boss |
| Notify of rejection | requester |
| Check rules and technologies | human resource inspector |
| Submit a hardcopy request | requester |
| Receive a hardcopy request | human resource inspector |
| Make an official order | human resource inspector |
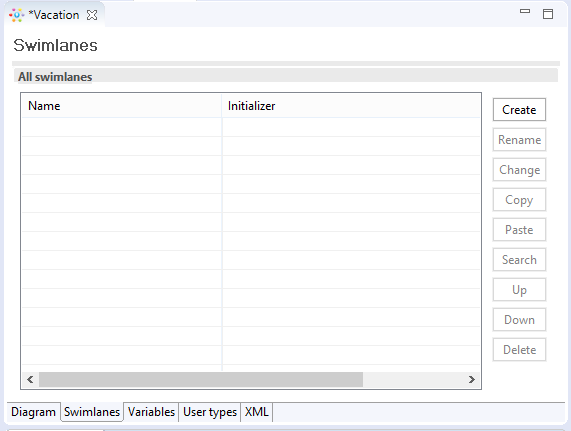
Click on the Swimlane tab.
On the appeared page click on the "Create" button.
Type in swimlane name "requester" and click "OK". This swimlane is used in the start state so there´s no need to specify initializer, it is initialized by the user who starts the process.
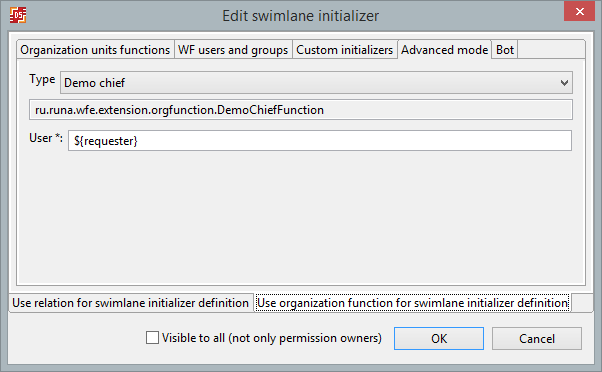
Add "boss" swimlane, specify initializer DemoChiefFunction with "requester" as parameter.
ru.runa.wfe.extension.orgfunction.DemoChiefFunction – “Boss(demo)”, returns the immediate boss of the user defined in demo.chief.properties
demo.chief.properties
...
^tiberius$=julius
^marcus$=julius
^gaiua$=nero
^attila$=nero
^caligula$=nero
...
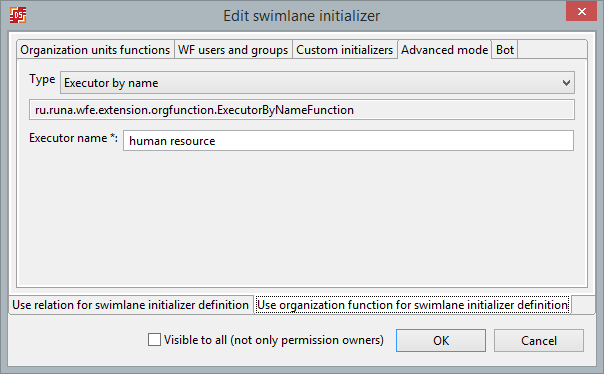
Similarly create "human_resource_inspector" swimlane. Use ExecutorByNameFunction initializer function with group "human resource" as parameter.
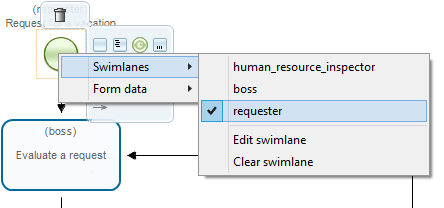
Open "Diagram" tab again, select the start state “Request for a vacation”, in its properties click on right part of the Swimlane\Value property and in the presented list select "requester".
Similarly set swimlanes to the other states.
Variables creation
| There are the following variables in the process: |
| Variable | Type | Description |
| since | Date | Date of the vacation start |
| till | Date | Date of the vacation end |
| reason | String | Reason |
| comment | Text | Comment |
| boss_comment | Text | boss comment |
| bossDecision | Boolean | boss decision |
| human_resource_inspector_comment | Text | Human resource inspector comment |
| humanResourceInspectorCheckResult | Boolean | The result of HR inspector check |
| official_order_number | String | Order number |
| official_order_date | Date | The order date |
Variables
- since
- till
- reason
- comment
must be initialized in the start node “Request for a vacation”.
Variables
- boss_comment
- bossDecision
must be initialized in the “Evaluate a request” activity node.
Variables
- human_resource_inspector_comment
- humanResourceInspectorCheckResult
must be initialized in “Check rules and technologies” activity node.
Variables
- official_order_number
- official_order_date
must be initialized in “Make an official order” activity node.
Click on "Variables" tab. Click on "Create"
Type the variable name "since", then choose Date as format.
Similarly create all the rest of the business process variables.
Creating a condition for the Exclusive gateway
There are two Exclusive gateways in this process: “Is approved?” and “Is correct?” that we need to provide conditions for.
“Is approved?” gateway:
If the bossDecision variable value equals to "true", the control is passed to «Check rules and technologies» activity node. Otherwise the control is passed to «Notify of rejection» activity node.
“Is correct?” gateway: If the humanResourceInspectorCheckResult variable value equals to "true", the control is passed to the Parallel gateway (a split to simultaneous tasks “Submit a hardcopy request” and “Receive a hardcopy request”). Otherwise the control is passed to «Evaluate a request» activity node.
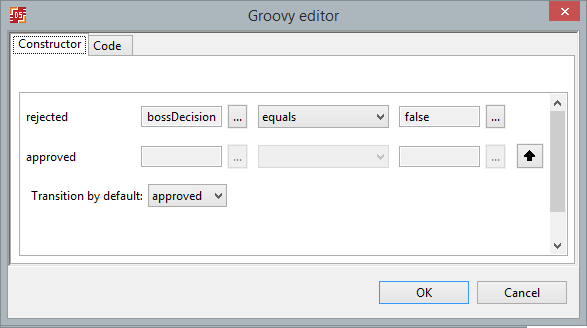
Choose "Diagram" tab, click on the «Is approved?» exlusive gateway, right-click on it to select "Edit configuration" menu item.
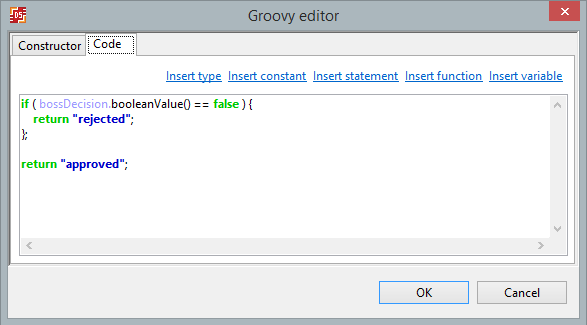
In the shown form for the "rejected" transition select variable bossDecision, select "equals" function and set the value to "false". In the default transition choose "approved":
Click «OK».
You can see the formula code on the "code" tab and it can be edited there.
Similarly the condition for “Is correct?” gateway is created.
Graphical forms creation
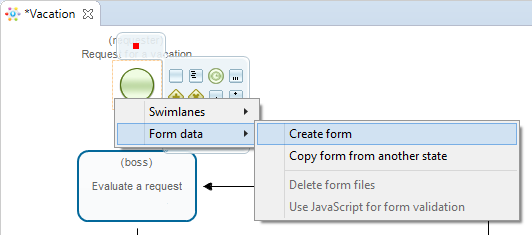
Right click on the start node «Request for a vacation» of the business-process diagram and select in the pop-up menu "Form data> Create form":
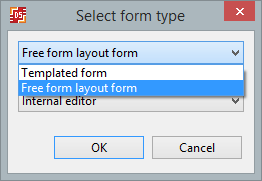
In the drop-down list select form type - "Free form layout form"
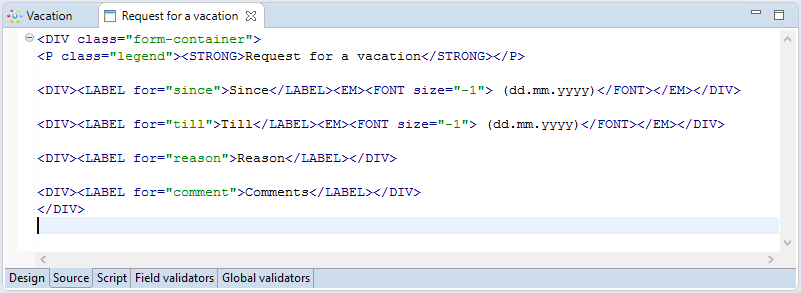
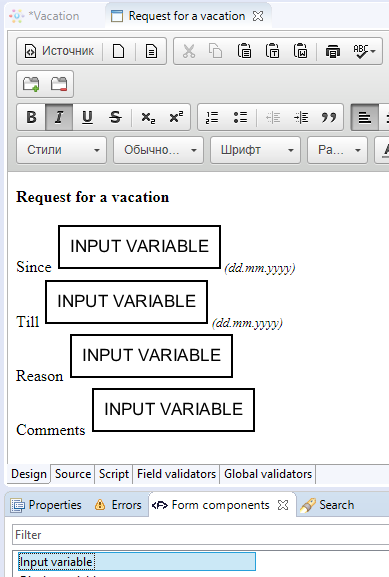
Select "Source" tab, end enter html text
Switch to design and drag four components "Input variable" from the "Form Components" tab onto form.
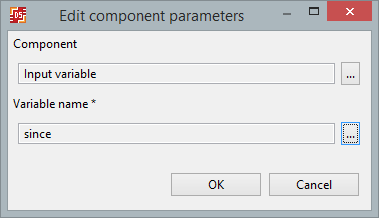
Select variable "since" in the parameters of the first component "Input variable"
Use "InputVariable" component to create input elements for the other business process variables:
- till
- reason
- comment
Save form and process.
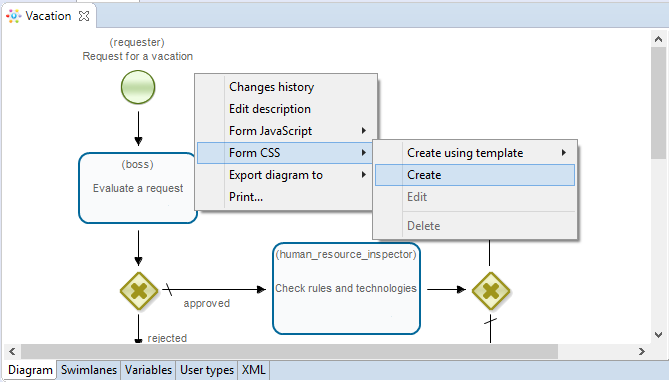
Create form CSS. Right click on empty space of the process diagram and select "Form CSS->Create"
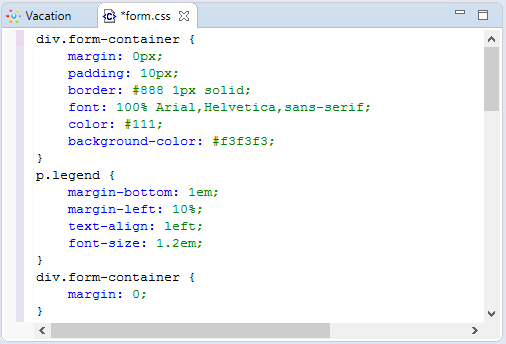
In the opened window you can edit form.css file, set styles in it:
div.form-container {
       margin: 0px;
       padding: 10px;
       border: #888 1px solid;
       font: 100% Arial,Helvetica,sans-serif;
       color: #111;
       background-color: #f3f3f3;
}
p.legend {
       margin-bottom: 1em;
       margin-left: 10%;
       text-align: left;
       font-size: 1.2em;
}
div.form-container {
       margin: 0;
}
div.form-container fieldset {
       margin: 10px 0;
       padding: 10px;
}
div.form-container legend {
       color: #666;
}
div.form-container fieldset div {
       padding: 0.25em 0;
}
div.form-container label {
       margin-right: 10px;
       padding-right: 10px;
       width: 150px;
       display: block;
       float: left;
       text-align: right;
       position: relative;
}
div.form-container label em {
       position: absolute; right: 0;
       font-size: 120%;
       font-style: normal; color: #C00;
}
div.form-container input:focus, div.form-container textarea:focus {
       background-color: #FFC;
       border-color: #FC6;
}
div.form-container input {
       width: 300px;
       padding-left: 5px;
}
div.form-container select {
       width: 300px;
}
div.form-container textarea {
       width: 300px;
       height: 100px;
       padding: 5px;
       overflow: auto;
}
.readOnlyText {
       background-color: #f3f3f3;
}
div.form-container div.controlset label, div.form-container div.controlset input {
       display: inline;
       float: none;
       width: auto;
}
div.form-container div.controlset {
       margin-left: 170px;
}
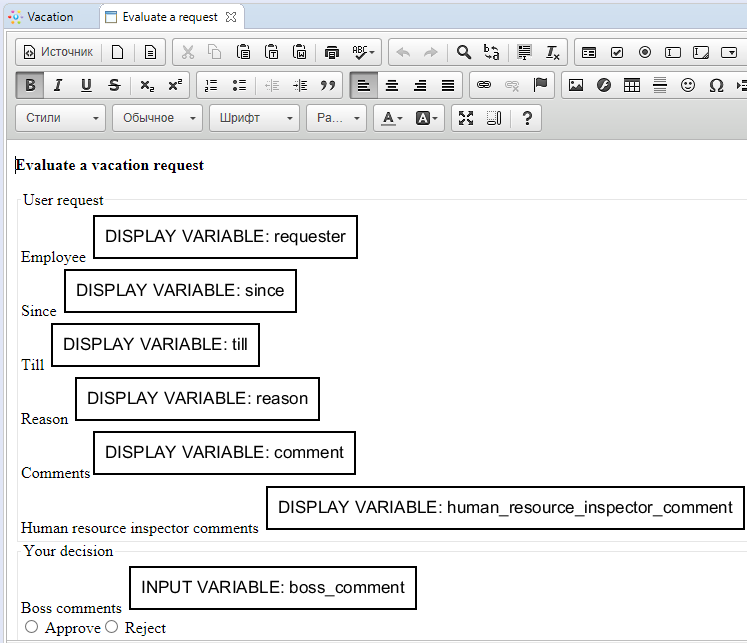
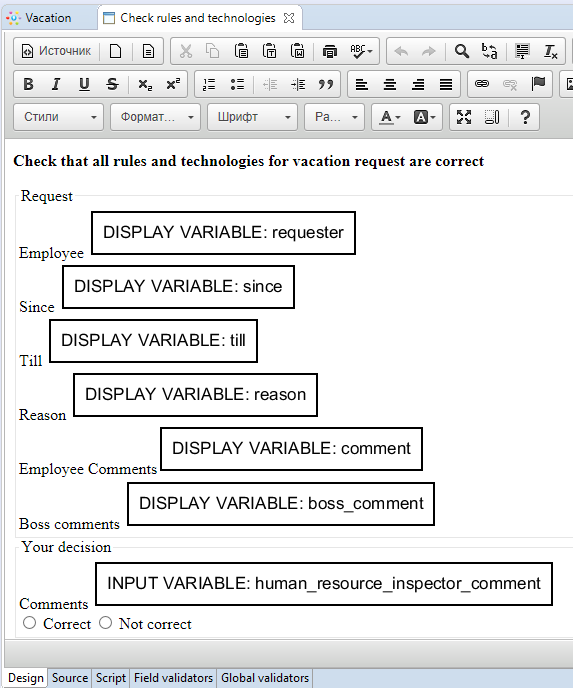
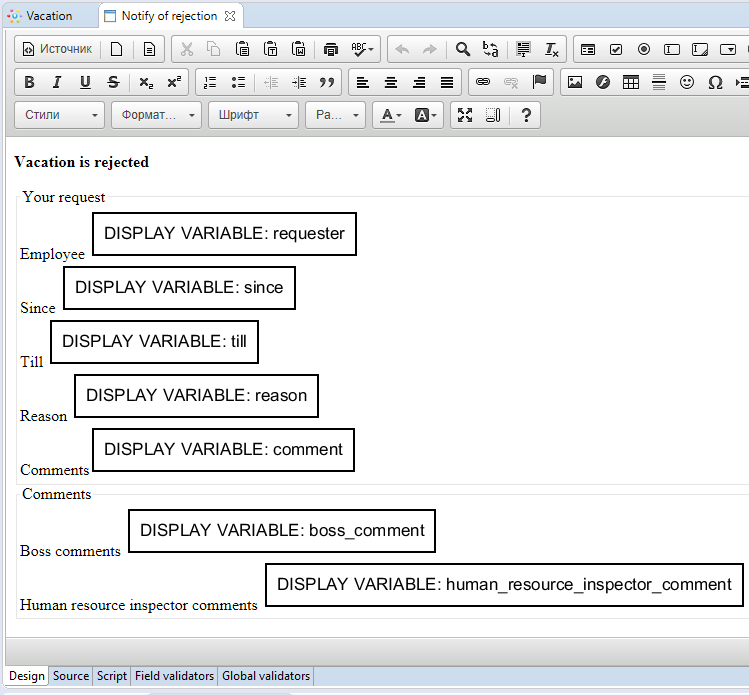
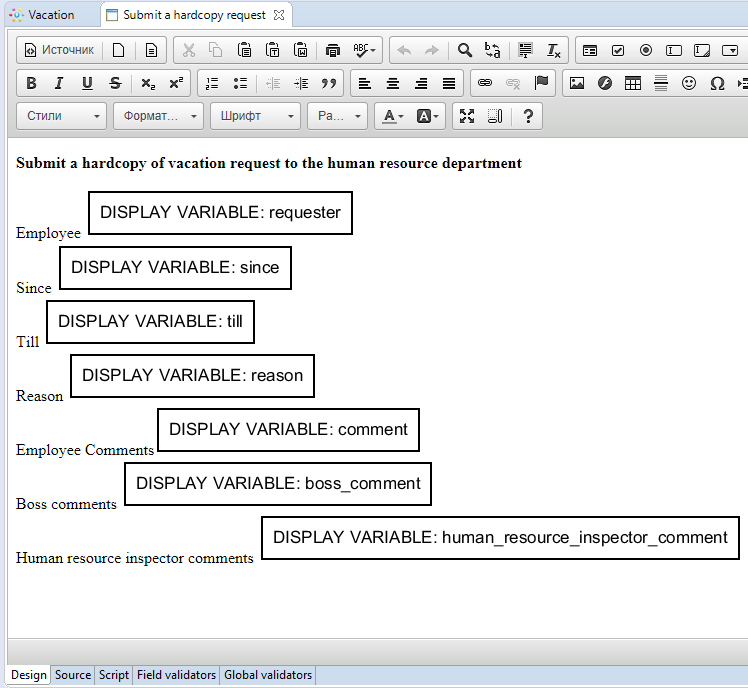
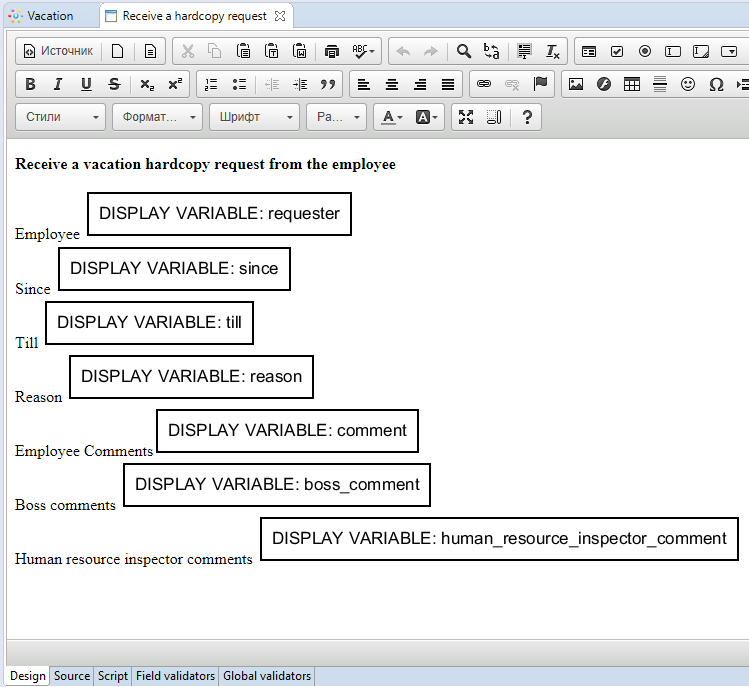
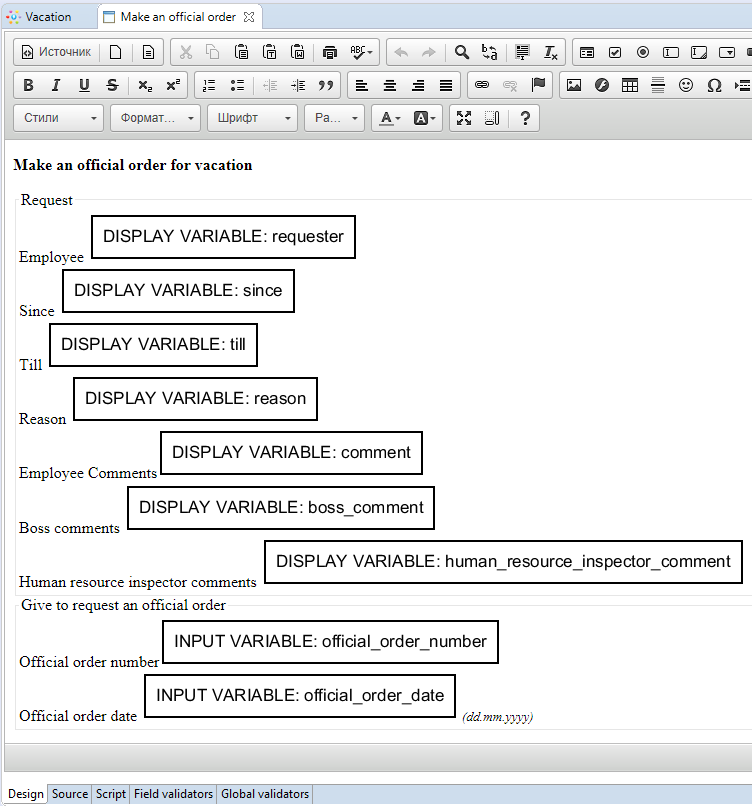
Similarly the rest forms for the other activity nodes can be created. Use copy form from another node.
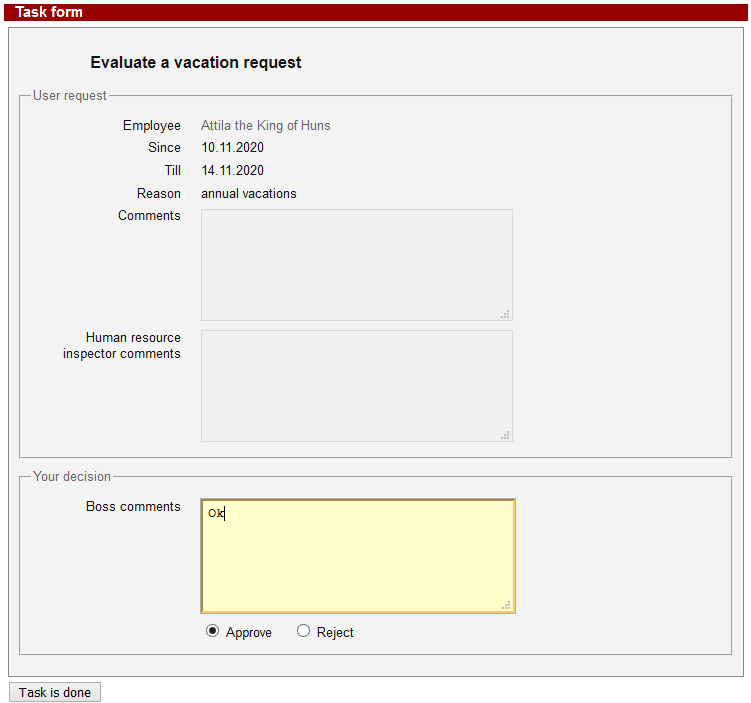
- Evaluate a request
Use the radio buttons to select either "Approve" or "Reject".
<DIV class="controlset">
  <INPUT id="bossDecisionApprove" name="bossDecision" type="radio" value="true"/> <LABEL for="bossDecisionApprove">Approve</LABEL>
  <INPUT id="bossDecisionDisapprove" name="bossDecision" type="radio" value="false"/> <LABEL for="bossDecisionDisapprove">Reject</LABEL>
</DIV>
where "bossDecision" is a variable name
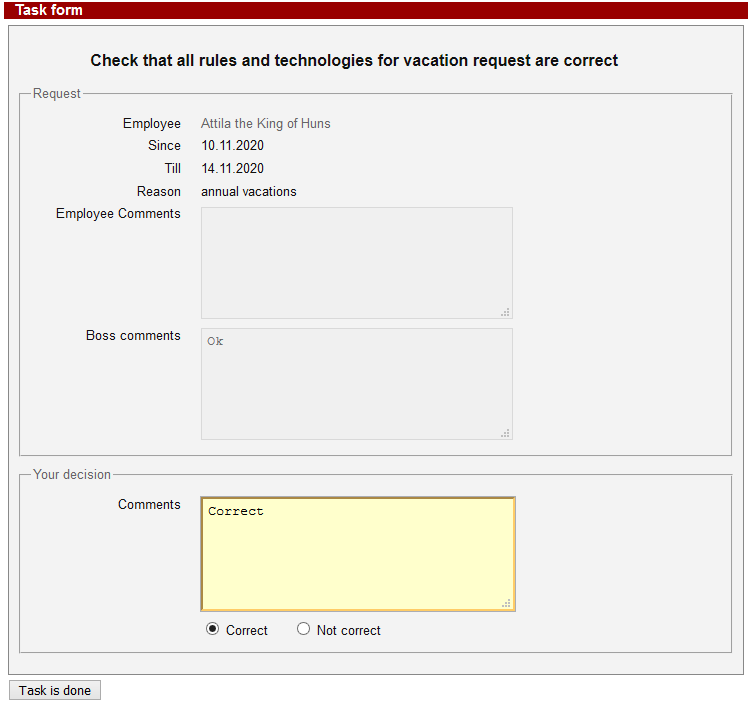
- Check rules and technologies
Use the radio buttons to select either "Correct" or "Not correct".
<DIV class="controlset">
  <INPUT id="ok" name="humanResourceInspectorCheckResult" type="radio" value="true"/> <LABEL for="ok">Correct</LABEL>
  <INPUT id="no" name="humanResourceInspectorCheckResult" type="radio" value="false"/> <LABEL for="no">Not correct</LABEL>
</DIV>
where "humanResourceInspectorCheckResult" is a variable name
- Notify of rejection
- Submit a hardcopy request
- Receive a hardcopy request
- Make an official order
Variables values validation
Form elements can be required or optional for input. There may be rules for several form elements. For instance, date-since cannot be later than date-till. There may be some limitations specific for types: for numbers it can be more or less than some number and for strings it can be the limitation of the string length, etc.
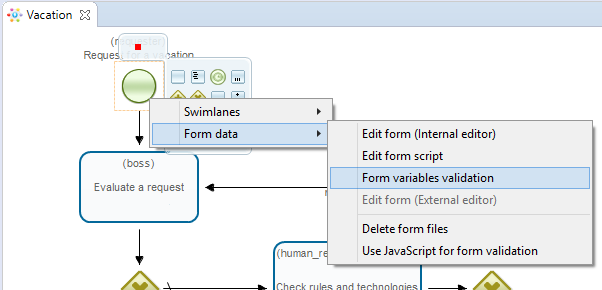
To create validations, right click on the node and select "Form > Form variables validation"
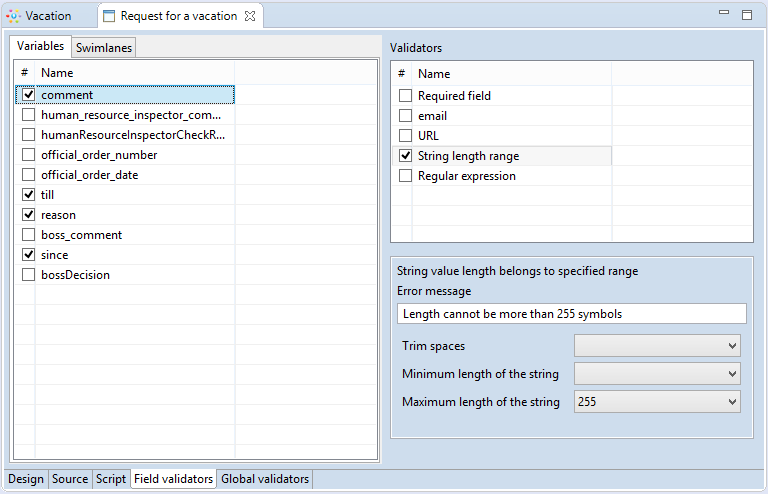
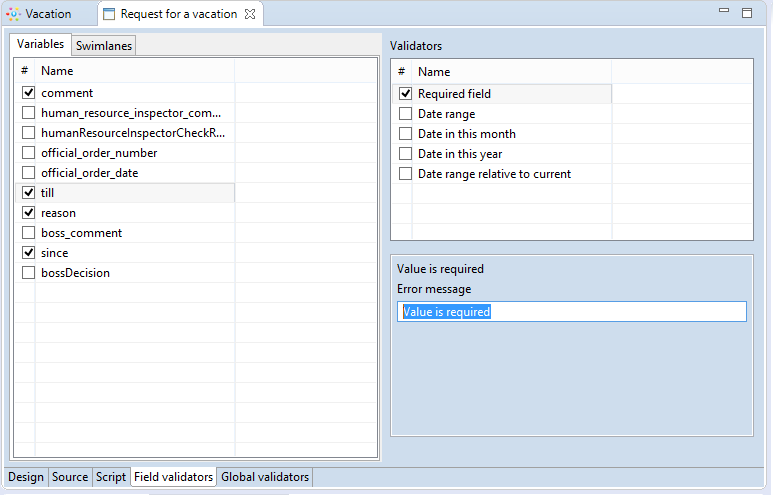
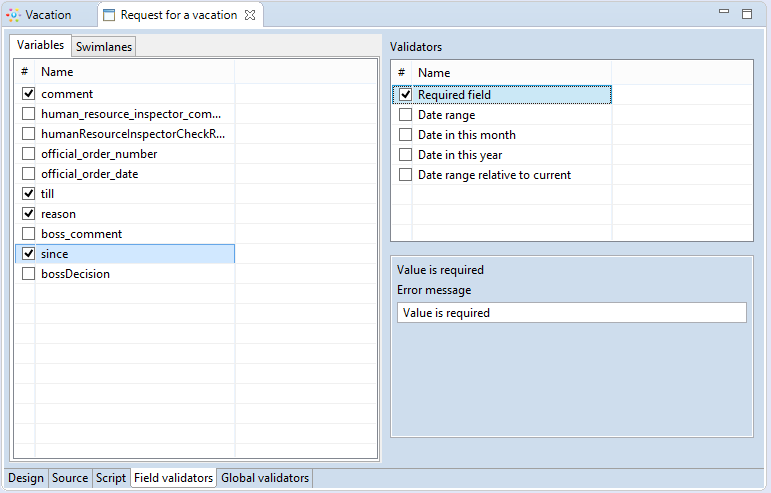
In the shown form there will be all the business process variables listed. All the variables that are used in the current form will be marked by checked checkboxes. If unchecked then a variable will not be initialized in this node. For a chosen variable there will be all available validations in the validations list. When a validation is selected then the validation parameters are available for edit below the validations list.
Add validators for variables in start form
- comment
Select variable and check "String length range". Enter error message - "Length cannot be more than 255 symbols", and set maximum length of the string - 255
- till, since
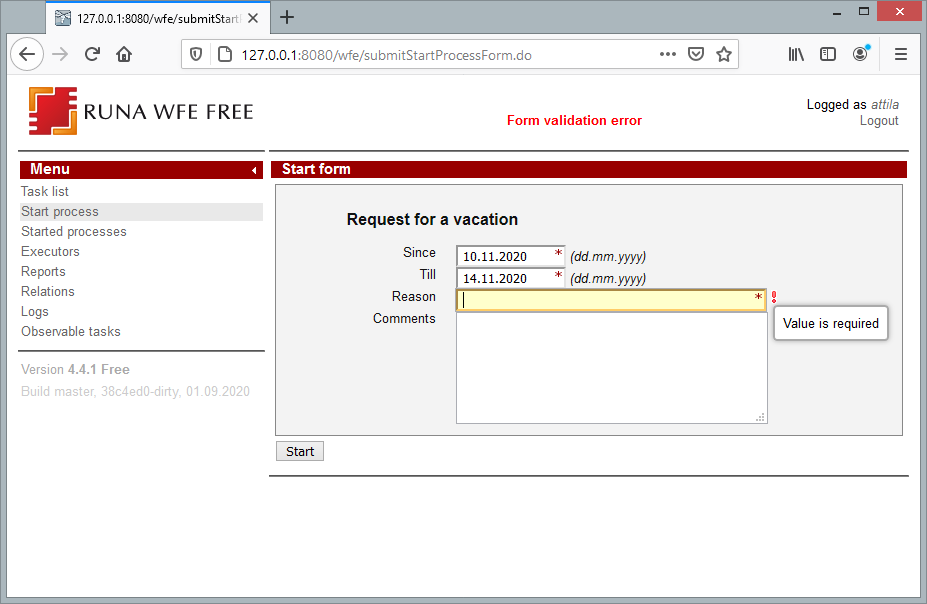
Select variable and check "Required field". Enter error message - "Value is required"
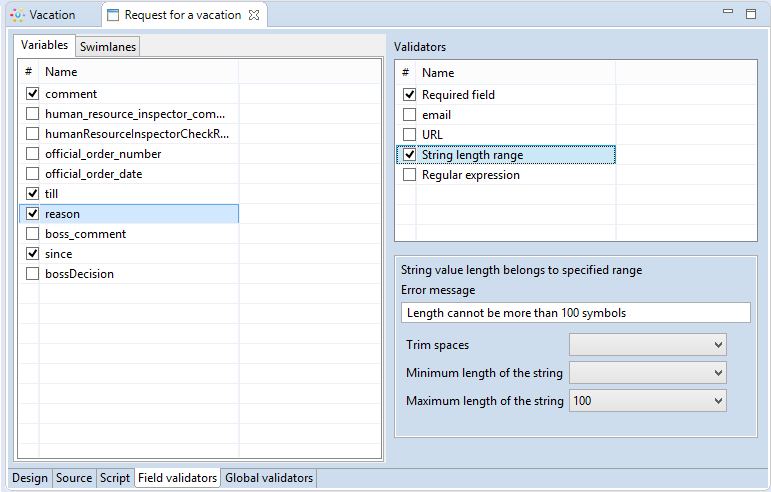
- reason
Add validators "Required field" and "String length range" (maximum length of the string - 100)
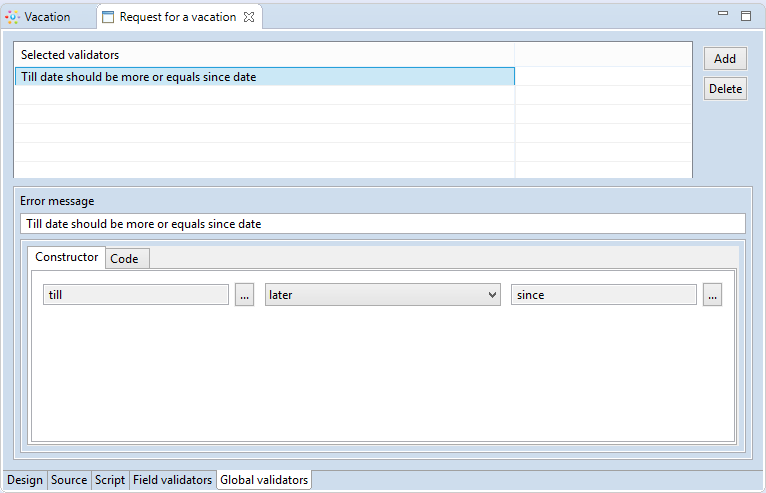
Next add validation for several variables togeth. Switch to "Global validators" tab. In the shown editor several variables validation may be created. For instance, date-since cannot be later than date-till.
Click "Add", enter error message "Till date should be more or equals since date", choose "till" later "since" in constructor window.
Similarly add validation for variables
- boss_comment - "String length range" (maximum length of the string - 255) in "Evaluate a request" form
- bossDecision - "Required field" in "Evaluate a request" form
- human_resource_inspectro_comment - "String length range" (maximum length of the string - 255) in "Check rules and technologies" form
- humanResourceInspectorCheckResult - "Required field" in "Check rules and technologies" form
- official_order_number - "String length range" (maximum length of the string - 50) in "Make an official order" form
- official_order_date - "Required field" in "Make an official order" form
Export process definition
To deploy the process directly to the server it is possible to use "Export to server"
Process execution
Log in as a user from the staff group, for example - "attila" (password is «123»).
Click on the menu item "Start process", open start form business process "Vacation"
Enter all required fields
- Enter the time interval for the vacation
- Fill the fields «reason»
- Click "Start"
The new instance of "Vacation" business process will start and boss will receive the "evaluate a request" task. The boss of Attila is Nero.
Click "Logout" and log in as nero.
Open "evaluate a request" task. Choose "accept", fill the «boss comment» and click «Task is done»
Click "Logout"
Login as member of the “human resource” group. (Cleopatra)
Open task "check rules and technologies"
Choose "correct", fill the "human resource inspector comment" and click "Task is done"
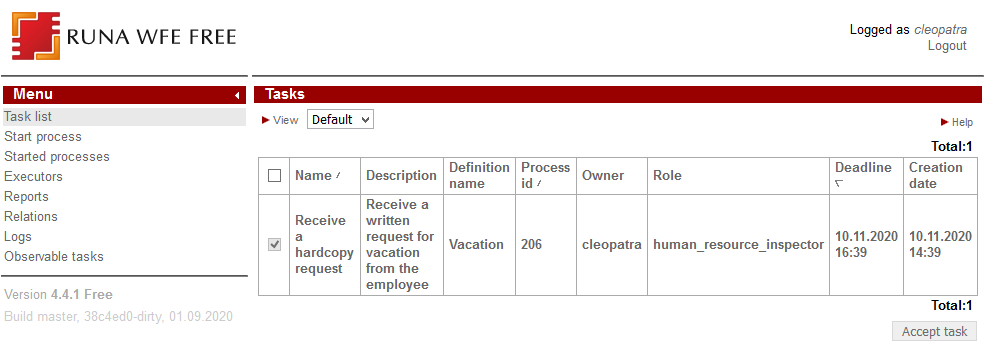
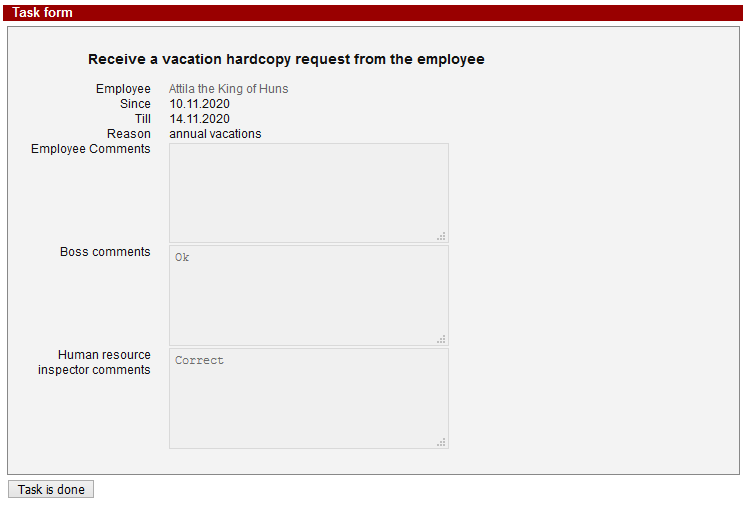
Open task list and choose "Receive a hardcopy request" task
Complete the task by clicking the "Task is done" button.
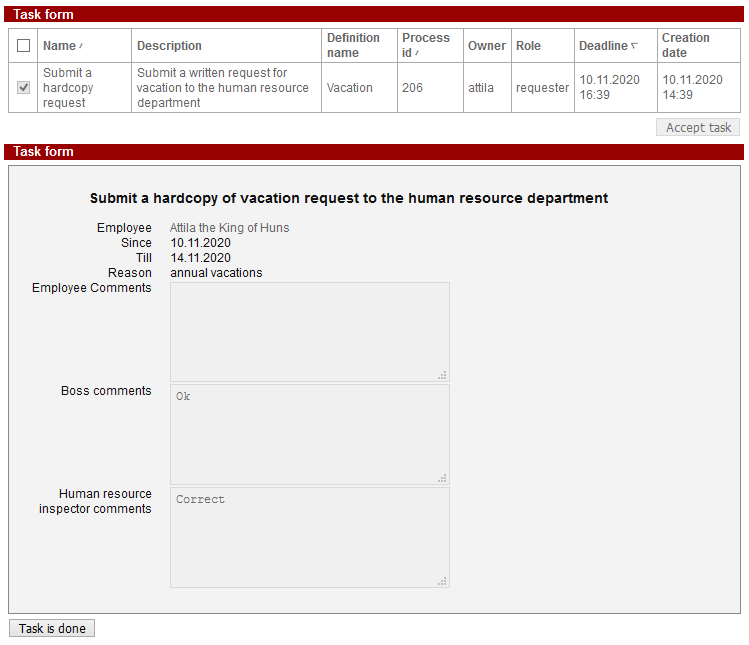
Log in as "attila" and open task "Submit a hardcopy request".
Complete the task.
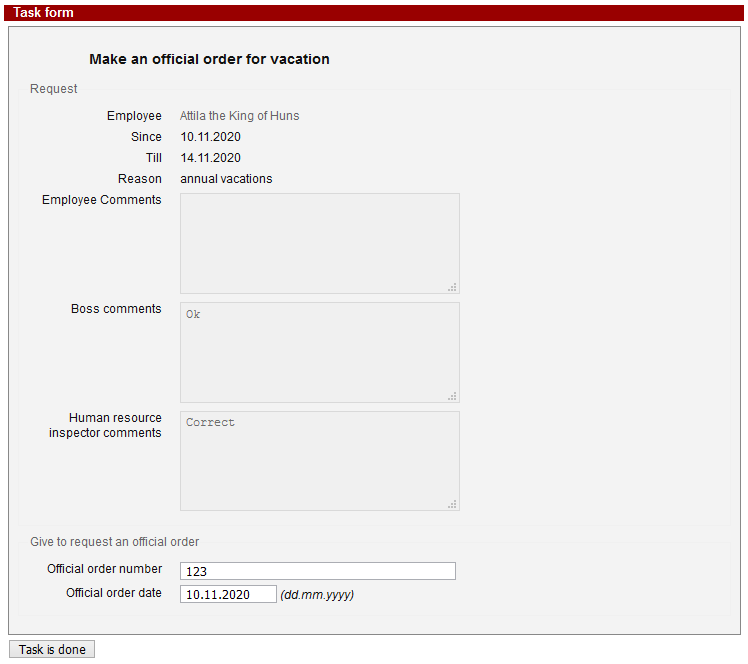
Log in as "cleopatra". Open "Make an official order" task.
Fill the "Official order number" and "Official order date" fields.
Complete the task.
The business process has ended.
